- 1Step 1 of 19
Before
- 2Step 2 of 19
Starting on clean, damp hair, begin painting the bright money pieces with Formula A. Paint the surface only with the brush sideways.
- 3Step 3 of 19
At the ends, fully saturate both the top and bottom for a brighter, blonder pop.
- 4Step 4 of 19
- 5Step 5 of 19
Move to the next section of the face frame below the first section. Repeat the wet balayage technique. Before painting sections, use a fine-tooth comb to make sure the section is neat and tangle-free.
- 6Step 6 of 19
Cover the two completed sections with plastic wrap, then repeat the money piece technique on the opposite side, again covering with plastic wrap when finished.
- 7Step 7 of 19
Move to the nape. Take a horizontal section and apply Formula B at the root and feather down, using a fine-tooth comb to drag it down.
- 8Step 8 of 19
On the same section, apply Formula A to the ends and blend up into the root shade. Be sure to blend, blend, blend for a soft transition.
- 9Step 9 of 19
Pro Tip: Check the underside of the section and make sure to paint there as well!
- 10Step 10 of 19
Move up the head to the next section. Note how Amy is taking larger sections and moving quickly through the technique—working on wet hair speeds up application time. Cover each section with plastic wrap.
- 11Step 11 of 19

As she works farther up the head, Amy pulls Formula B down a bit farther on some sections for more depth in those areas, and on other sections she’ll only pull it down a little bit.
- 12Step 12 of 19
At the crown, begin working in diagonal-back sections using the same technique.
- 13Step 13 of 19
When application is complete, cover the entire head with plastic wrap. Process until the level of desired lift is achieved. Because Amy used Schwarzkopf Professional IGORA VIBRANCE with IGORA VIBRANCE Activator Gel 1.9% (6-volume) for the root shade, she wasn’t worried about it becoming too dark, so she was able to let the entire head process at the same time.
- 14Step 14 of 19

Shampoo the hair.
- 15Step 15 of 19
At the bowl, apply Formula C. Amy likes to use IGORA VIBRANCE with a bowl and brush for root melting, but applies toners at the bowl using a bottle application. The product is versatile and can be used both ways.
Note: Amy prefers to apply IGORA VIBRANCE with a brush because she can get a more precise application at the root, versus using a bottle at the bowl.
- 16Step 16 of 19
Let develop for at least 5 minutes. Shampoo, condition, rinse and style.
- 17Step 17 of 19
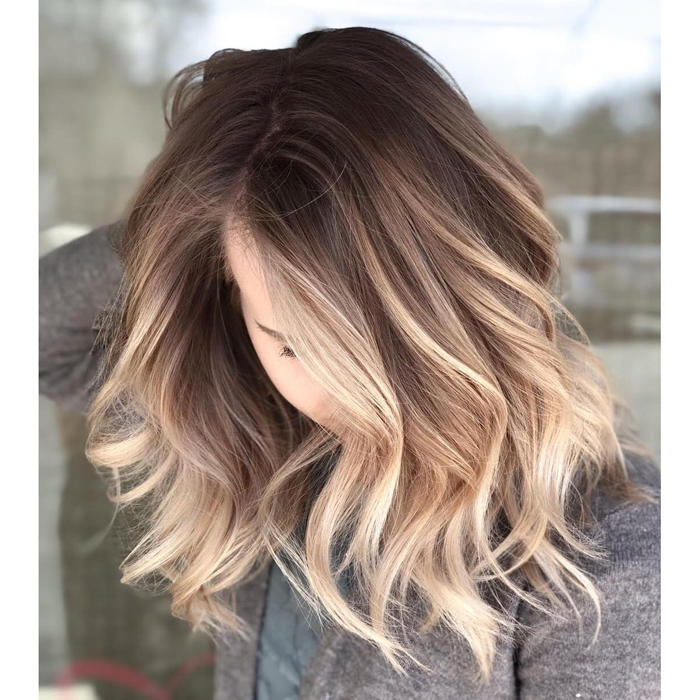
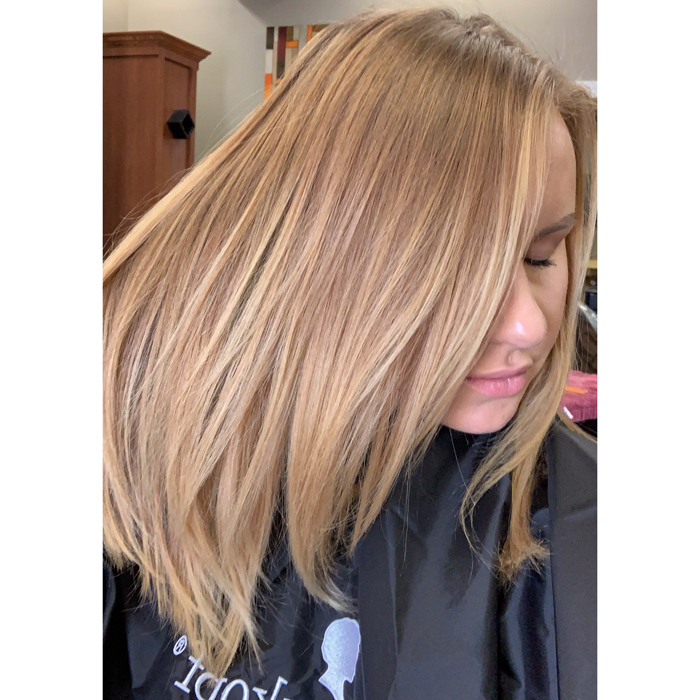
Finished look.
- 18Step 18 of 19
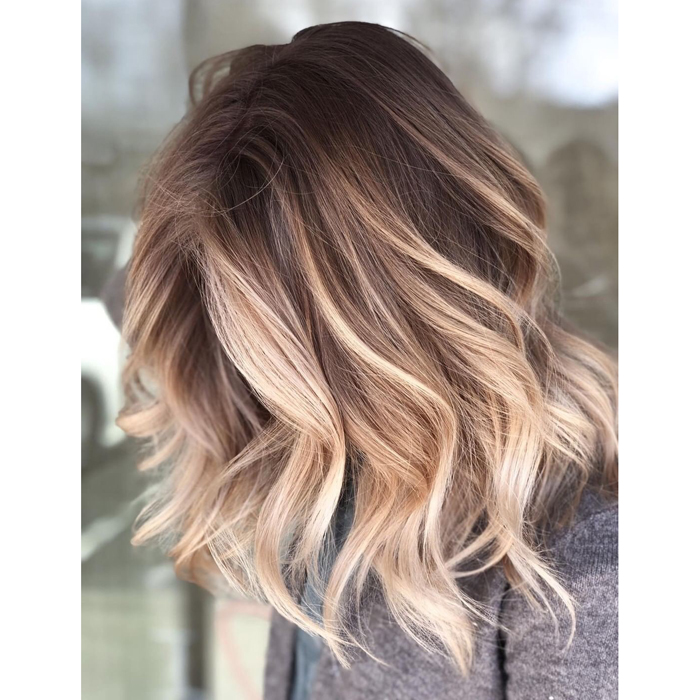
Finished look.
- 19Step 19 of 19
Finished look.
Balayage
Wet Balayage + Root Melt
April 18, 2019·1 min read
Here’s the situation—your blonde client is ready for warmer tones and more dimension…but you only have 90 minutes. We have the solution courtesy of BTC Team Member Amy McManus, aka @camouflageandbalayage. Amy invited BTC to her shop, Trinity Salon in Fitchburg, Mass., to demo this technique that combines adding depth through a root melt with adding pops of brightness (quickly!) using Amy’s wet balayage technique. Her client (who also happens to be BTC Team Member @thefaithfulblonde!) was craving warmth so Amy gave her this “Barely Butterscotch” look! Scroll to see how it’s done! (more…)
More to Read


