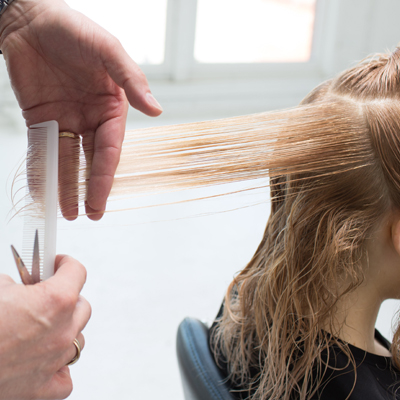
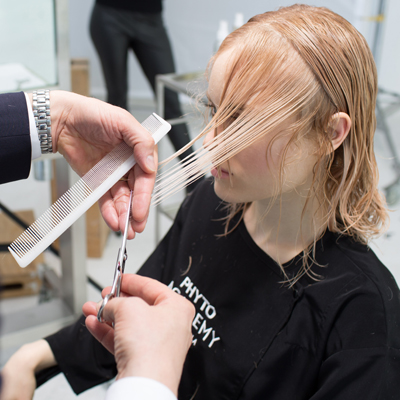
- 1Step 1 of 19

Section off at the parietal ridge.
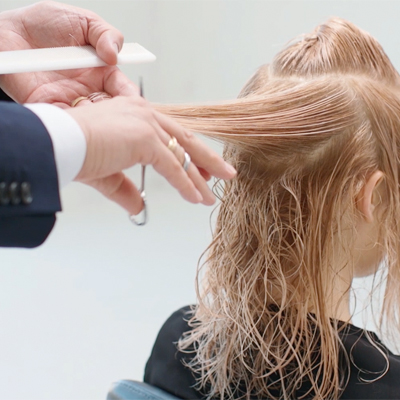
- 2Step 2 of 19

Start at the center back with a triangular section pulling the hair out at 90 degrees and cut a flat layer.
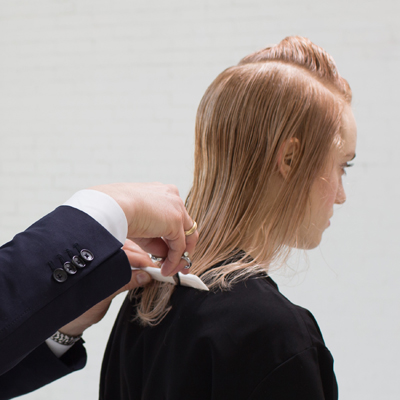
- 3Step 3 of 19
Continue with slightly diagonal sections over-directing the hair from the round of the head toward the center to compensate for the head shape. Work with flat layers through the back of the head and cross-check horizontally.
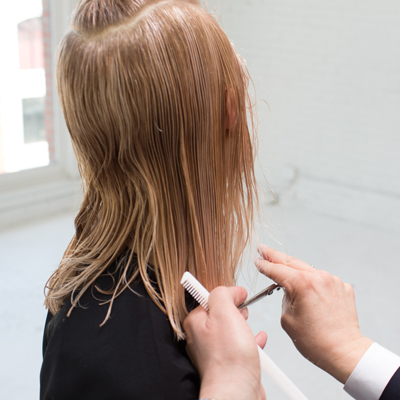
- 4Step 4 of 19
Move into the sides using diagonal sections, pulling the hair up and back to connect to the square shape in the back.
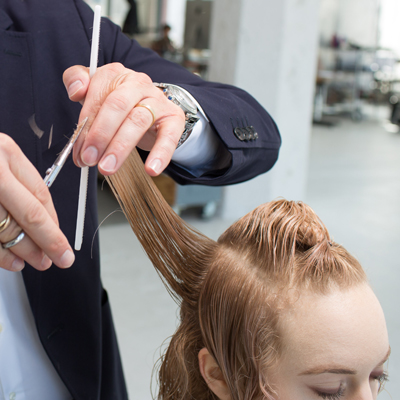
- 5Step 5 of 19
Have the client stand and cut the outline in a square shape using the shorter pieces in front as the guide for the back.
- 6Step 6 of 19
Turn the head to continue the baseline on the sides keeping the hair at zero degrees of elevation with minimal tension.
- 7Step 7 of 19
Start at the round of the head with vertical sections and over-direct hair toward the face until reaching the ear and then over-direct back, cutting concave layers to flatten the shape.
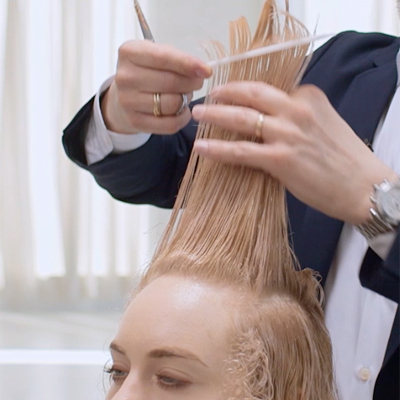
- 8Step 8 of 19
Continuing through the crown, connect the top using horizontal sections and cut a square line, bringing everything to a stable guide.
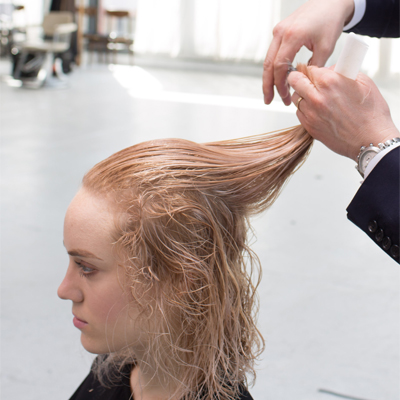
- 9Step 9 of 19
Using the back as a guide, pulling everything straight up, cut a round line continuing toward the face as you reach the hairline and refine.
- 10Step 10 of 19
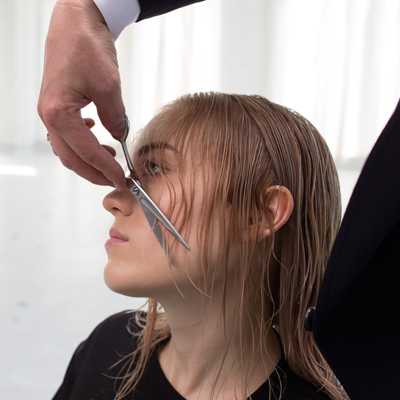
Section from the round of the head to behind the ear and follow the cheekbone to carve in a rounded fringe that connects to the outline, maintaining the corner.
- 11Step 11 of 19
Lift each section in the crown while using lower elevation on the sides and bring forward and follow the guideline. Apply PHYTO Professional Curl Energizing Cream to assist the texture while hydrating the hair.
- 12Step 12 of 19
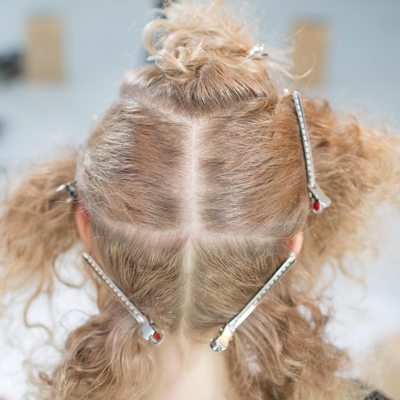
Begin with a horseshoe section that runs below the parietal ridge and above the occipital bone.
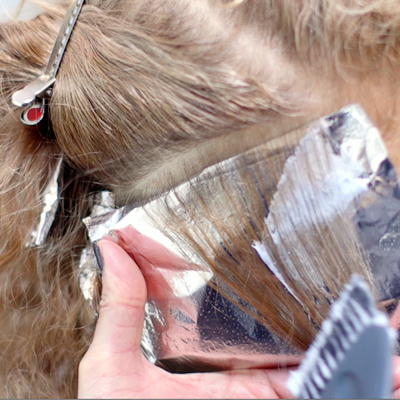
- 13Step 13 of 19
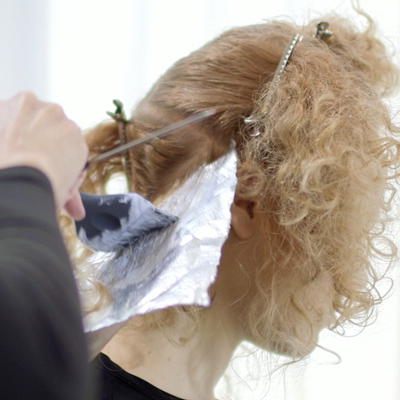
Divide the hair down the center below the occipital bone and start at the hairline with 1-inch diagonal sections. Slice the hair heavily, placing two foils on top of each other to eliminate bleeding.
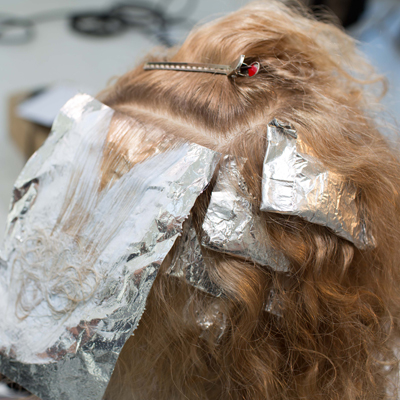
- 14Step 14 of 19
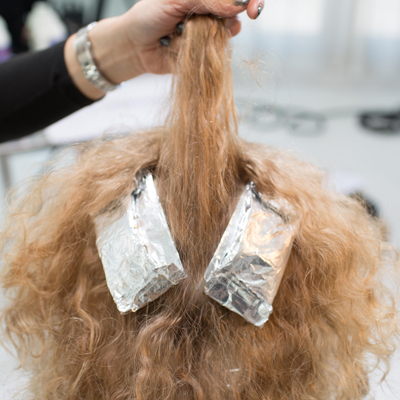
Continue on both sides below the occipital bone leaving a triangular shape in the center that is natural for depth.
- 15Step 15 of 19
Move to the sides starting at the hairline with 1-inch diagonal sections, continue slicing and working to the center. Leave out another V-shaped section which will be incorporated in the top.
- 16Step 16 of 19
Starting at the front in a herringbone pattering using 1-inch sections, slice the hair working in a pivoting motion toward the crown, then join the V-section with the top.
- 17Step 17 of 19
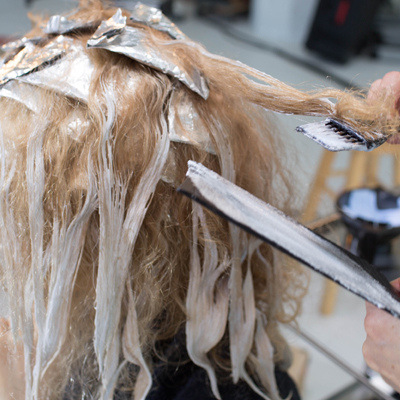
Using a balayage technique to create a veil of color on the ends, start in the area below the occipital bone using a freehand method to apply lightener in a V-shaped pattern.
- 18Step 18 of 19
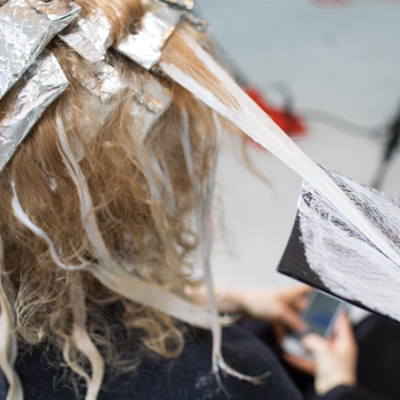
Throughout the rest of the head, balayage in-between every foil with the same V-shaped pattern. Tone at the bowl for five minutes.
- 19Step 19 of 19
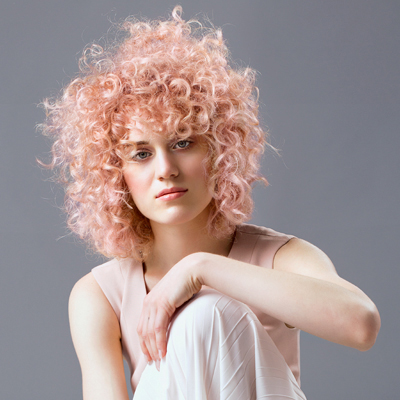
Finished Look
Balayage
Ultimate Blonde, '60s Inspired Chop
October 5, 2016·1 min read
Just because your client likes to keep things effortless and natural doesn’t mean she can’t rock a fierce, feminine look at the same time. Empower your client with this ’60s Bohemian-inspired cut and color from PHYTO Global Artistic Director Anthony Cristiano. Perfect for every woman, this chop is crucial to add to your arsenal. (more…)
More to Read


