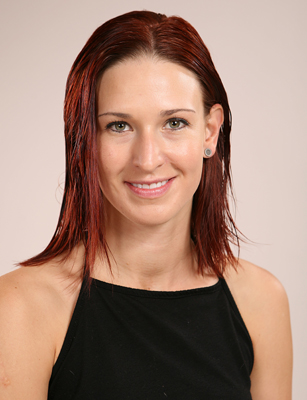
Tyson Daniel first wowed us with his “Regina” Step-by-Step and our BTC members loved it! He’s back with a swingy, free-and-easy cut that could become the go-to look for all of your clients wondering what to do with their bobs. The nape graduation and rounded layers make it a flattering fit for most. Here’s Tyson’s how-to! Subscribe to behindthechair.com “On Paper” Magazine–4 Issues Only $9.95! (more…)
- 1Step 1 of 8
- 2Step 2 of 8
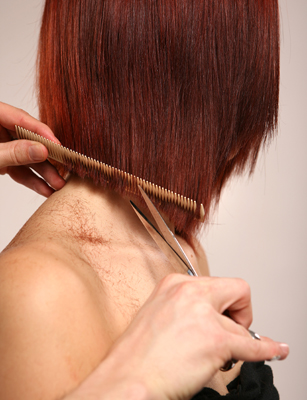
 Starting with clean, dry hair create the baseline at the nape to the desired lenth by softly point cutting.
 - 3Step 3 of 8
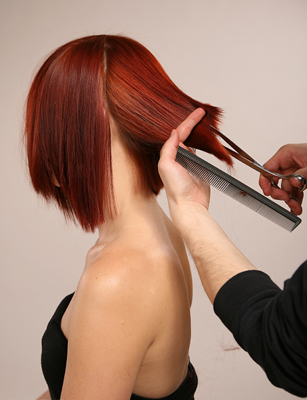
 Visualize the perimeter line you want to create using your comb. Gather the hair at a natural fall and gently sculpt.
 - 4Step 4 of 8
 Establish a vertical section in the center back and architect the perfect shape for you client by deeply carving a graduation in the nape that seamlessly transitions into a rounded layer above the occipital.
 - 5Step 5 of 8
 Continue by over directing the rest of the hair to create the desired transition of the shape.
 - 6Step 6 of 8
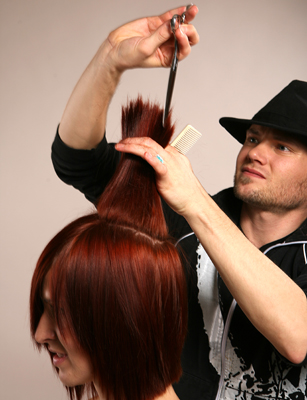 Work a massive diamond shape section around the crown and generously relieve the weight from the interior.
 - 7Step 7 of 8
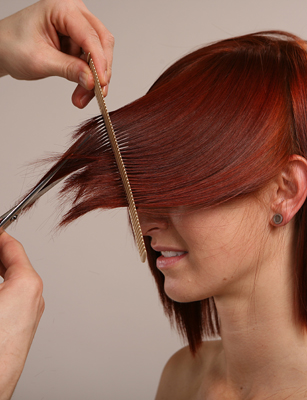 Detail the front of your masterpiece using the comb, creating a personalized frame.
 - 8Step 8 of 8