- 1Step 1 of 24
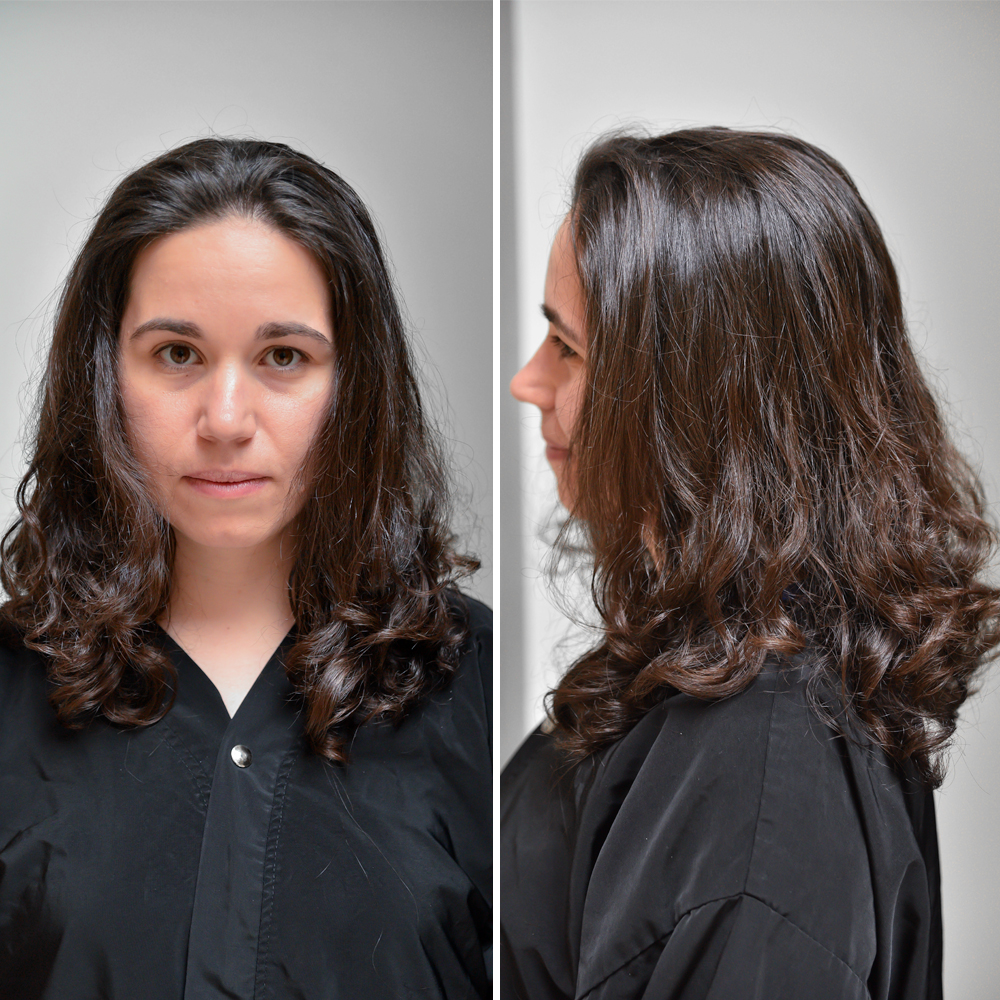
Before
- 2Step 2 of 24
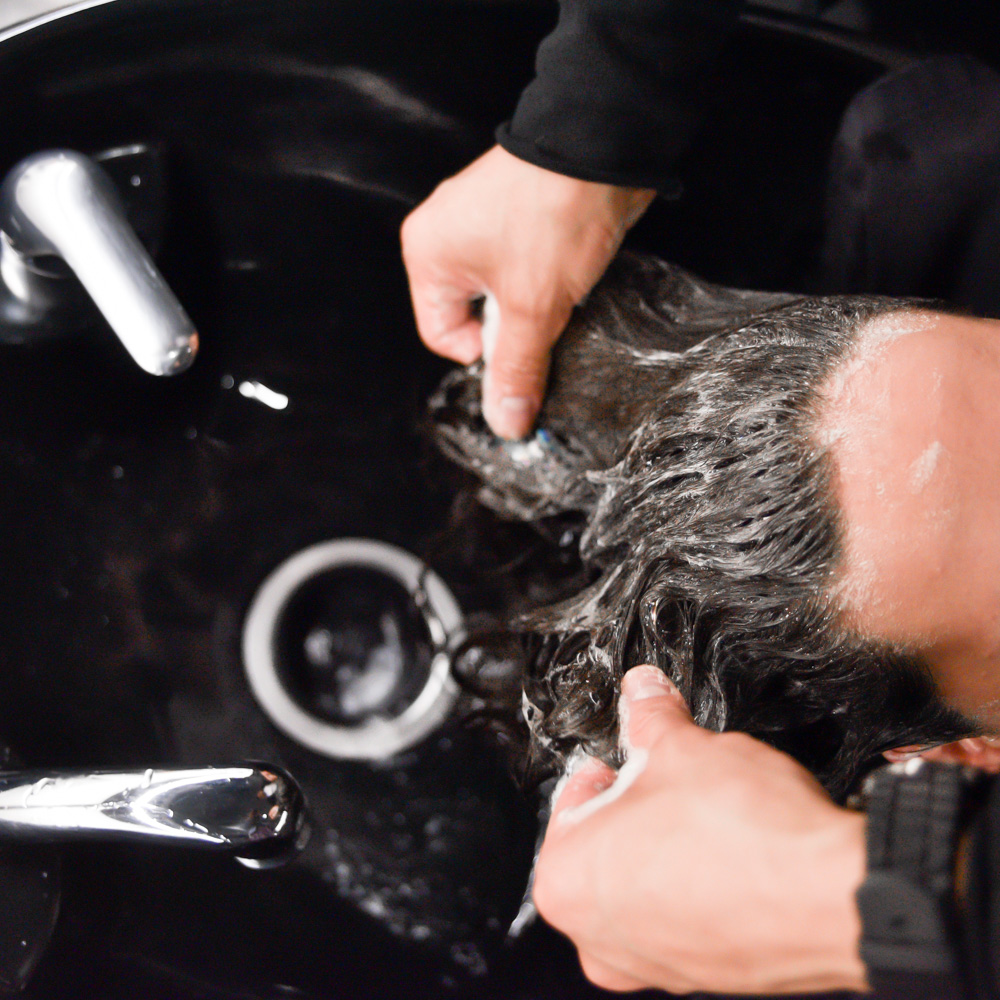
Start by washing with SEVEN haircare RINZU®️ Color Shampoo and Conditioner for deep conditioning and moisture, then towel-dry the hair.
- 3Step 3 of 24
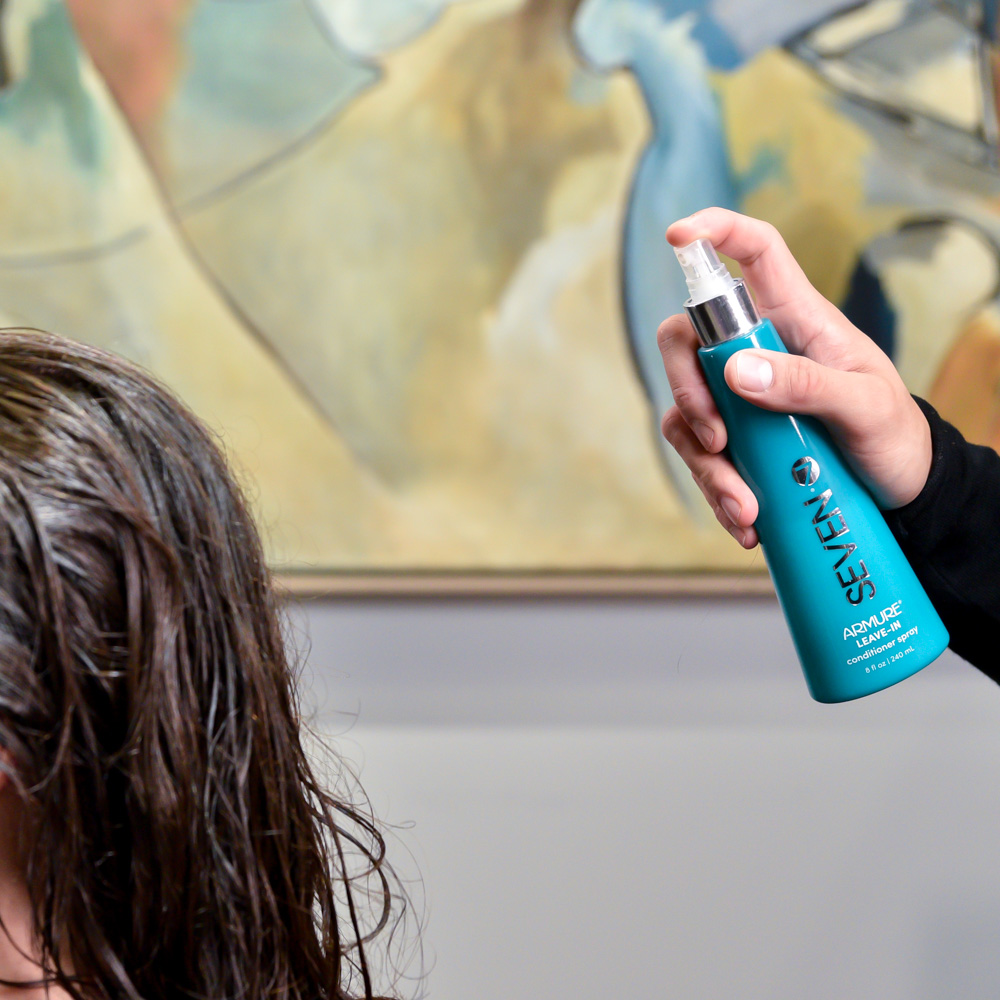
Prep with SEVEN haircare ARMURE®️ LEAVE-IN Conditioner Spray for moisture and strength, applying all over the hair.
- 4Step 4 of 24
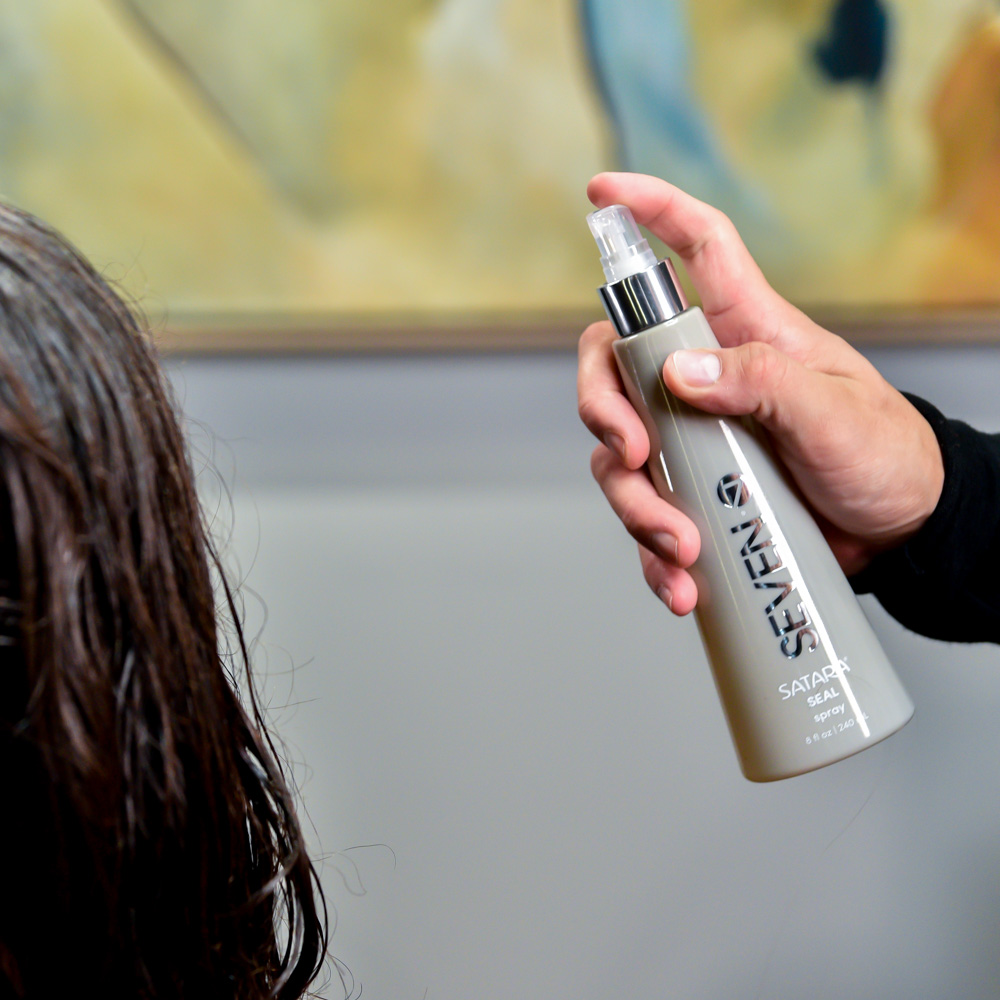
Then, apply SEVEN haircare SATARA®️ Seal Spray to lock in the moisture.
- 5Step 5 of 24
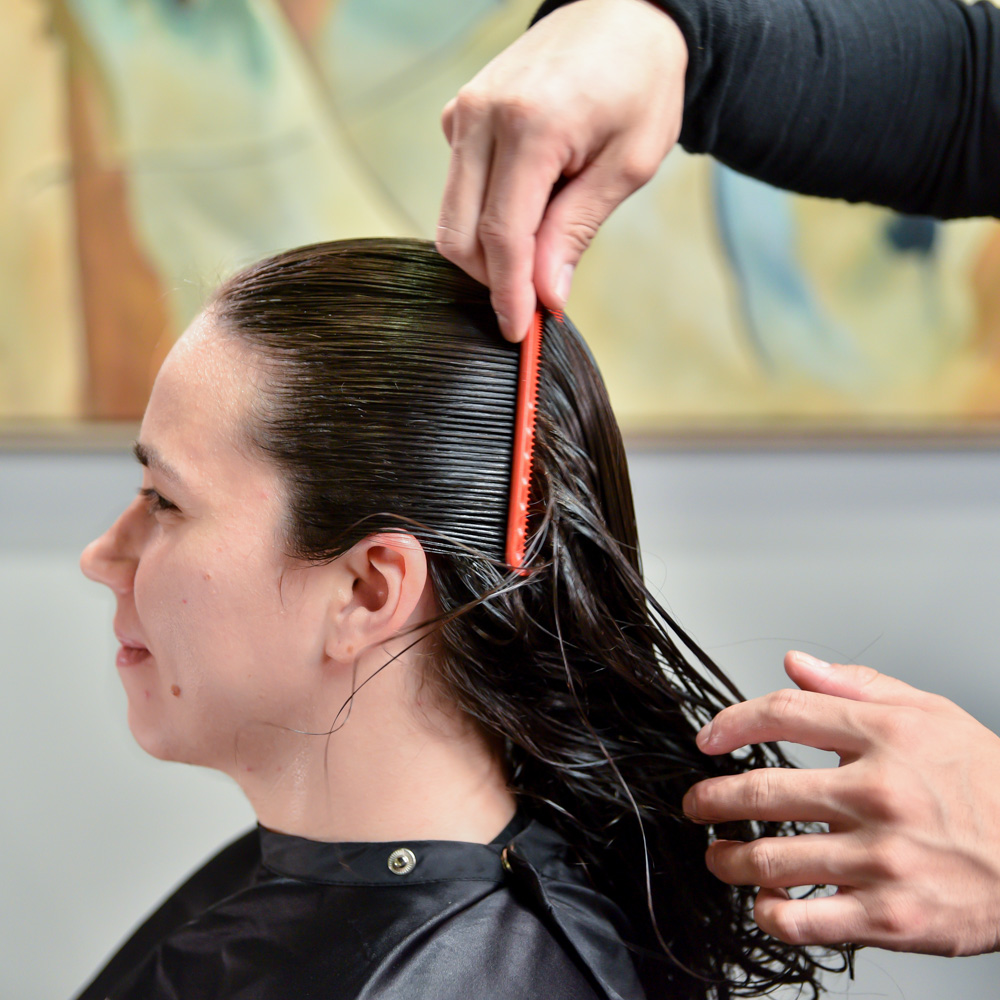
Comb through to evenly distribute the product.
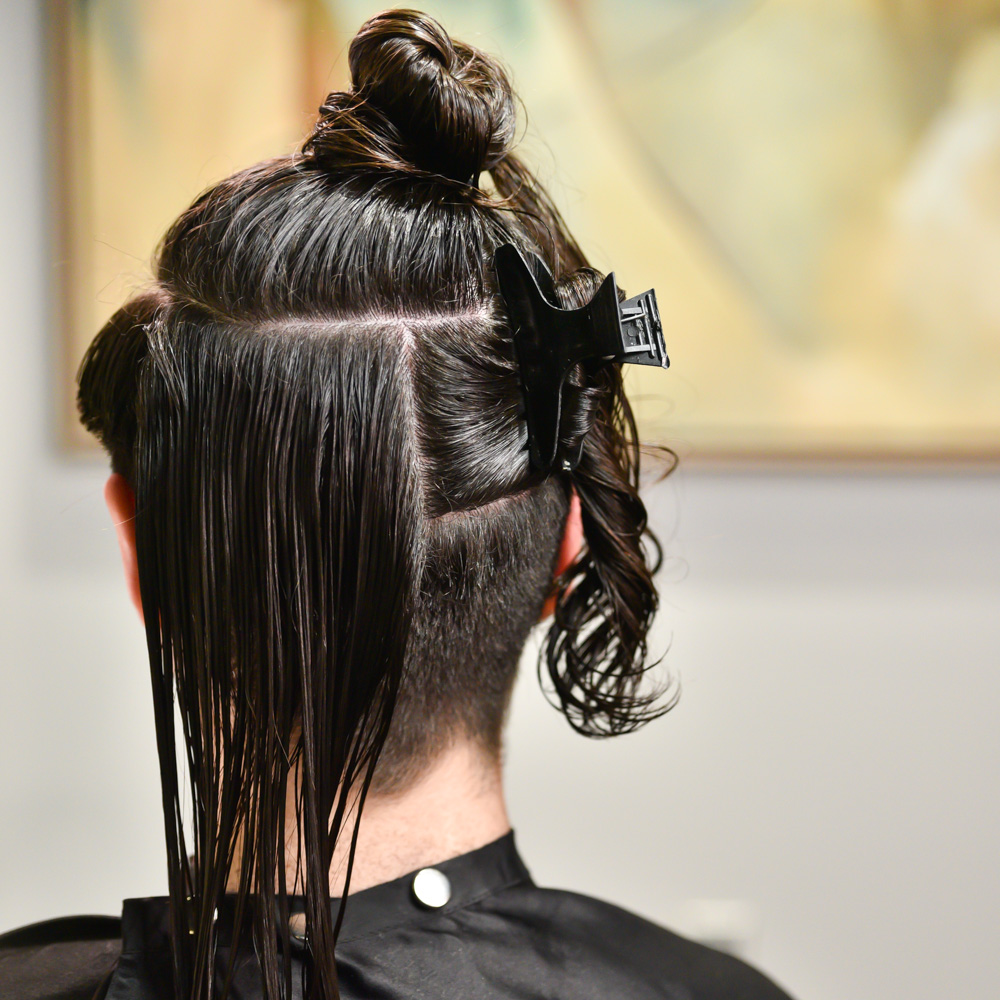
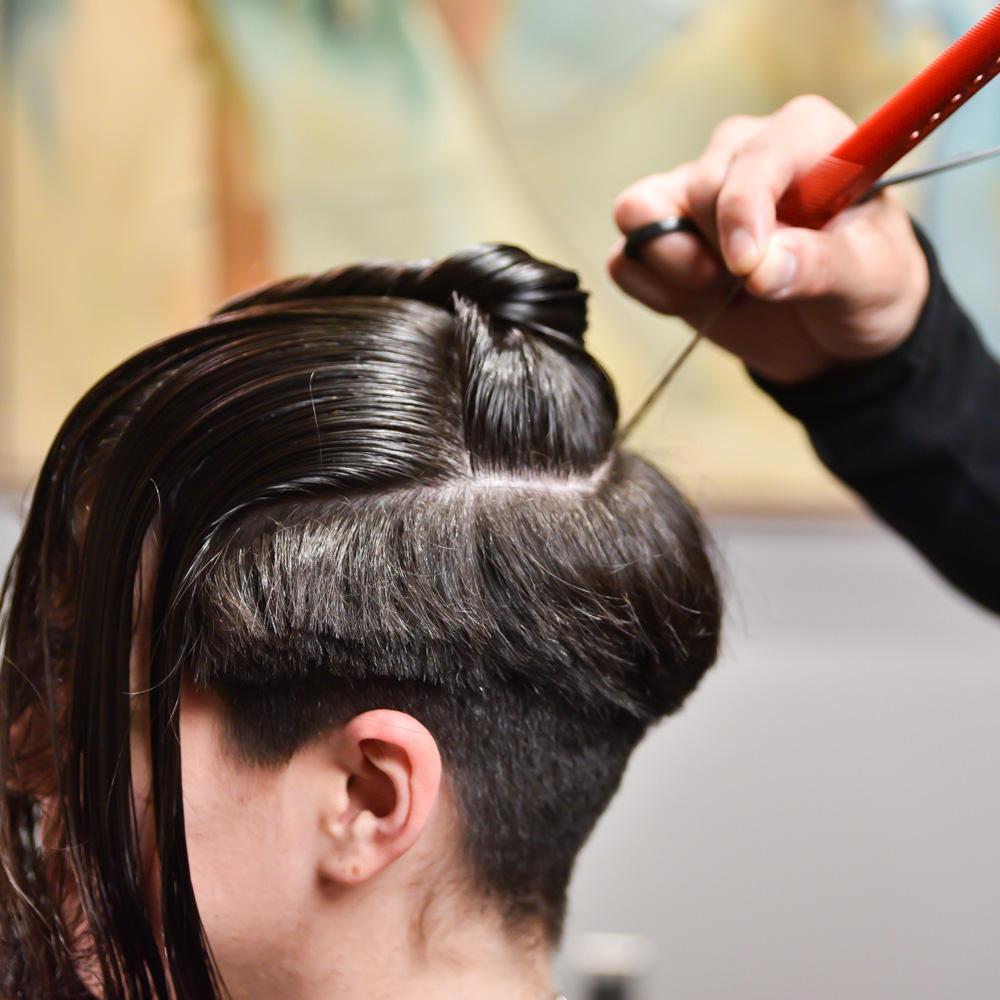
- 6Step 6 of 24
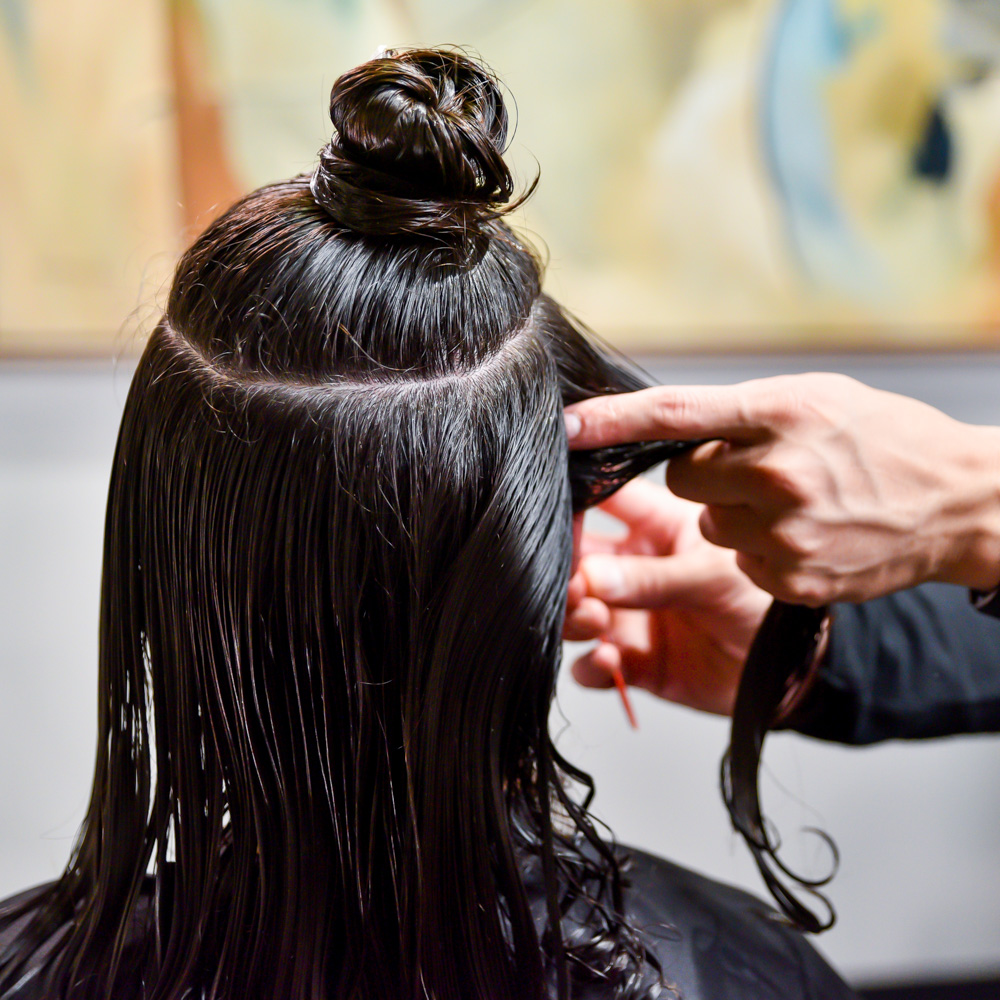
Create a horseshoe parting and clip the hair out of the way.
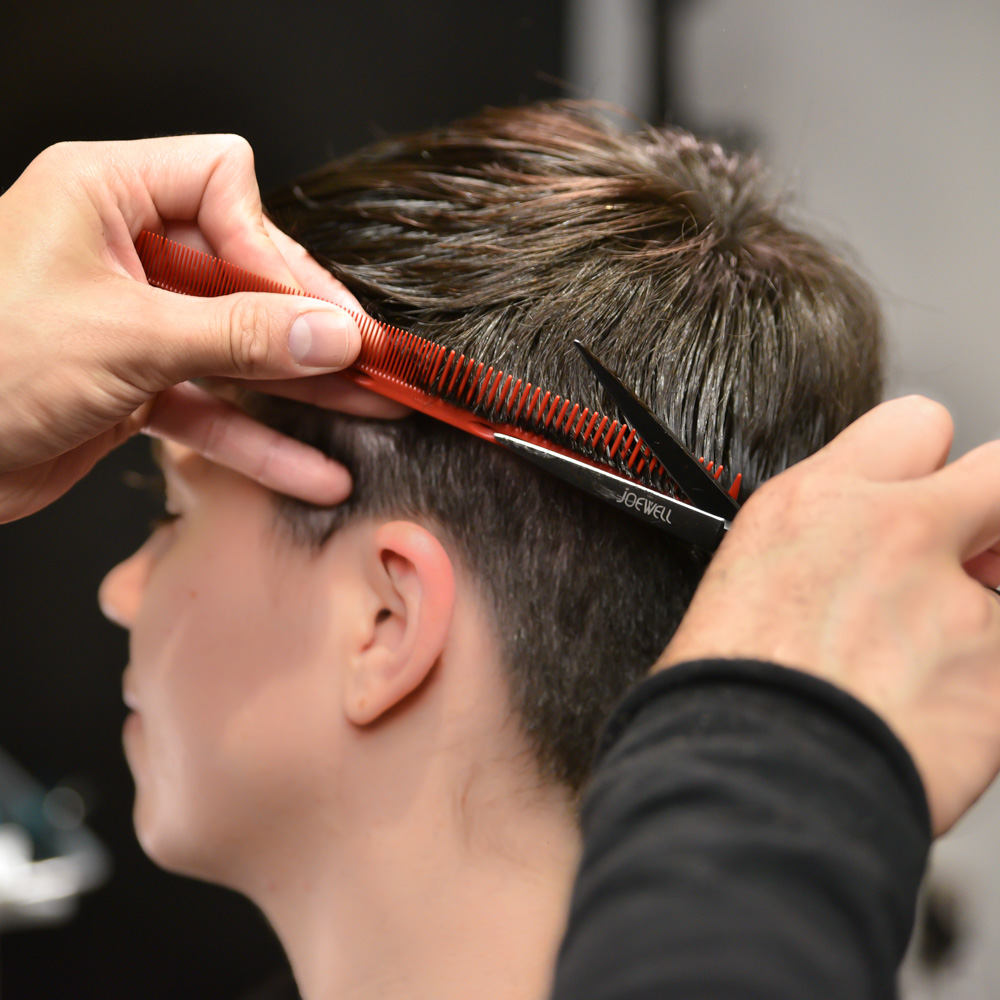
- 7Step 7 of 24
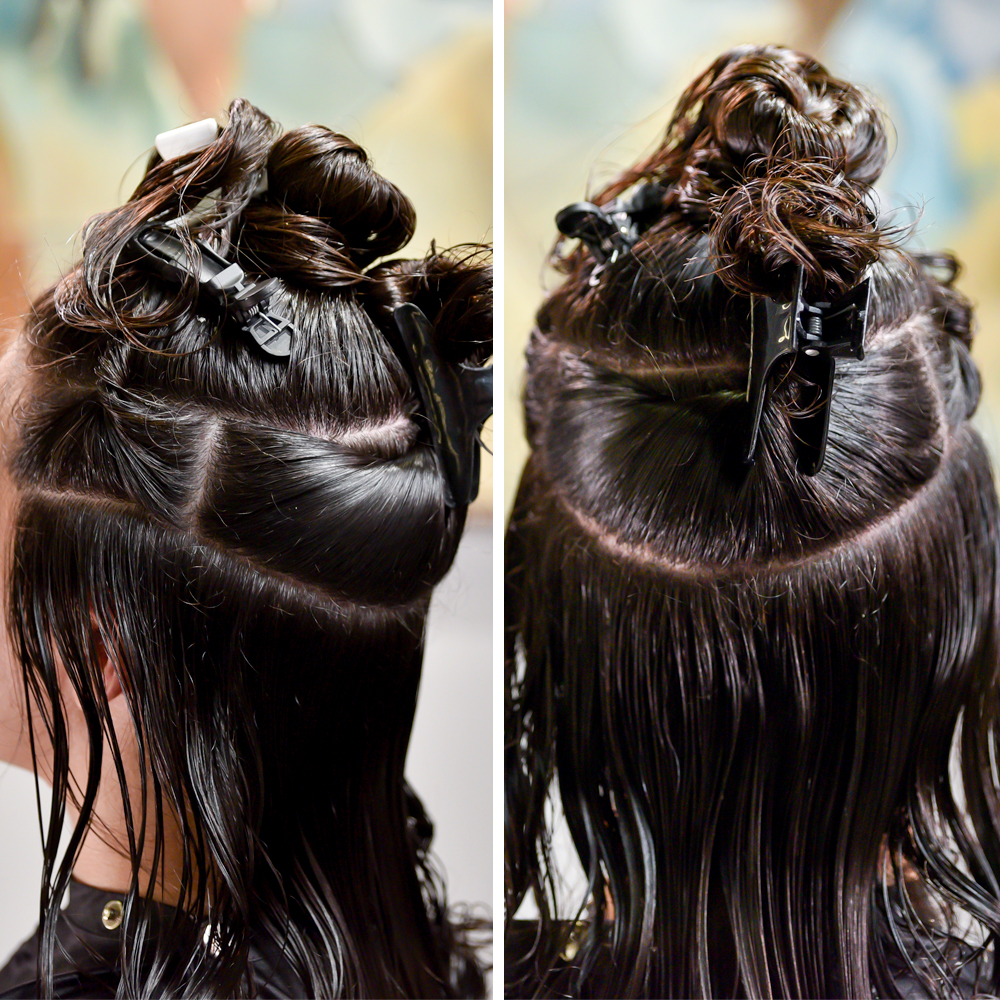
Section the hair on both sides from the ear forward and create two subsections directly in front of the ears. Then, take a section from the occipital bone to the parietal ridge, leaving out the hair below.
- 8Step 8 of 24
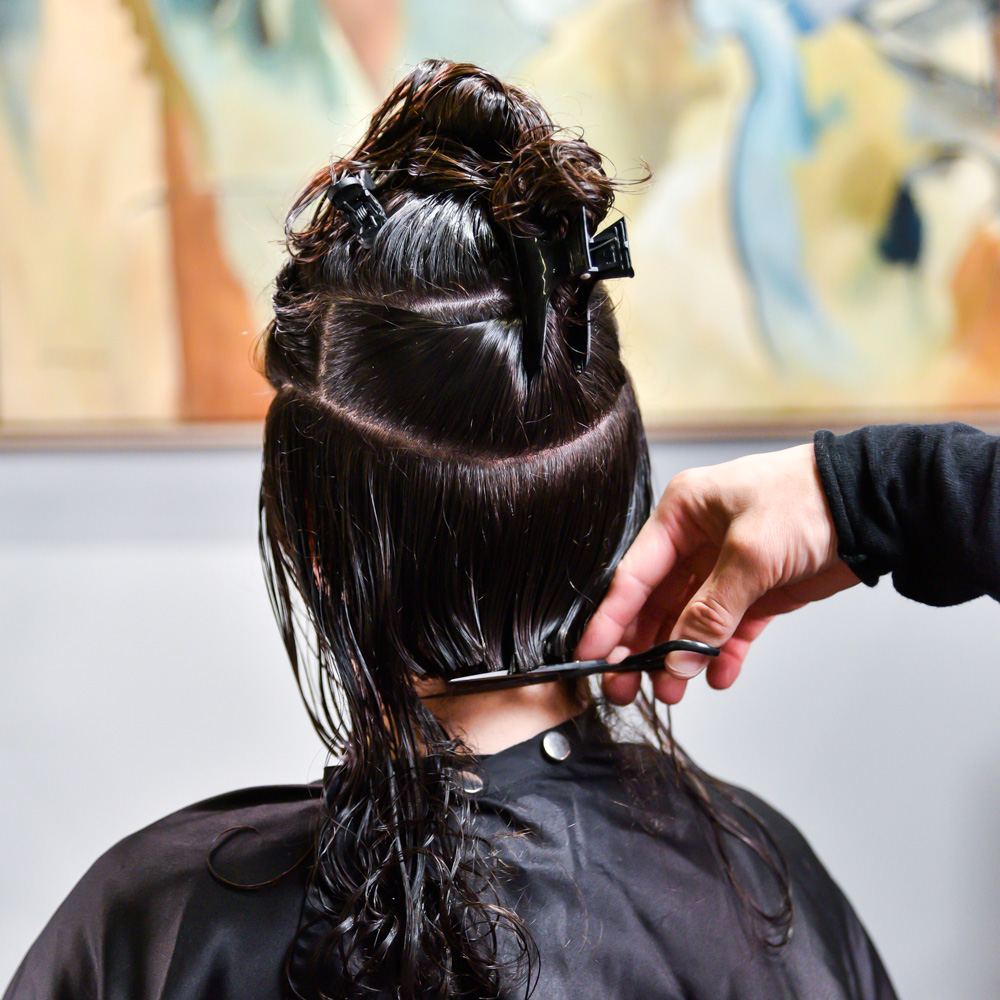
Starting in the back, begin removing the bulk of the length following the hairline at zero elevation.
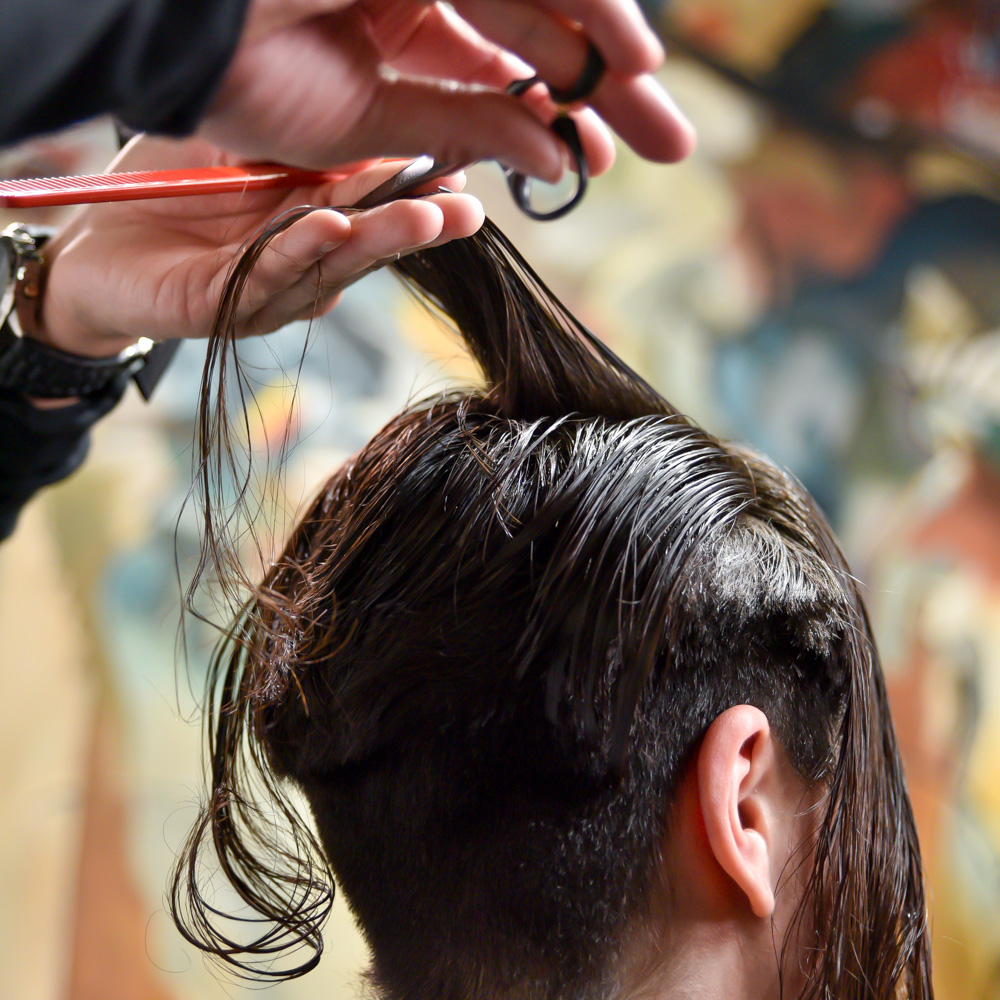
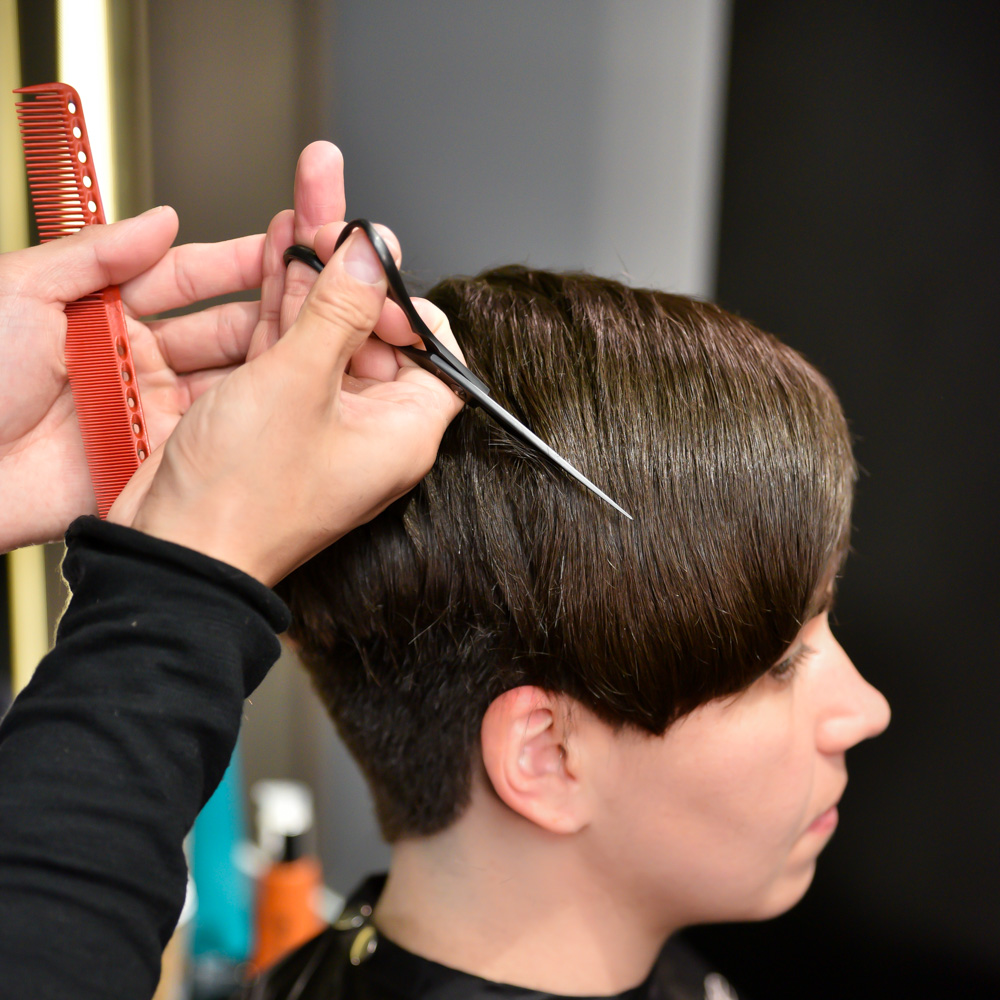
- 9Step 9 of 24
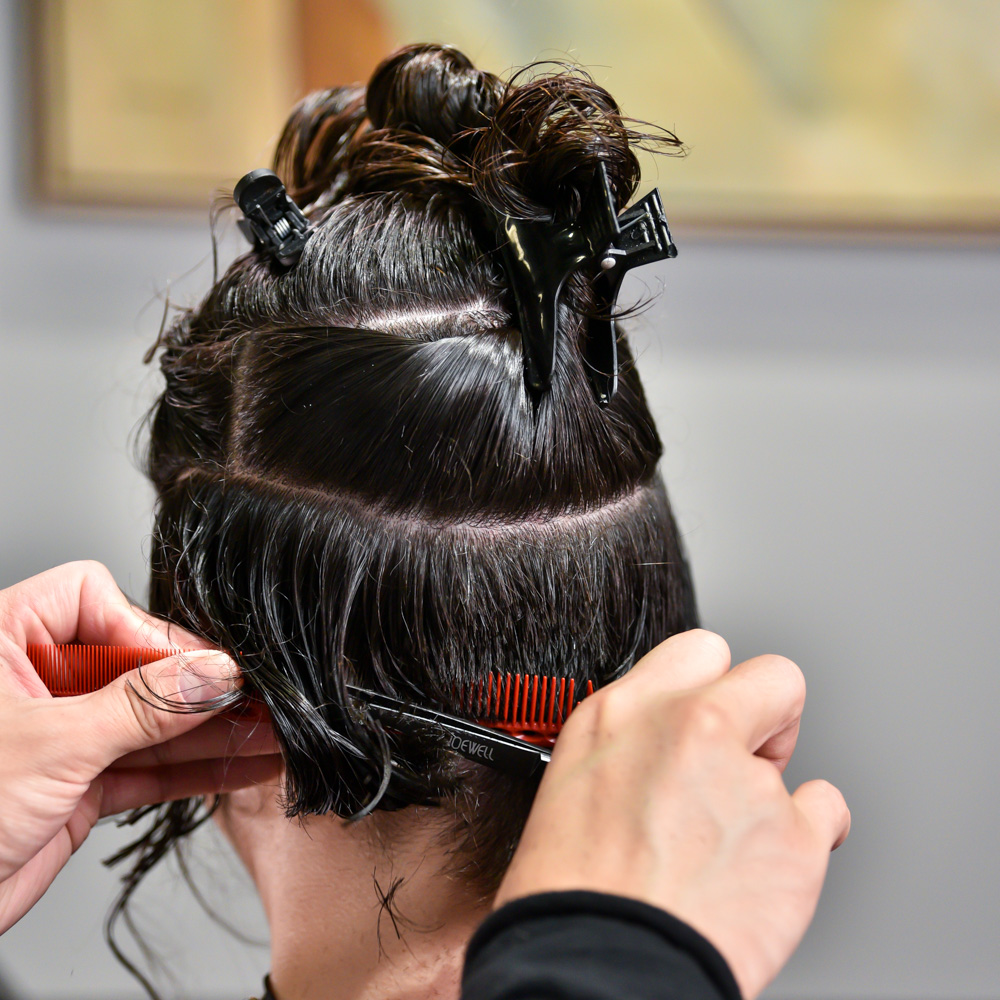
Then, use a scissor-over-comb technique and cut at a 90-degree angle. Leaving 1/4-inch of length at the nape, continue blending until you reach the occipital—this is where you will create the weight line following the round of the head.
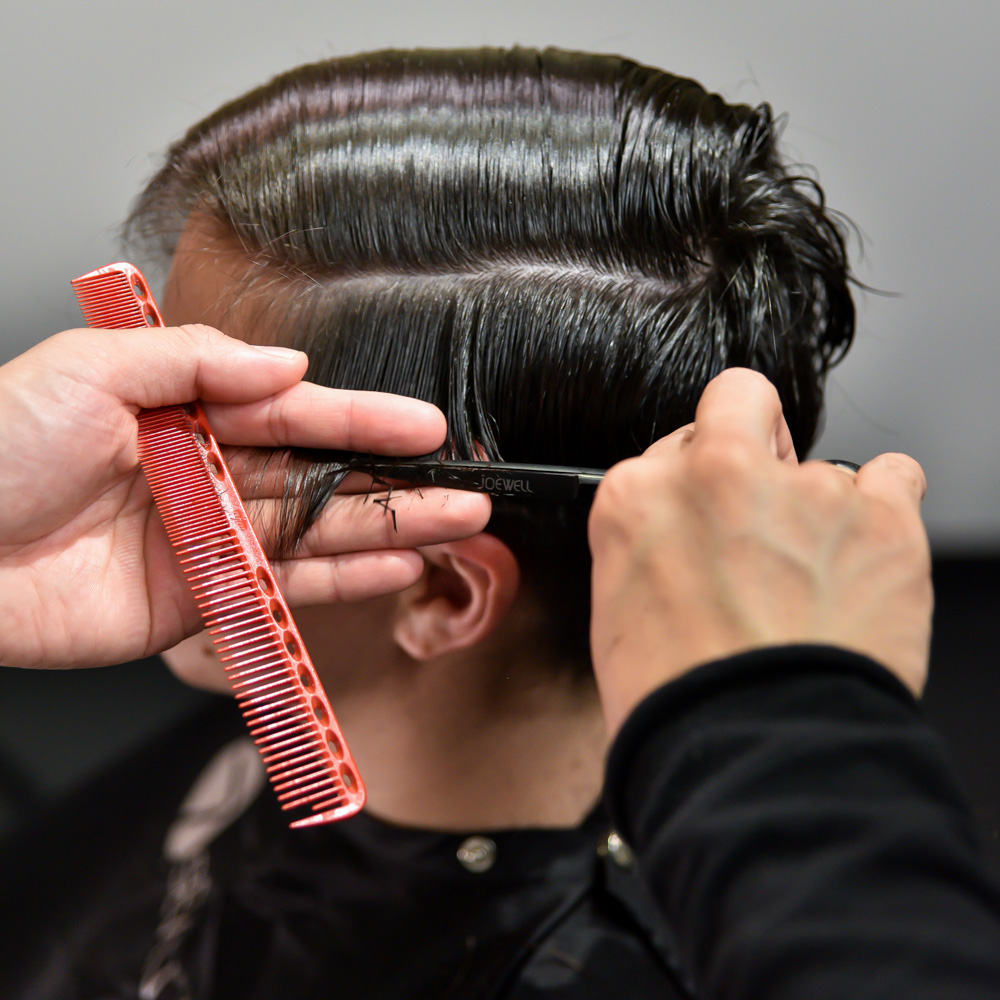
- 10Step 10 of 24
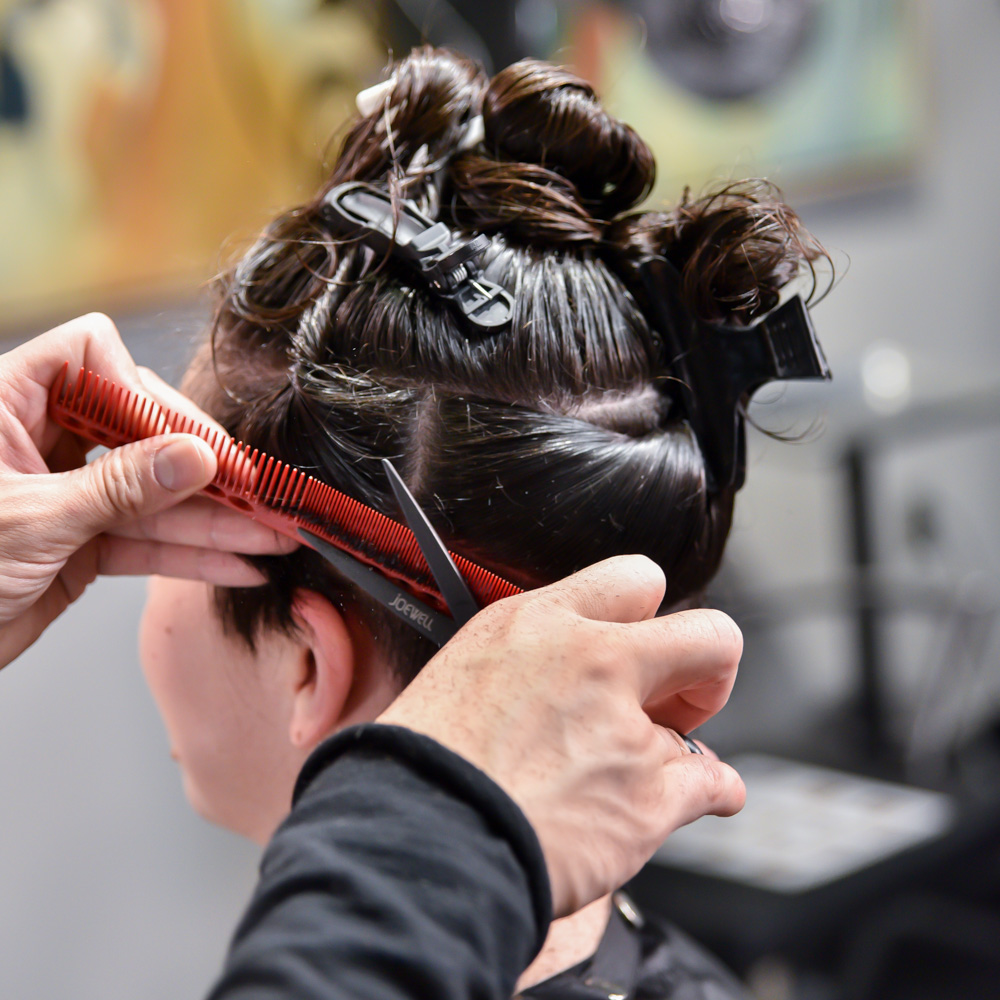
Cut the weight line by leaving 1 inch of length and overdirecting the comb at a 45-degree angle. Use this as a traveling guide and work horizontally.
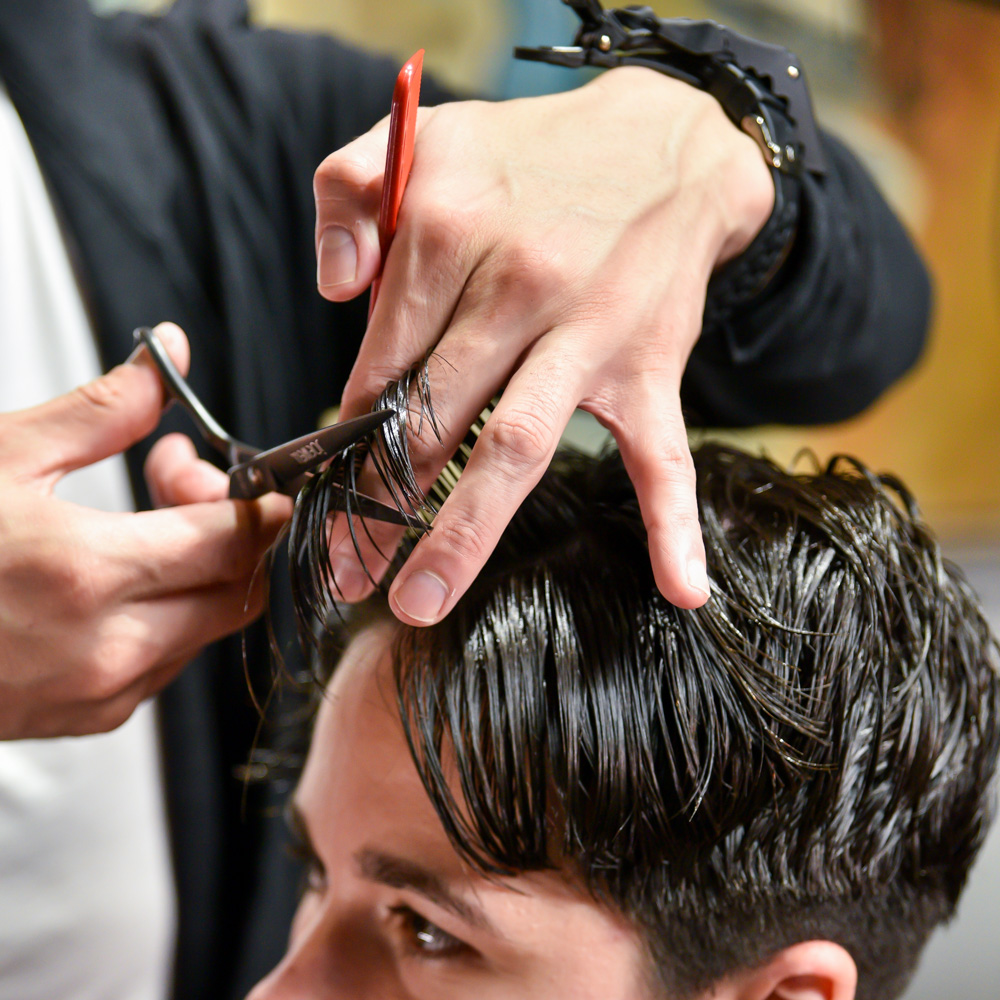
- 11Step 11 of 24
Release the subsections on both sides. Working in 1/4-inch horizontal sections, blunt-cut at a low 45-degree angle to build weight and create disconnection.
- 12Step 12 of 24
Release the section from the occipital bone to the parietal ridge and separate down the center. Continue with the same cutting technique working in 1/4-inch horizontal sections, cutting at a low 45-degree angle and moving up the back of the head to build graduation.
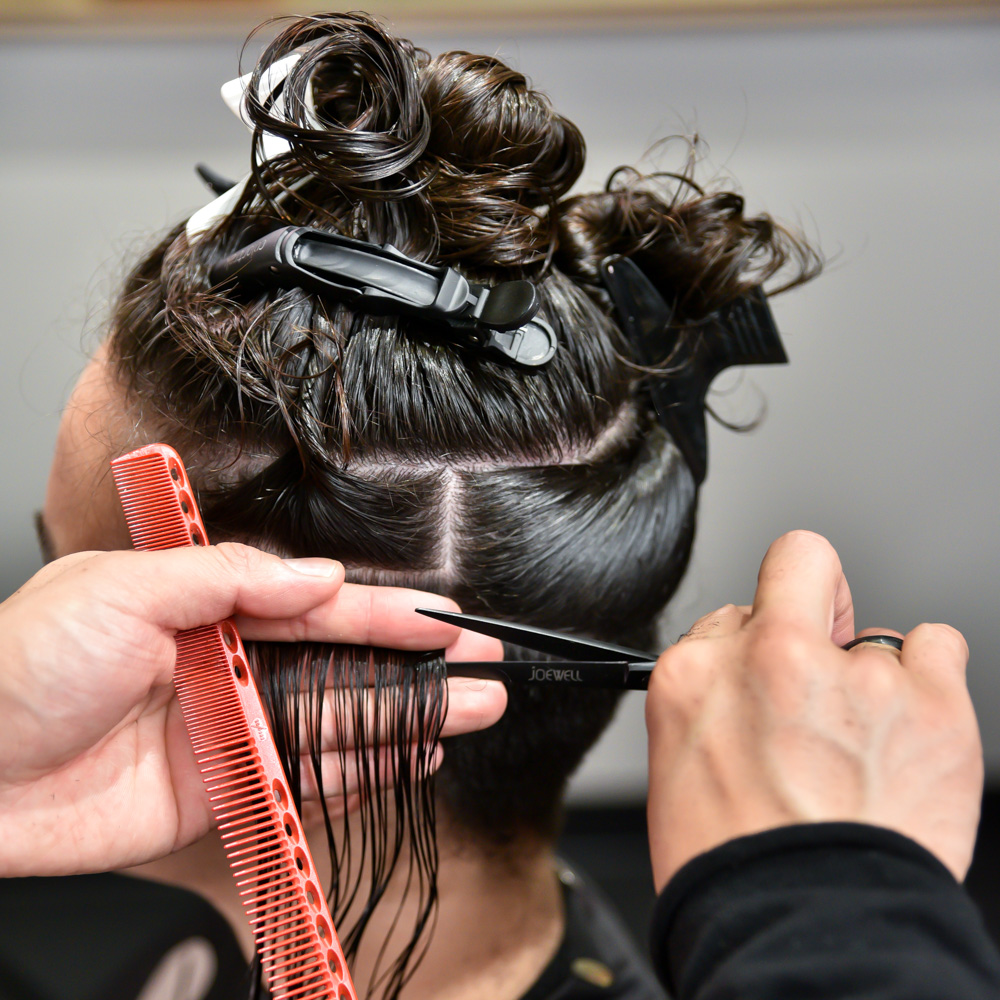
- 13Step 13 of 24
Release the horseshoe parting and take horizontal 1/2-inch sections following the established length at the occipital.
- 14Step 14 of 24
Use a traveling guide and continue working from crown to hairline. Take each section horizontally and overdirect to the 90-degree guideline at the crown.
- 15Step 15 of 24
Release and cut horizontal sections at the parietal ridge, working up to the top of the head and overdirecting into the low 45-degree guide. Continue to work up the round of the head to build square graduation. Repeat on both sides.
- 16Step 16 of 24
Take a 1/2-inch horizontal parting following the hairline, overdirect at a 90-degree angle and cut parallel to the side of the head. Continue working through the fringe and overdirecting the hair to this point. Repeat on the other side.
- 17Step 17 of 24
Then, cross-check the square graduation using scissor-over-comb throughout the sides.
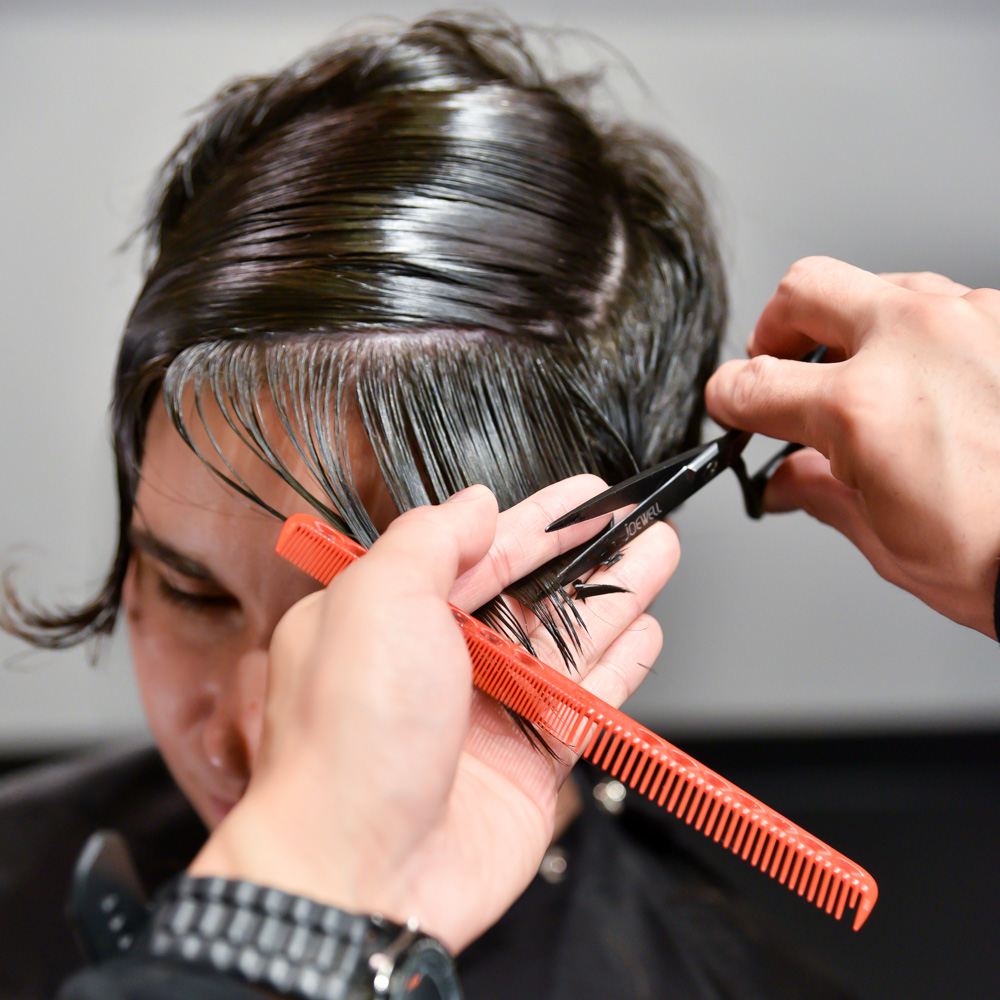
- 18Step 18 of 24
Texturize the fringe by working in vertical sections and slide-cutting through the ends using the heel of the blade.
- 19Step 19 of 24
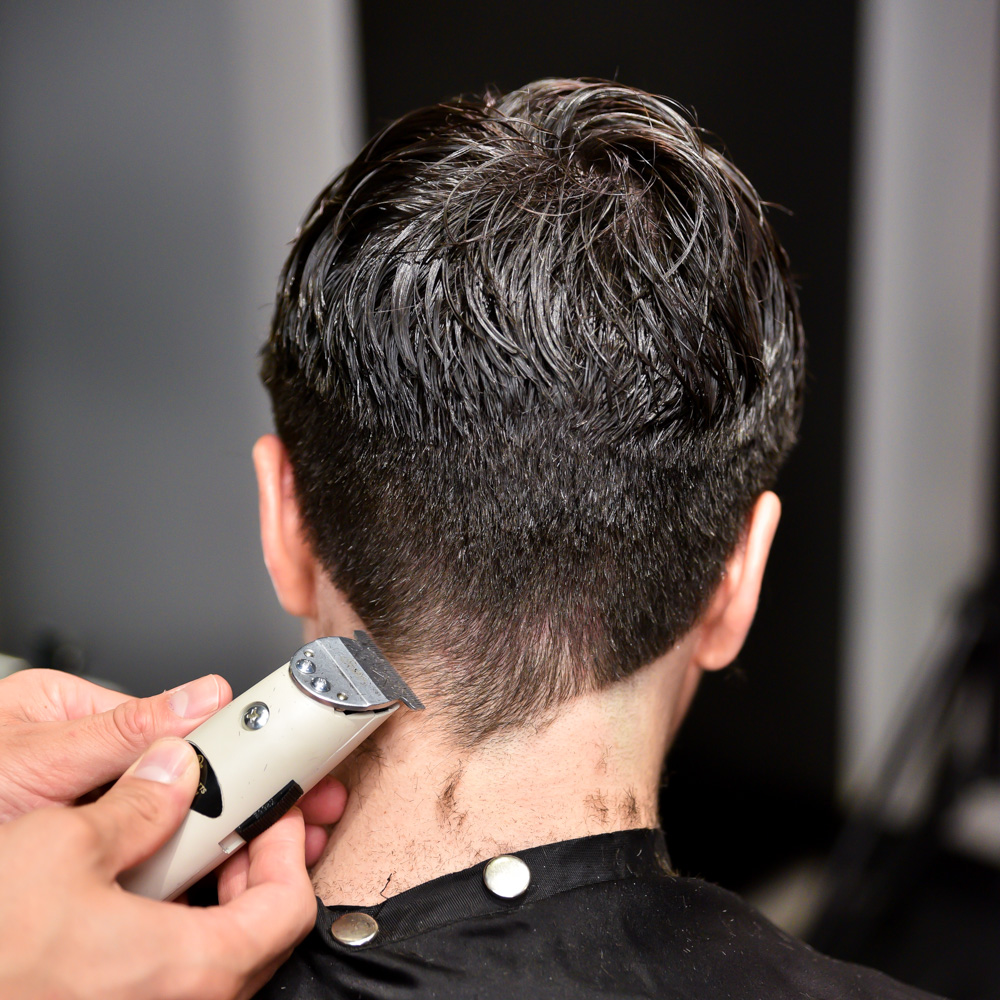
Then, use clippers to create a V-shaped neckline.
- 20Step 20 of 24
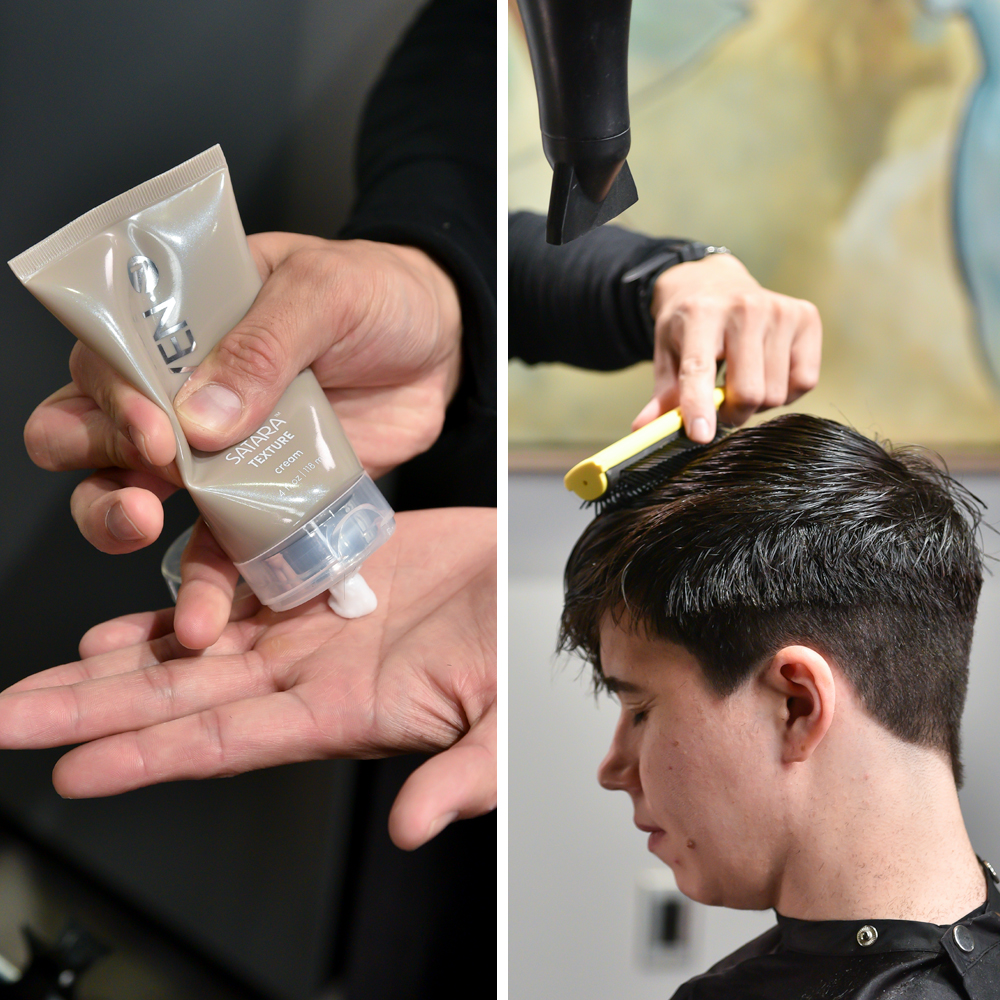
Apply pea-sized amounts of SEVEN haircare SATARA®️ TEXTURE Cream and GAZAR®️ DIAMOND Serum, then blow-dry the hair forward using a Denman brush to smooth out the hair and emphasize the dramatic fringe.
- 21Step 21 of 24
On dry hair, slide-cut to texturize throughout the front.
- 22Step 22 of 24
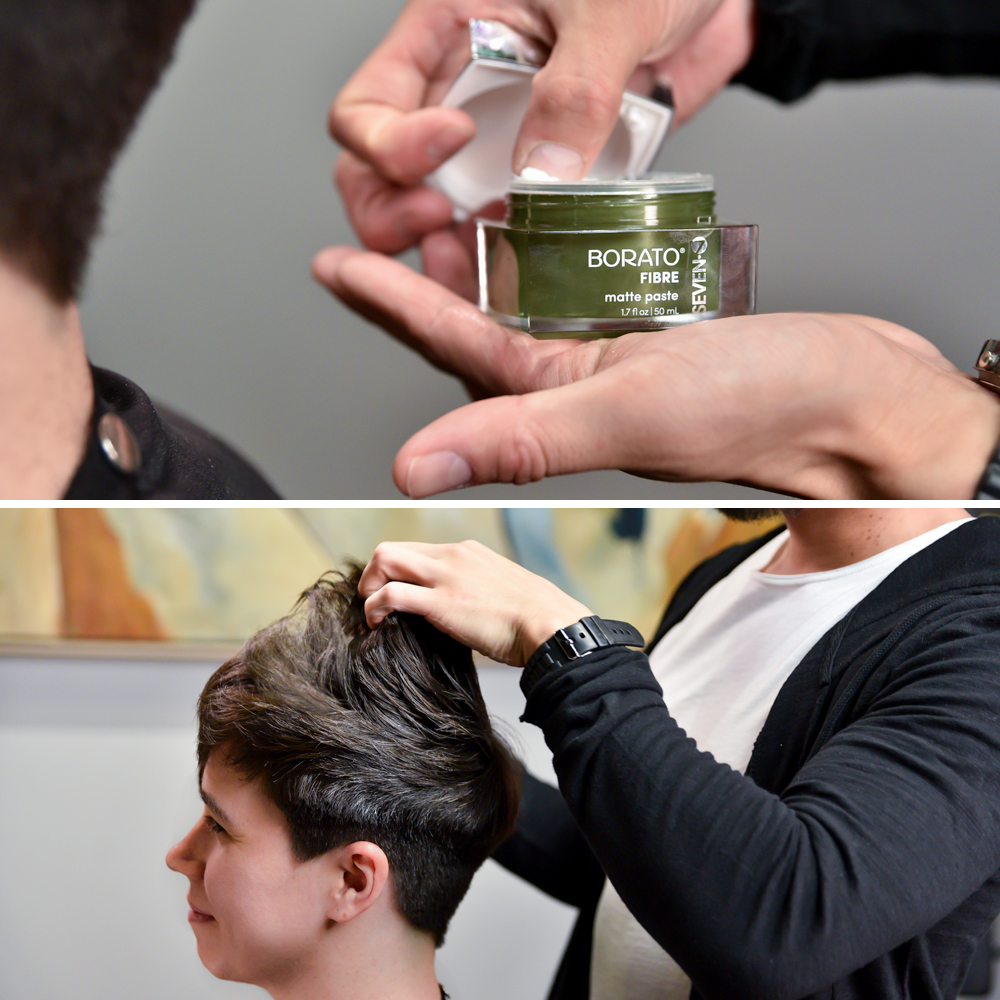
Style the hair with SEVEN haircare BORATO®️ FIBRE Matte Paste, pushing the hair forward.
- 23Step 23 of 24
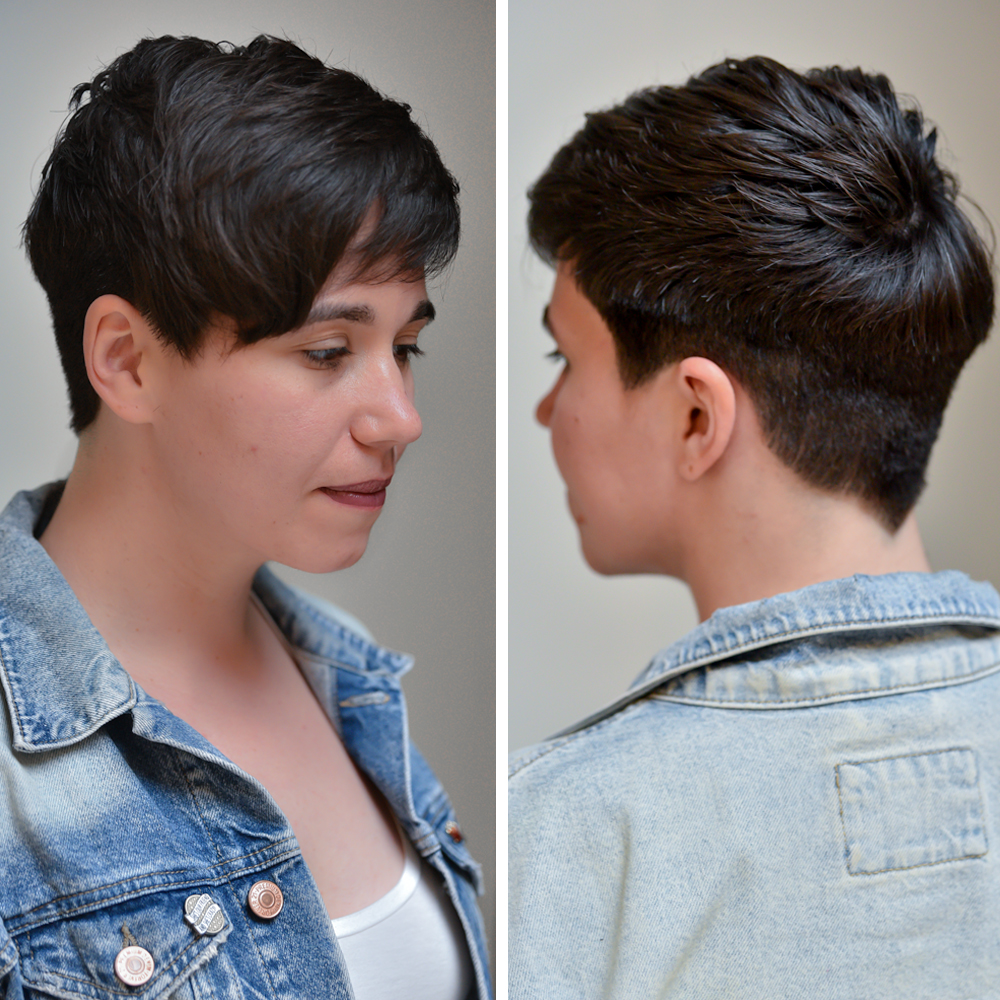
After
- 24Step 24 of 24
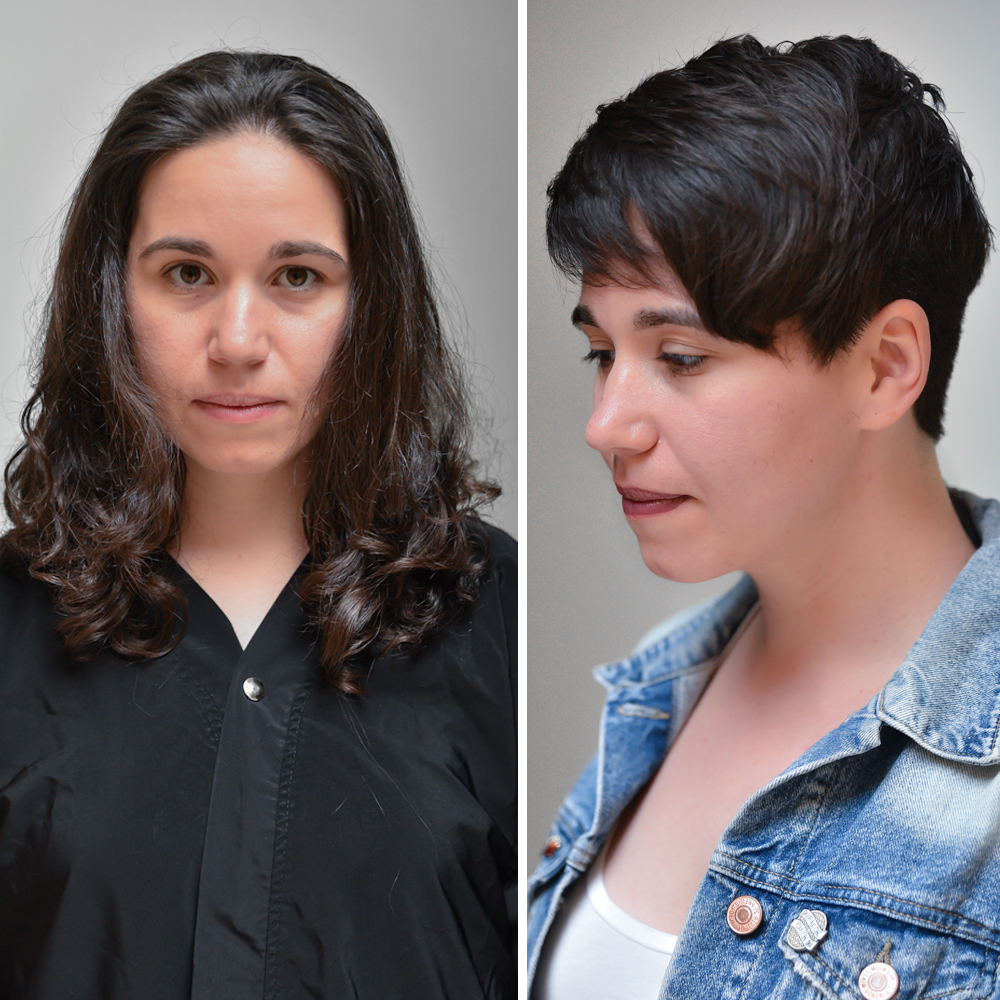
Check out the OMG-worthy transformation!
Haircuts
Transformation: Edgy Pixie + Fringe
May 14, 2018·1 min read
One of this year’s biggest hair trends? Haircuts! Women everywhere are ditching their long locks and opting for edgier, short-haired styles—and sometimes the results are life-changing! That was exactly what happened when SEVEN haircare Flagship Educator and senior stylist (@hawkshairfashion) created this major transformation, and BTC was there to snag every step. Scroll through for the full how-to, then recreate this pixie with dramatic fringe! (more…)
More to Read


