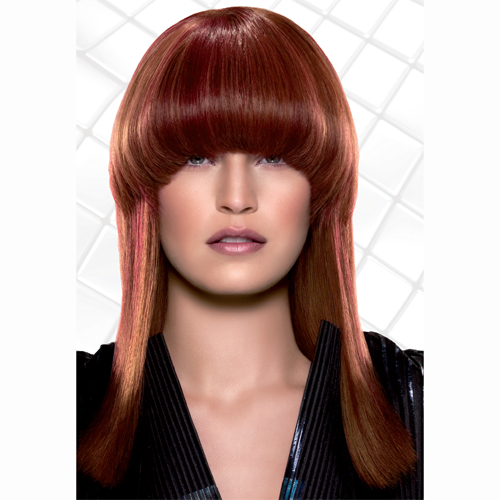
“Go big or go home.” You can say it all you want, but do you mean it? When it comes to a cut like this one from Alfaparf, there’s no such thing as “too bold.” With a super-wide set, long fringe, your client’s face snags all the attention while the long length keeps the look modern and feminine. What are you waiting for? See the steps in the following pages and dive in. Like the color? Here’s the color step-by-step! (more…)
- 1Step 1 of 9
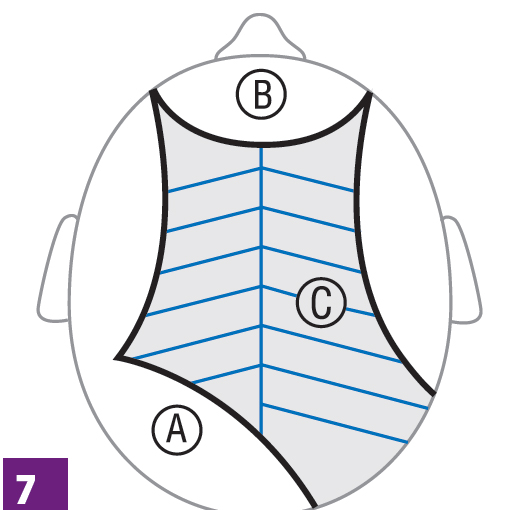
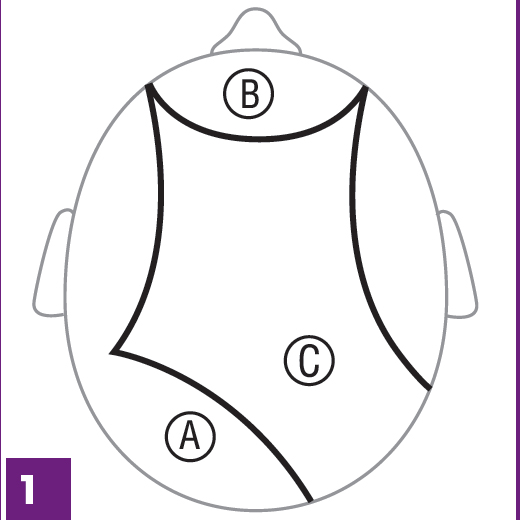 Divide the hair into three panels as shown. See additional views in the following pages.
 - 2Step 2 of 9
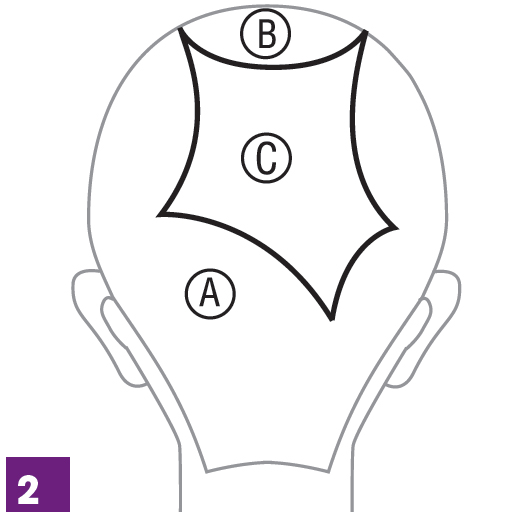
Divide the hair into three panels. See next slides for additional views.
- 3Step 3 of 9

Divide the hair into three panels. See next slide for additional view.
- 4Step 4 of 9
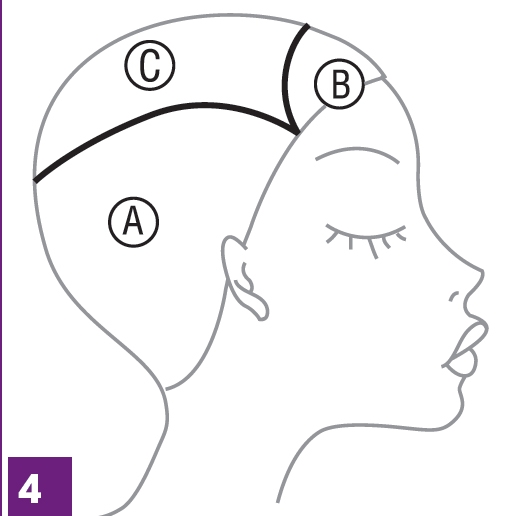
Divide the hair into three panels. See previous slides for additional views.
- 5Step 5 of 9
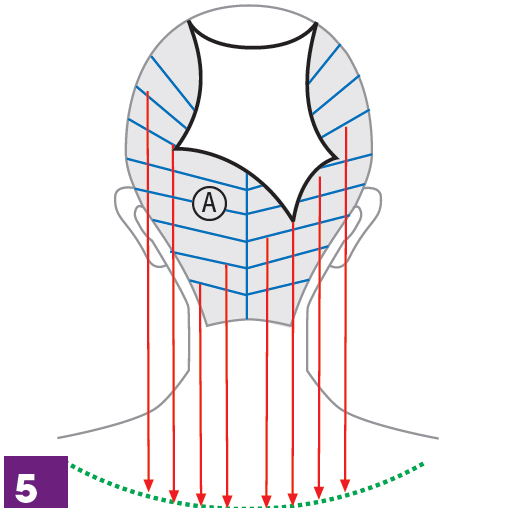 Divide panel A into diagonal inverted sections. Comb the hair downwards and cut a long and slightly rounded perimeter
 - 6Step 6 of 9
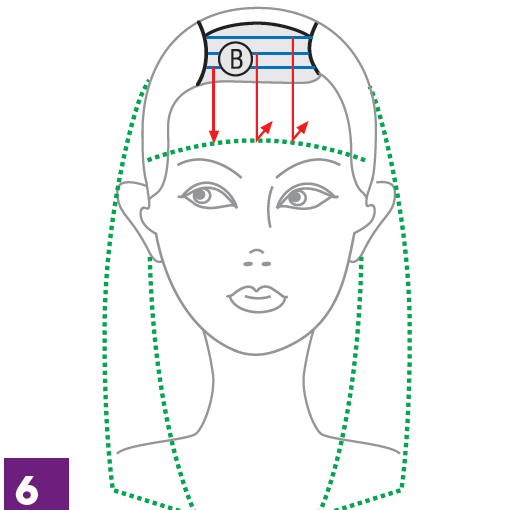 Work panel B, taking horizontal sections to get a round fringe. Slightly lift each section to create a soft graduation rounding the perimeter.
 - 7Step 7 of 9
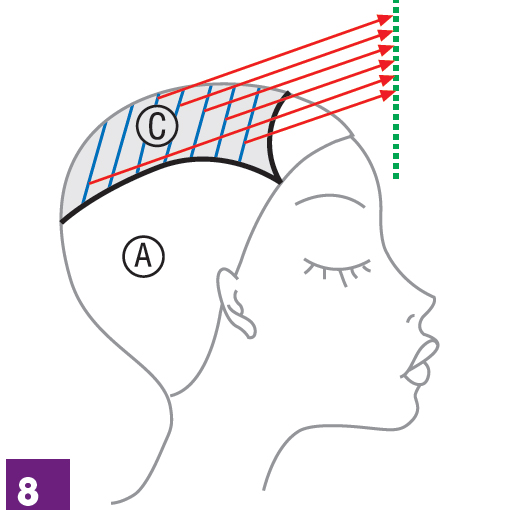
 Divide panel C into diagonal sections; use section A as a guideline starting from the forehead. Cut a squared line. Overdirect all the other sections on the first one keeping a low elevation to maintain the weight.
See the next slide for an additional view. - 8Step 8 of 9
 Divide panel C into diagonal sections; use section A as a guideline starting from the forehead. Cut a squared line. Overdirect all the other sections on the first one keeping a low elevation to maintain the weight.
See the previous slide for an additional view. - 9Step 9 of 9
 After drying, take the hair in the longest part of panel C and refine the perimeter length to visually
join panel C and panel A. Continue with a soft cut, overdirecting each section to the first one.
Like the color? See the step-by-step!


