- 1Step 1 of 11
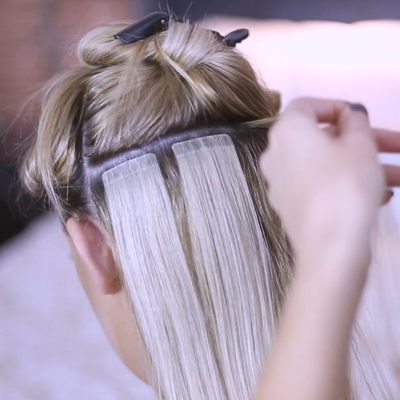
Begin by applying a full head of hairtalk® Extensions. Use hairtalk Original Extensions (18"-20" in Color 613) and hairtalk Petite Extensions (18”-20” in Color 613) to give her length and volume.
- 2Step 2 of 11
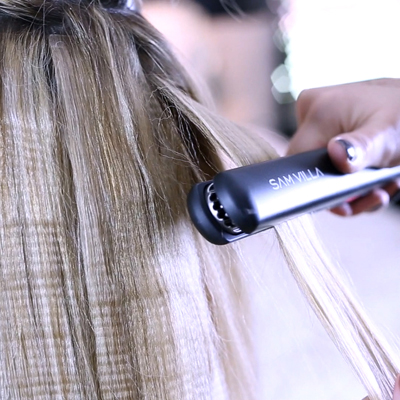
Using a 1-inch Sam Villa Crimping Iron, take small sections and press tight to activate the crimp. hairtalk® extensions are great for holding texture and curls all day.
- 3Step 3 of 11
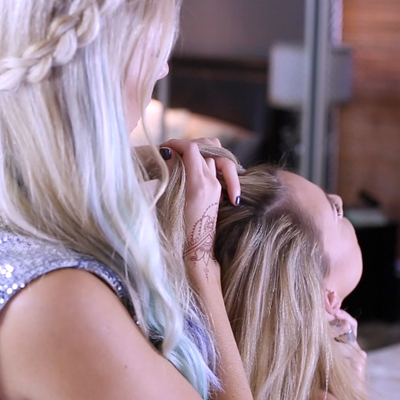
Section the hair in two. The first section will be all the hair above the ears and the second section will be below the ears.
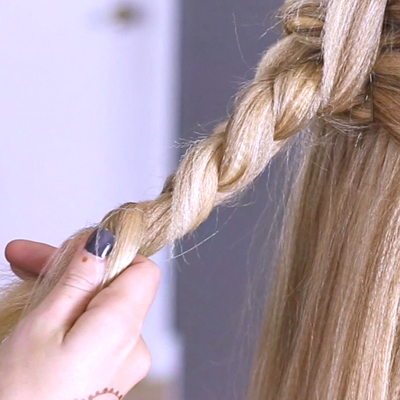
- 4Step 4 of 11
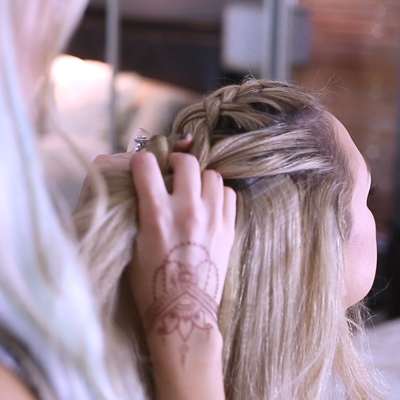
Grab the top section and create a three-strand French braid at the center part. Continue to the occipital bone, and then transition to a three-strand standard braid and secure with an elastic. Place the braid to the side for later.
- 5Step 5 of 11
In the lower section, start a standard braid, securing with an elastic.
- 6Step 6 of 11
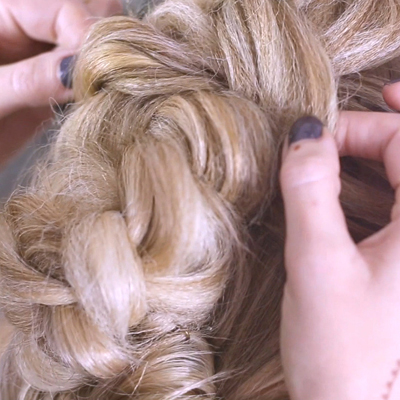
Pancake out all the sections to give volume and a lived-in appearance.
- 7Step 7 of 11

Clean up and tuck away any unwanted extension tabs into place.
- 8Step 8 of 11
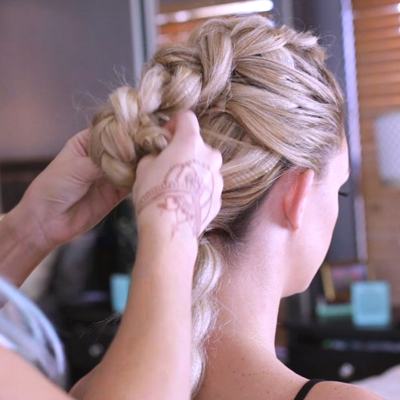
Starting at the top, barrel roll the tail end of the pancaked braid. Be sure to bobby pin the newly tucked braid at the occipital bone.
- 9Step 9 of 11
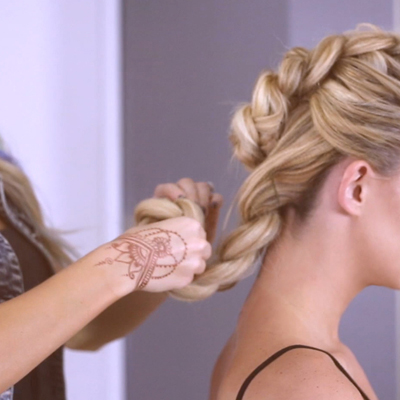
Grabbing the lower section, complete the Fauxhawk Braid by rolling the second braid upward to meet and interlock with the top section. The key to this sleek but textured do is to make sure tension is secured on the sides and nape while keeping volume at the top.
- 10Step 10 of 11
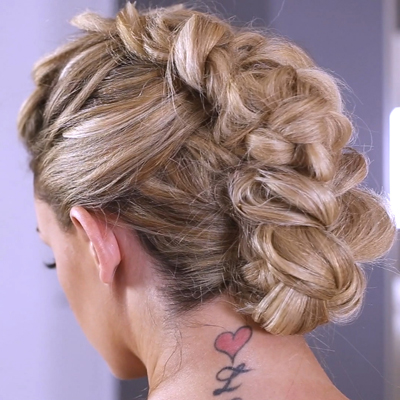
Finished Look
- 11Step 11 of 11Watch the video ↗
Hair Extensions
Textured Faux Hawk Braid
November 4, 2015·1 min read
For an airy updo she can wear casually or out, this texturized braid is a sleek and voluminous choice your client will love. And now, the big, voluminous fauxh awk braid is possible with any length of hair. From the trusted makers of Hotheads Hair Extensions comes hairtalk®, the next generation of 100 percent human Remy hair that gives your clients a naturally luxurious feel. Get these revolutionary and flexible hair extensions and give your client an updo she’ll never forget. This textured fauxhawk braid is perfect for the client who needs a few added strands for a fuller, longer look. How much do (more…)
More to Read


