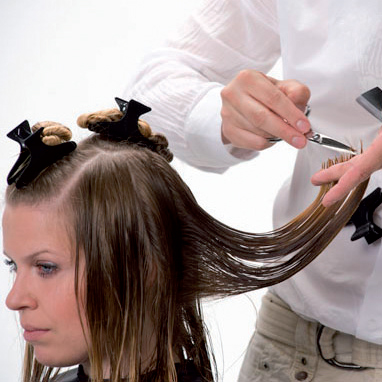
- 1Step 1 of 12
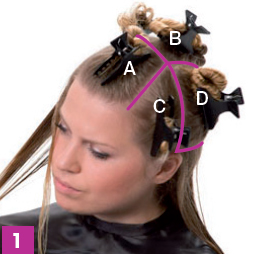
Create a trapezoid starting from ¾ of the outside of the right eyebrow to ¾ of the outside of the left eyebrow and continue up to the level of the crown (panel A). Starting at the base of the trapezoid near the crown, create a triangle with the point facing down (panel B) and then trace a straight line to about 1 cm (0.39 inches) behind the ear, creating the C panels. Trace a line that runs parallel to the shoulders, beginning from the point of section B and going above the ear to create the D panels. The rest of the hair is panel E.
Click through to see additional views of the sectioning.
- 2Step 2 of 12
Create a trapezoid starting from ¾ of the outside of the right eyebrow to ¾ of the outside of the left eyebrow and continue up to the level of the crown (panel A). Starting at the base of the trapezoid near the crown, create a triangle with the point facing down (panel B) and then trace a straight line to about 1 cm (0.39 inches) behind the ear, creating the C panels. Trace a line that runs parallel to the shoulders, beginning from the point of section B and going above the ear to create the D panels. The rest of the hair is panel E.
Click through to see additional views of the sectioning.
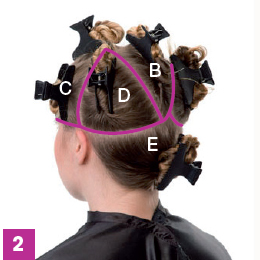
- 3Step 3 of 12
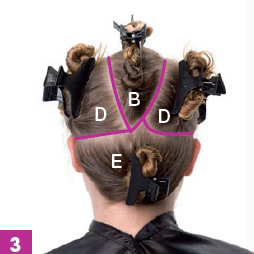
Create a trapezoid starting from ¾ of the outside of the right eyebrow to ¾ of the outside of the left eyebrow and continue up to the level of the crown (panel A). Starting at the base of the trapezoid near the crown, create a triangle with the point facing down (panel B) and then trace a straight line to about 1 cm (0.39 inches) behind the ear, creating the C panels. Trace a line that runs parallel to the shoulders, beginning from the point of section B and going above the ear to create the D panels. The rest of the hair is panel E.
Click back to see additional views of the sectioning.
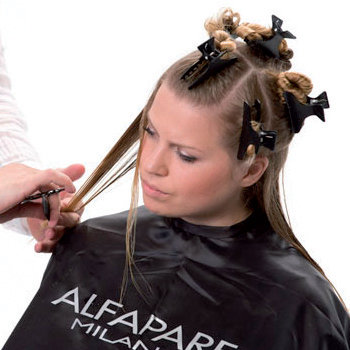
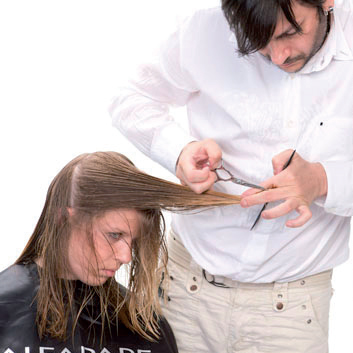
- 4Step 4 of 12
 Panel E: Define the perimeter length 4-5 cm (1.58-1.97 inches) below the shoulders and bring all the hair to this length. Form into a round shape. Continue to loosely shape hair into a circle, bringing the two side sections together with the back perimeter and bringing all of the hair to the guideline.
 - 5Step 5 of 12
 Panel C: Lower the base of the perimeter 2-3 cm (0.79-1.18 inches), creating a concave shape and bringing all of the hair to the central guideline.
 - 6Step 6 of 12
 Panel D: Create diagonal sections, bringing them to the guideline created in section E to form a concave shape.
 - 7Step 7 of 12
 Divide panel B into two parts, connecting them to the remaining section of the perimeter through a concave shape.
 - 8Step 8 of 12
 Divide panel A into two sections. Lower the perimeter of the section of hair, creating a concave shape, until it is touching the side perimeter of C.
 - 9Step 9 of 12
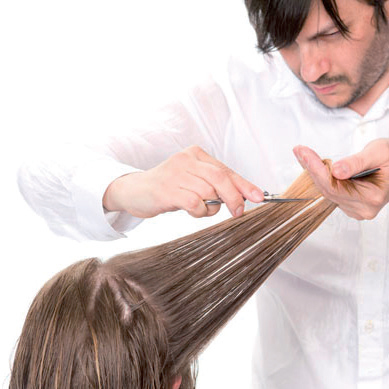 Finish the cut using the scissors with the blades open. Lightly tousle the hair to separate and diminish volumes.
 - 10Step 10 of 12
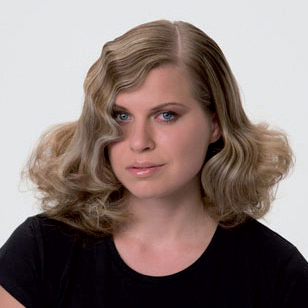
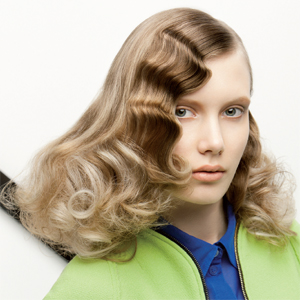 In this look, we see a delicate finger wave blended into looser texture.
 - 11Step 11 of 12
 Same style, different model! Dry and style with Semi di Lino Diamante Illuminating Strong Mousse and Semi di Lino Diamante Illuminating Hairspray.
 - 12Step 12 of 12
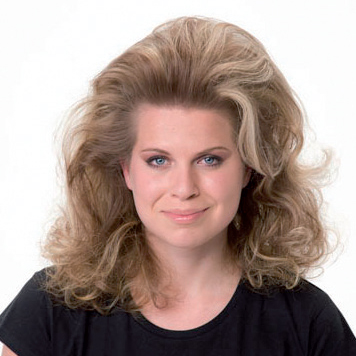 Alternatively, open up the curls and set them with Semi di Lino Diamante Illuminating Hairspray.
Haircuts
Textured 70s-Inspired Cut How-To
March 6, 2012·1 min read
In this look from Alfaparf’s 70’s Collection, cool, elegant blonde is offset by a darker, face-framing shade for a chic pop of color. The provocative style juxtaposes smooth finger waves with expanded, teased volume. (more…)
More to Read


