- 1Step 1 of 10
- 2Step 2 of 10
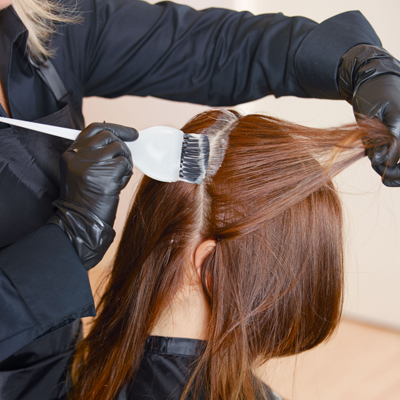
Apply Formula A to regrowth and Formula B to midlengths and ends. Process 35 minutes and remove. Gloss all strands roots to ends with Formula C. Process 10 minutes and remove.
- 3Step 3 of 10
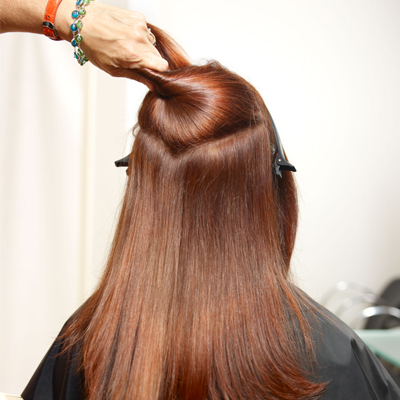
Create an ear to ear, radial parting to divide the front from the back section. Use a profile parting from the natural side parting; then create a v-shaped parting at the occipital bone to isolate the top section.
- 4Step 4 of 10
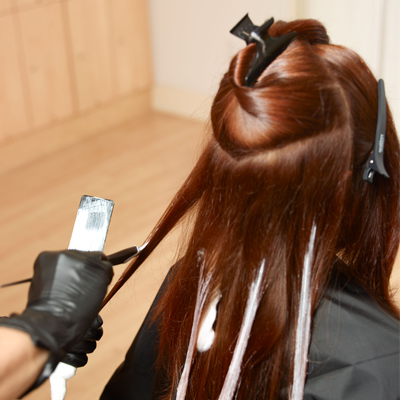
Begin in the back of the head, at the occipital bone. Create medium sized, v-shaped sections to apply single-point highlights. Sweep Formula D onto the surface of the section from midlengths to ends, holding the brush at a 45-degree angle.
- 5Step 5 of 10
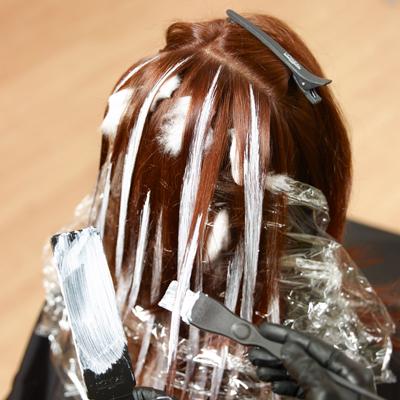
Using a bricklay placement, continue creating single-point highlights from the bottom of the crown to the original control point. Sweep Formula D along the entire length of the strand, from the regrowth area to the ends. Place cotton under the highlighted pieces, and perforated plastic over the highlighted pieces.
- 6Step 6 of 10

In the front, begin work at the hairline. Create diagonal back sections and work until reaching the ear-to-ear radial parting.
- 7Step 7 of 10
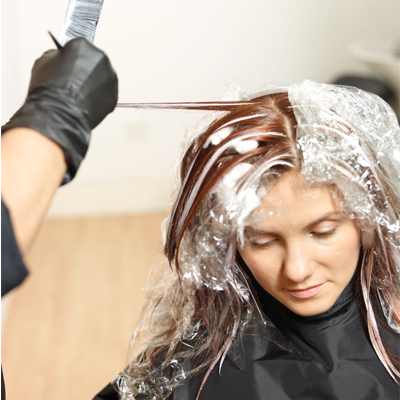
As work progresses, place highlights closer together near the front hairline and further apart as you work away from the face. Create larger sections around the face frame area for added dimension and impact. Place perforated plastic over the final highlighted section. Process, shampoo, condition and style the hair.
- 8Step 8 of 10
- 9Step 9 of 10
- 10Step 10 of 10Watch the video ↗
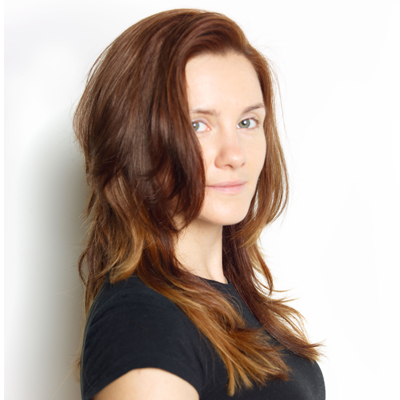
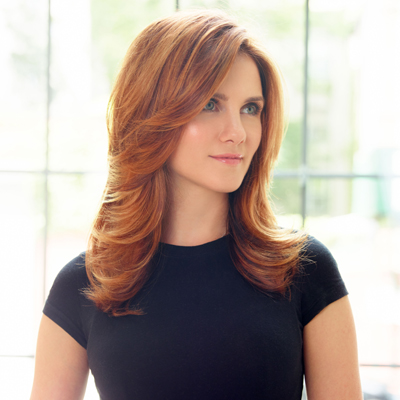
Balayage
Shimmering, Strawberry Balayage From L'Oréal Professionnel
October 12, 2014·1 min read
Balayage + redheads. Now that’s an appealing combination! Why? Because as most colorists know, it’s difficult to create natural-looking highlights that don’t look stripe-y on a red base. Here, L’Oréal Professionnel Artist Nancy Braun illuminates a rich, beautiful auburn with her signature balayage technique. (more…)
More to Read


