- 1Step 1 of 16
Rest the still blade on the client’s head.
- 2Step 2 of 16
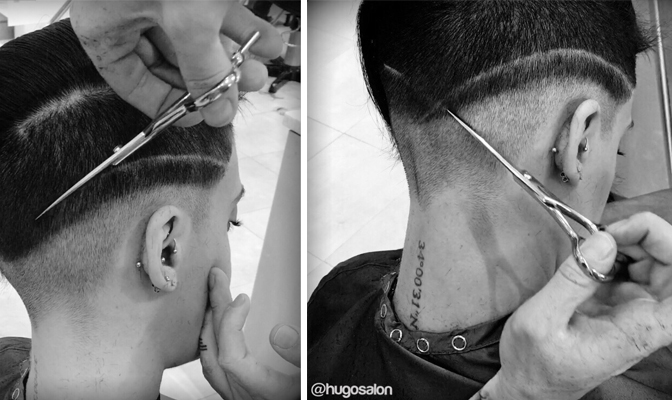
Begin air-cutting, using small opening and closing movements before actually cutting any hair so that you already have the right movement down as you start your line.
- 3Step 3 of 16
Try to cut from the beginning point to the end point without stopping.
- 4Step 4 of 16
If the extension of your arm/wrist limits your reach while cutting the line, stop and begin again from your end point, meeting the other section of your line in the middle.
- 5Step 5 of 16
Once you’ve created your line, go back in with the trimmers to tighten it up. Some barbers will even use a straight razor for this.
- 6Step 6 of 16
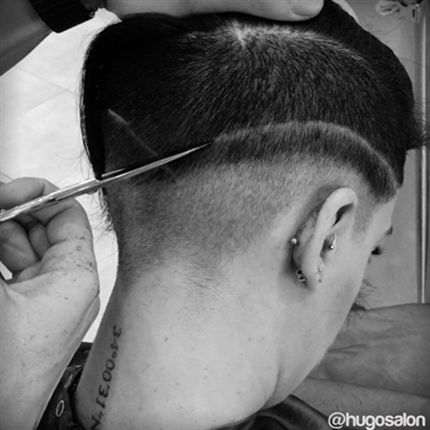
Stability is key! You can use your non-cutting hand to stabilize your shears at the pivot area, hold the client’s head still or even gently maintain their chin position to avoid any inadvertent rotation.
- 7Step 7 of 16
Pick a starting point and ending point and visualize the line while you cut.
- 8Step 8 of 16
When you’re just beginning, start with shorter, straighter lines. As you begin to feel more comfortable, longer or curved lines become less challenging.
- 9Step 9 of 16
Use smaller, more detail-oriented shears (5.5” or shorter). The smaller the blade, the more you are able to open and close the shears in a small area, giving you much more control.
- 10Step 10 of 16
“People often ask how sharp the shears need to be,” says Doug. “As long as they’re sharp enough for a cut—without pushing hair—they’re sharp enough for etching.”
- 11Step 11 of 16
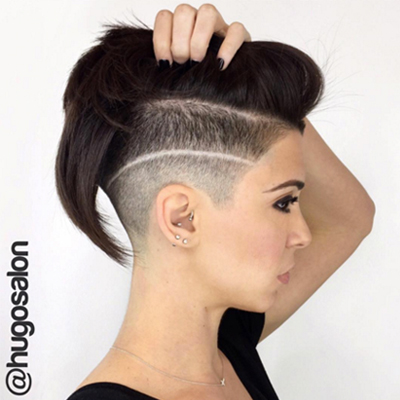
Typically, designs look cleaner when the undercut is faded, so Doug usually teaches fading before shear etching.
- 12Step 12 of 16
Take down the length of the undercut first, then cut the lines. Save the fade for last. This allows you to customize your fade to accent the design. “For example, in the look below, once the line across her right side was set, I was then able to create two separate fades (one above the line and another below it),” says Doug.
- 13Step 13 of 16
Only use the point of your shears. This will help you avoid opening and closing your shears too widely, and smaller movements mean smaller errors.
- 14Step 14 of 16
Practice on a mannequin. “None of us love that idea, but it’s important to get comfortable and create muscle memory before jumping in with a client,” notes Doug.
- 15Step 15 of 16
Be honest with your client. “I was once in the middle of a design when I realized it just wasn’t going to turn out like I’d hoped,” shares Doug. “If you find yourself in that situation, speak up. In that instance, I switched to a geometric design, and [my client] was incredibly grateful I didn’t continue with something I knew I wasn’t going to do well.”
- 16Step 16 of 16Watch the video ↗
Haircuts
Shear Etching: Everything You Need to Know
April 5, 2016·1 min read
We just can’t get enough of this amazing design work from Hugo Salon stylist Doug Theoharis! You might remember Doug from BTC’s 2015 #ONESHOT awards, where he took home the prize for Precision Shot of the Year. Obviously, Doug’s no stranger to fades, undercuts and designs, but as he found himself with more and more requests for these trendy precision cuts, he struggled with his limitations using trimmers. “There are some amazing barbers out there who use trimmers as cleanly as if they had an X-Acto knife, but I’m not one of them,” says Doug. “I’m a stylist, raised with (more…)
More to Read


