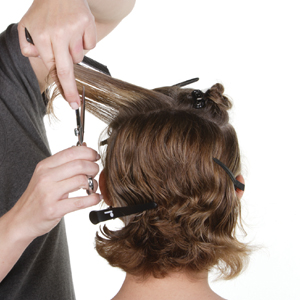
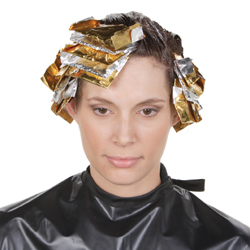
- 1Step 1 of 12
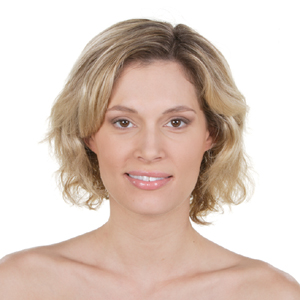
This model's hair has grown out from a previous cut. She’s ready for a new shape to add more manageability to her thick, wavy hair.
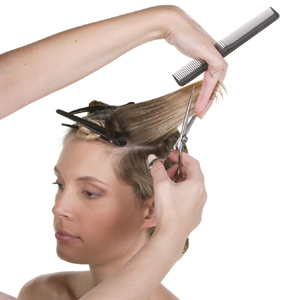
- 2Step 2 of 12
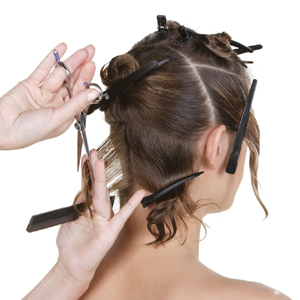
Release a vertical parting in the center nape. Project at 45°, position your fingers for a high line of inclination and sculpt parallel. Work to one side using slight diagonal-forward partings and multiple stationary design lines. Repeat on the opposite side.
- 3Step 3 of 12
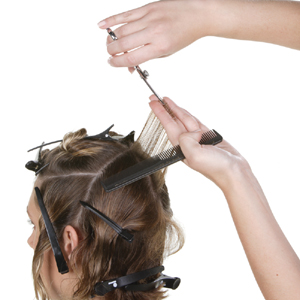
Release a vertical parting at the center crown. Project at 90° and sculpt to create slightly shorter lengths at the top. Work toward the left converging vertical partings to the center parting project at 90°. Repeat on the right side.
- 4Step 4 of 12
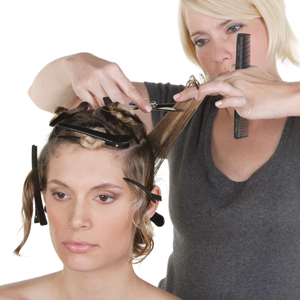
Take a vertical parting at the back of the section. Project at 90° at the top of the parting. Slide cut from midstrand to the ends. Work to the front sculpting each parting individually. Repeat on the other side.
- 5Step 5 of 12
In the top left section, take a vertical parting at the back and project 90° from the bottom of the parting. Slide cut from midstrand to ends, opening and closing the shears. Work toward the front.
- 6Step 6 of 12
From the apex, converge lengths back and continue to slide cut. Repeat on the right side.
- 7Step 7 of 12
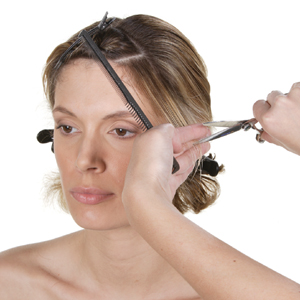
Release a diagonal parting at the left side of the fringe. Distribute perpendicular with low projection and sculpt parallel.
- 8Step 8 of 12
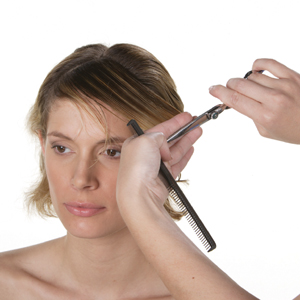
Converge subsequent diagonal partings to the stationary design line and sculpt.
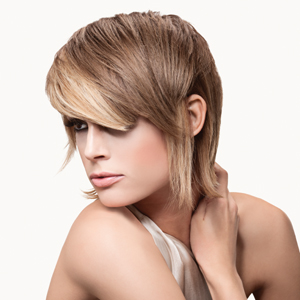
- 9Step 9 of 12
Use medium-thick, back-to-back diagonal slices to alternate level 8, golden blond and lightener. Apply level 9, caramel demi-permanent color to the remaining lengths. Process, rinse, shampoo and condition prior to styling.
- 10Step 10 of 12
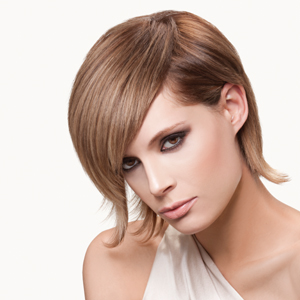
When worn to one side, the graduated fringe is accentuated...
- 11Step 11 of 12
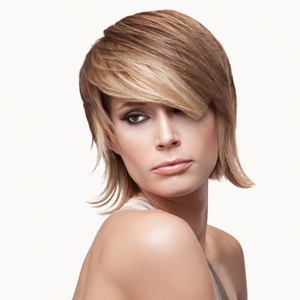
...but when worn on the other side, the layers are accentuated.
- 12Step 12 of 12
Want more? Check out another step-by-step: Short Multi-Tonal Brunette Cut and Color from Pivot Point.
Credits
Artist | Robin Hain | Pivot Point International
Makeup | Rue Dufkis | www.ruegeinc.com
Fashion Stylist | Isaac King | kingfashion71@gmail.com
Jewelry/Accessories | Rossi Cole | www.jewelsbyrossi.com
Fashion Photographer | John Gress | www.johngress.com
Senior Photographer/Videographer | David Placek
Bobs & Lobs
Sculpted Bob Cut and Color How-To From Pivot Point
January 9, 2012·1 min read
Have a client looking for style versatility? Look no further than this cut from Pivot Point International, Inc. With a jaw-grazing length and sculpted shape, the fringe can be worn on one side or the other to accentuate the graduated fringe or appear more layered. Just long enough to pull up a little, and just short enough to stay sassy, this cut and color is perfect for clients who want a low-maintenance, chic style. (more…)
More to Read


