- 1Step 1 of 20
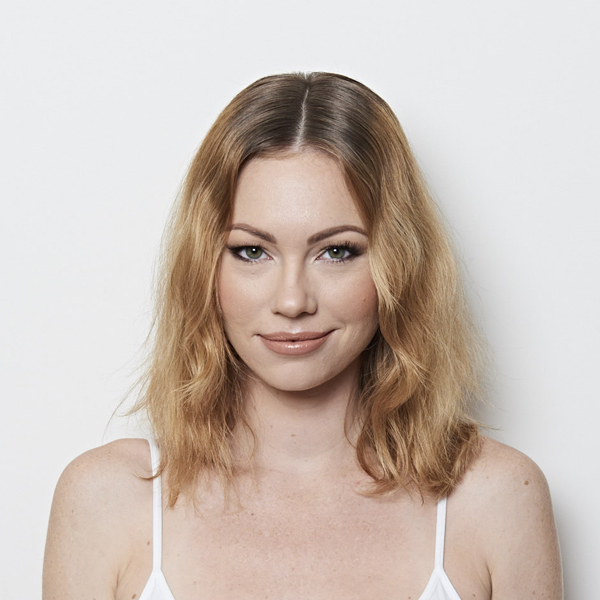
The model had a natural Level 6 regrowth with colored and highlighted Level 8 hair from the mids to ends.
- 2Step 2 of 20
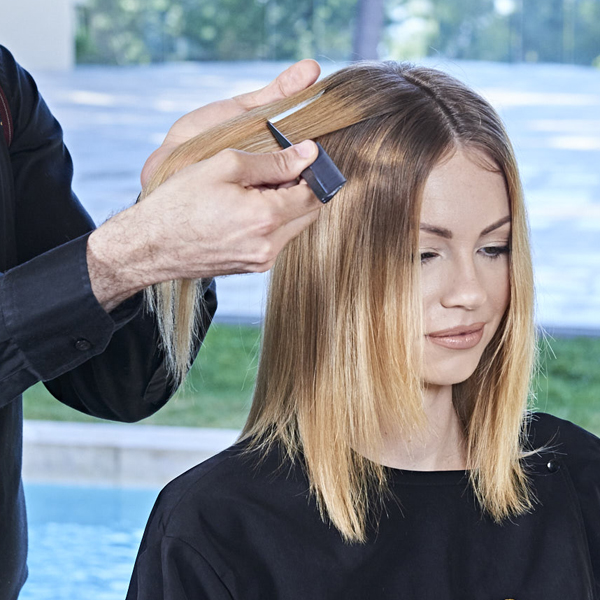
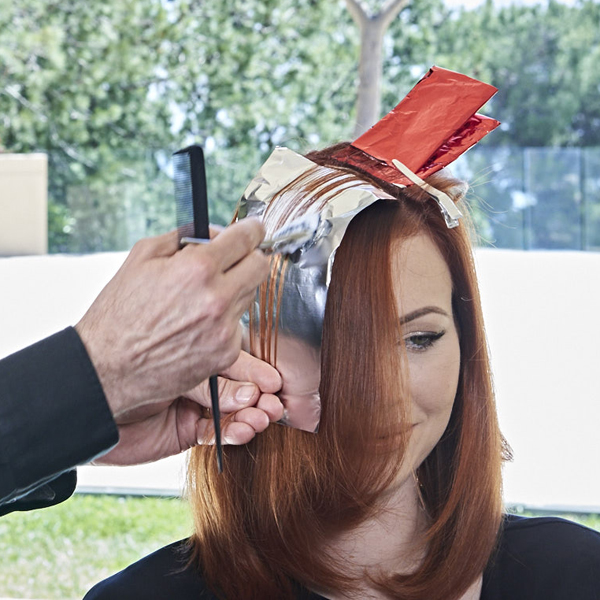
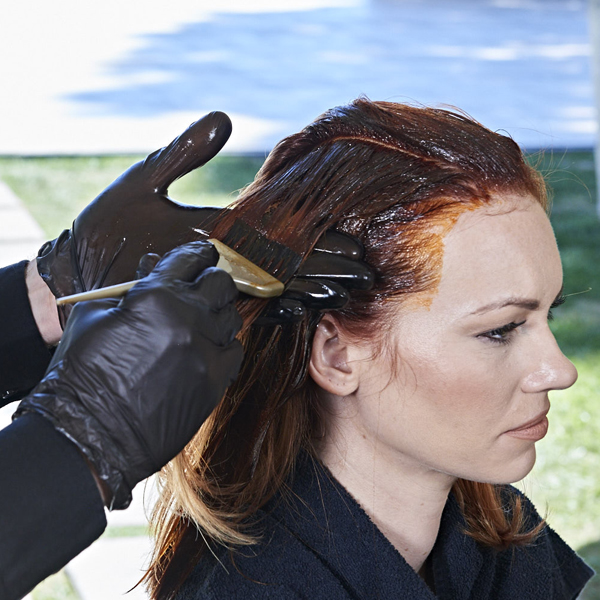
Part the hair down the middle to the nape. Working on each side, apply Formula A in diagonal- horizontal, 1/8-inch sections.
- 3Step 3 of 20
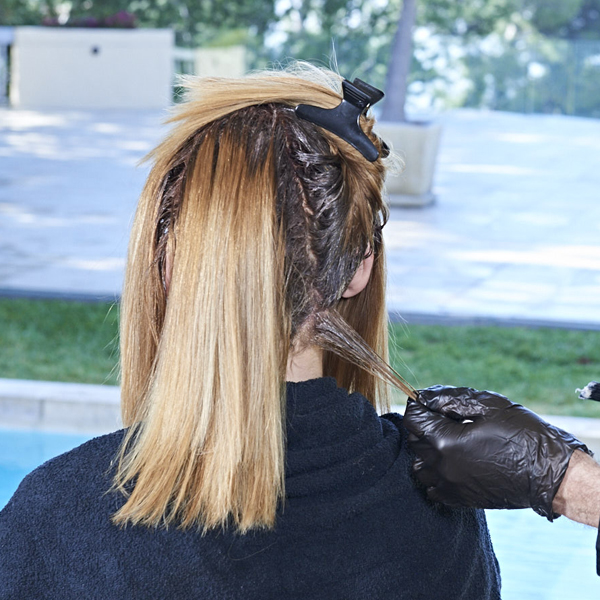
Apply Formula A from the base to about 2 inches out, covering the natural regrowth.
Pro Tip: When working with reds or warm tones, lower the developer volume or working level to avoid hot roots.
- 4Step 4 of 20

- 5Step 5 of 20
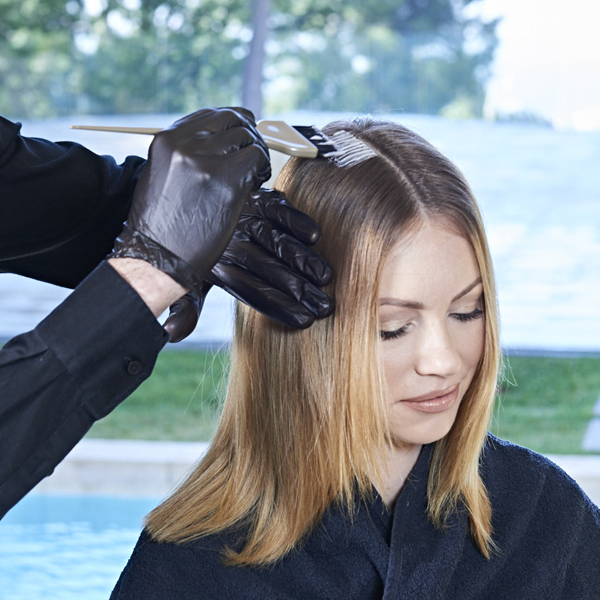
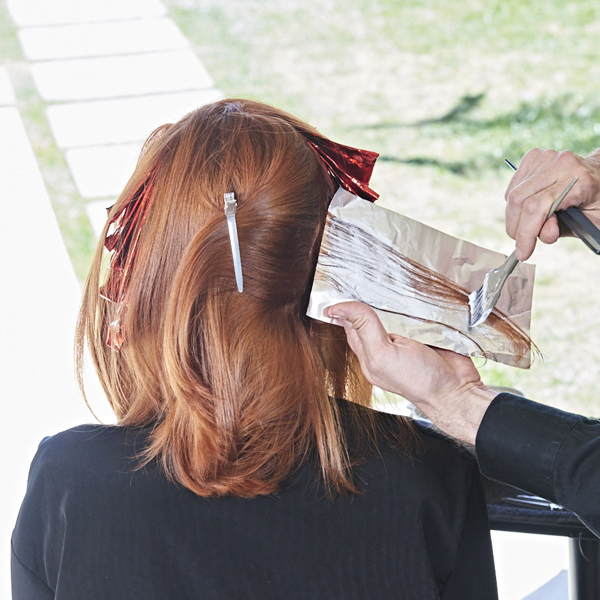
Continue taking diagonal-horizontal partings with Formula A throughout the rest of the head. The diagonal sectioning creates a more natural-looking result.
- 6Step 6 of 20
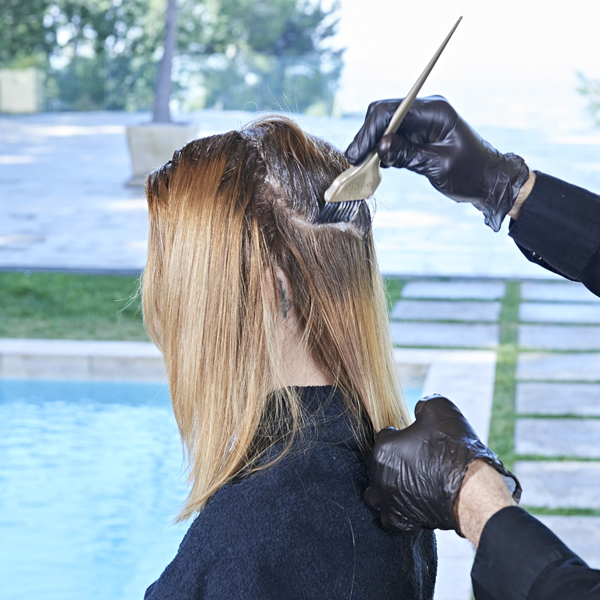
Working upwards from the nape, apply Formula B to the midlengths and ends.
Pro Tip: When working with reds, keep color rich and deep at the roots, and lighter and fiery on the ends.
- 7Step 7 of 20
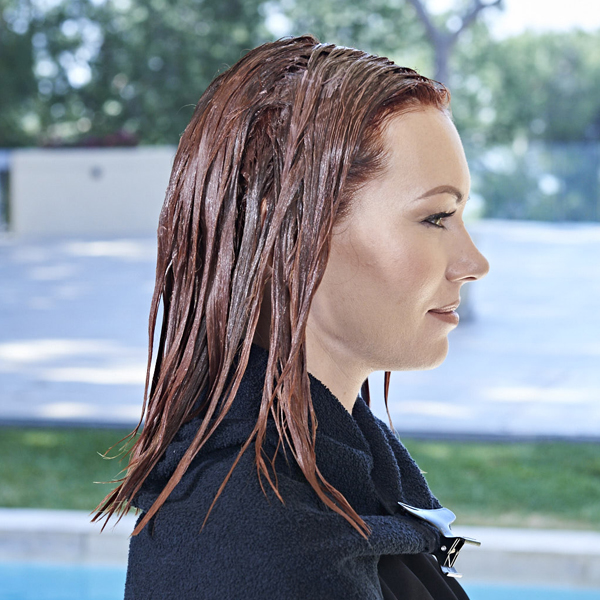
Process for 35 minutes. Shampoo and condition with K-PAK Color Therapy Shampoo and Conditioner. Dry the hair with a paddle brush.
- 8Step 8 of 20
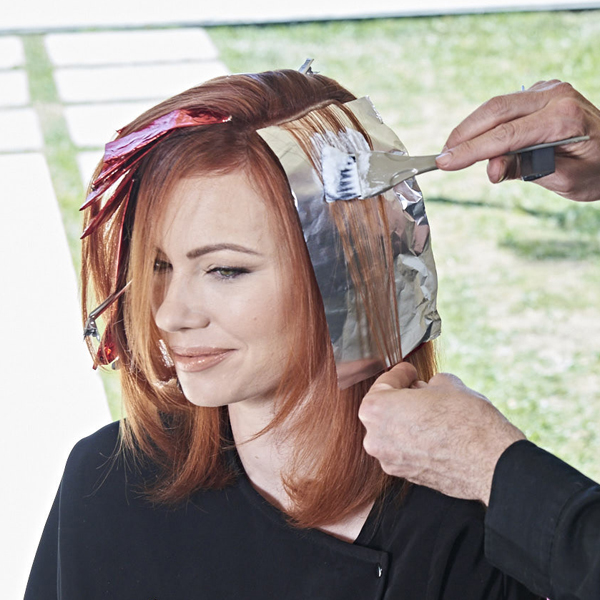
Section the hair over the left or right eye, whichever the client prefers. Working off a deep horizontal parting creates soft streams of color from the scalp and bursts of brightness at the ends.
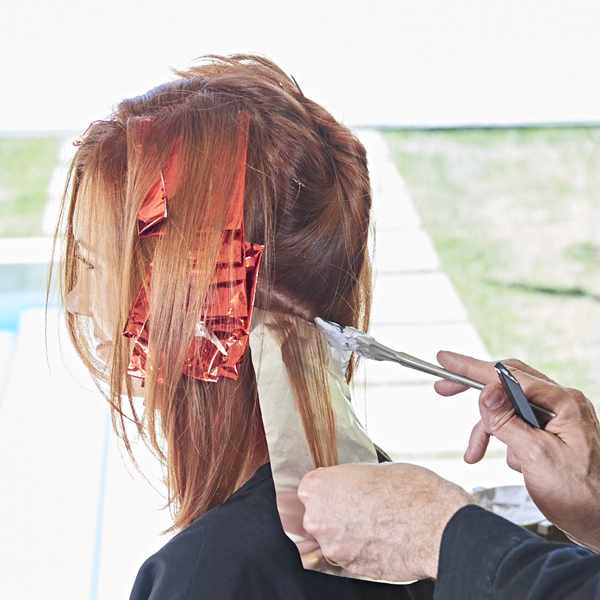
- 9Step 9 of 20
Working off the deep part, take a slender, diagonal parting and clip it aside. Start the application on a diagonal-horizontal weave parting and apply Formula C. Hold the brush at an angle to create a solfter line at the scalp about an inch away. Saturate the mids and ends to create brightness towards the ends, forcing an ombré.
- 10Step 10 of 20
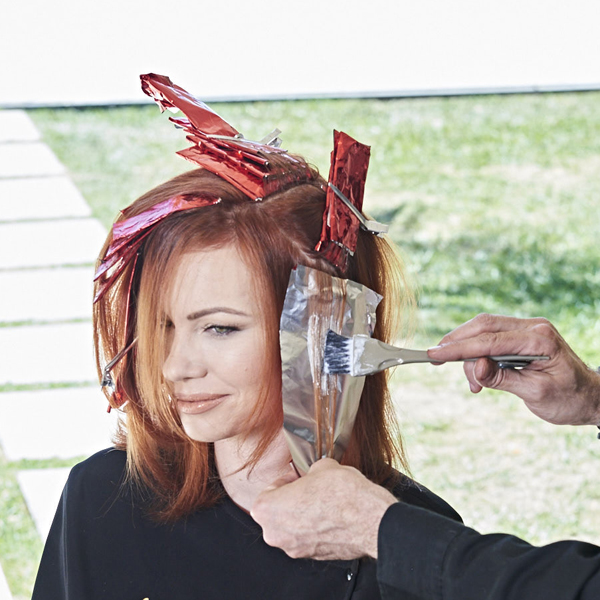
Continue creating ribbon lights, taking 5 to 7 back-to-back highlights. Note that the number of ribbon lights will depend on client’s hair density.
- 11Step 11 of 20
Working behind the ear, leave out about an inch of hair and continue with another set of ribbon lights. Angle these toward the face to add tons of brightness where it’s most flattering.
- 12Step 12 of 20
On the other side, take a 1-inch section of hair and move it over to the opposite side. Then, continue taking horizontal weave partings with Formula C.
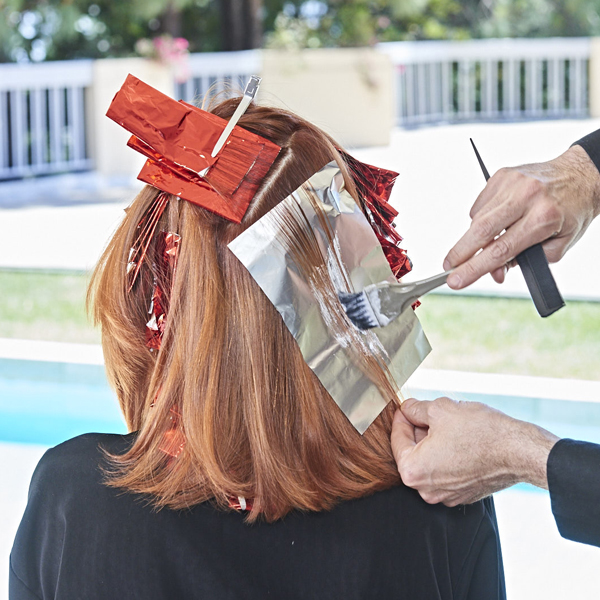
- 13Step 13 of 20
Take out a triangle section about 3 inches wide and clip it aside. Do another set of ribbon lights with the foils angled toward the face. Keep in mind that this is not supposed to be symmetric to the opposite side—this allows for different looks, depending on where the client parts her hair.
- 14Step 14 of 20
In the area behind the ear, add another set of ribbon lights using Formula C. Work on a strong diagonal angle toward the nape.
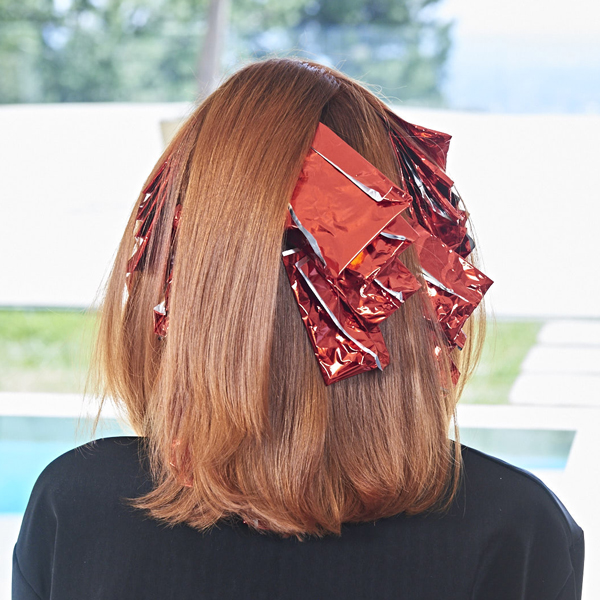
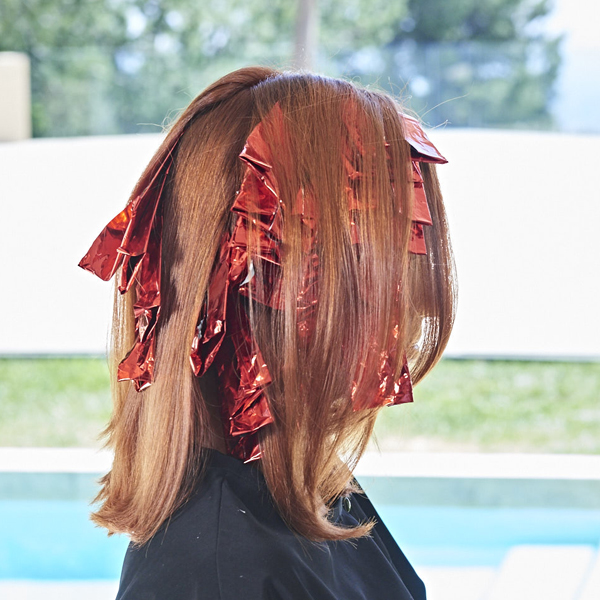
- 15Step 15 of 20
Working off a diagonal-vertical parting below the crown (just above the occipital bone), add 5 to 7 ribbon lights with Formula C feathered about an inch away from the scalp.
- 16Step 16 of 20
Process for 10 to 15 minutes or until hair lifts to a yellow-orange (Level 8) color.
- 17Step 17 of 20
Shampoo with K-PAK Color Therapy Shampoo. Towel-dry with two towels, gently squeezing moisture out of the hair to prevent roughing up the cuticle.
- 18Step 18 of 20
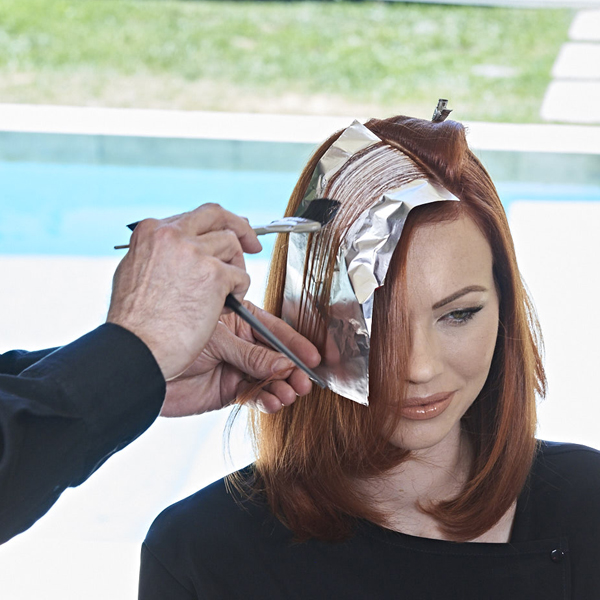
Apply Formula D from scalp to ends, using a bowl and brush or an applicator bottle. Process for 10 minutes, then shampoo and condition with K-PAK Color Therapy.
- 19Step 19 of 20
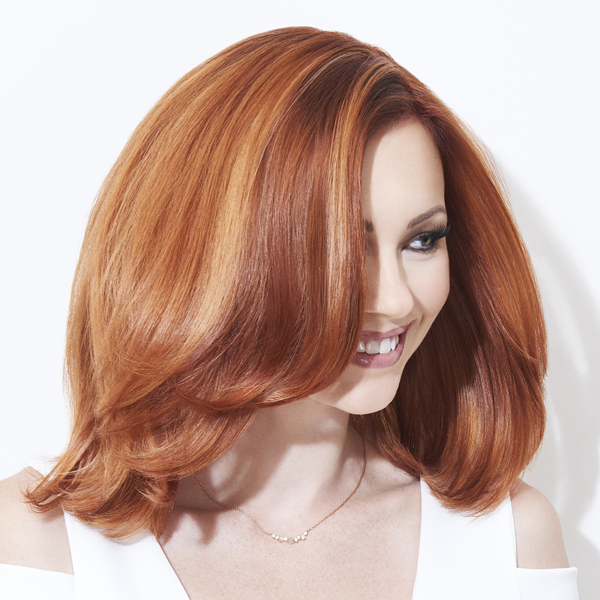
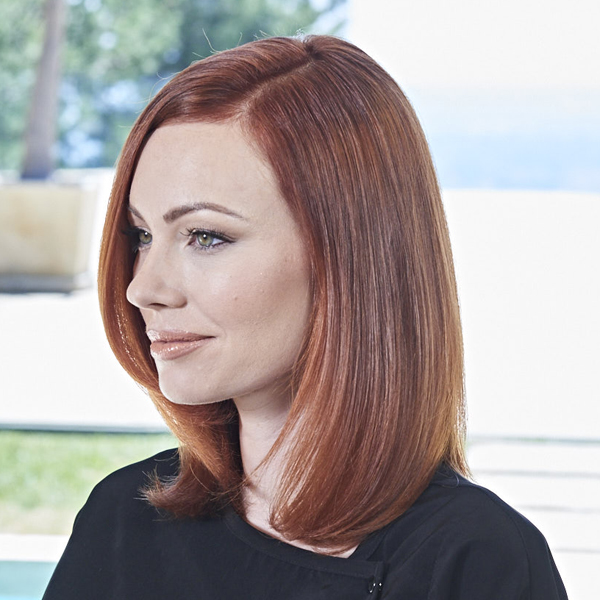
Finished look.
- 20Step 20 of 20Watch the video ↗
Hair Color
Red Ribbon Lights
September 6, 2017·1 min read
To create a fiery red haircolor that looks natural and healthy, Mark Miletti, Joico Global Guest Artist, pre-treated the hair with the Joico K-PAK Hair Repair System, balanced the red base, then did ribbon lights, an asymmetric technique that allows for different looks depending on where the client parts her hair. The natural red gold tones are designed to last 30 shampoos and fade to a natural base, instead of pink, and help deliver deepness at the root and a fiery pop on the ends. See how it’s done below and watch the entire process here! (more…)
More to Read


