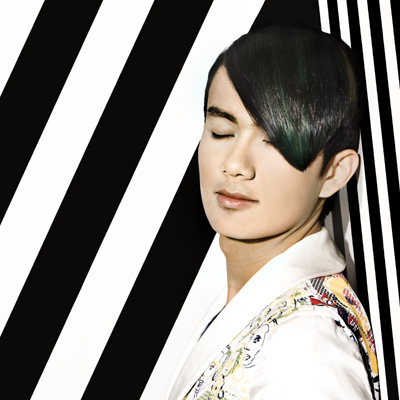
Pivot Point’s “Tinlei” is a funky look to match the lifestyle of your funky male clients. Overlapping lengths in front offer different styling options and a more contemporary style. Here’s the how-to. To learn more, go to www.pivot-point.com Subscribe to behindthechair.com “On Paper” Magazine–4 Issues Only $29.95! Next Issue: COLOR with Beth Minardi! (more…)
- 1Step 1 of 18
 Soft curls and longer lengths detract from Tinlei's striking bone structure. He wants a short, more angular style to accentuate his masculine features.
 - 2Step 2 of 18
 Increase layers in the interior overlap graduation in the center.
 - 3Step 3 of 18
 Increase layers in the interior overlap graduation in the exterior.
 - 4Step 4 of 18
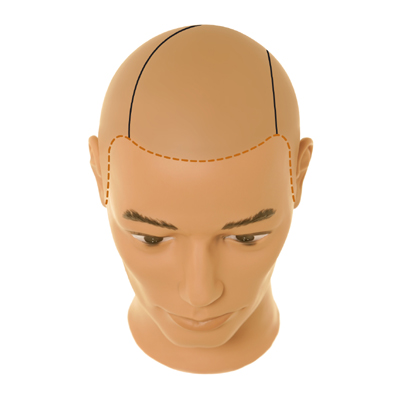
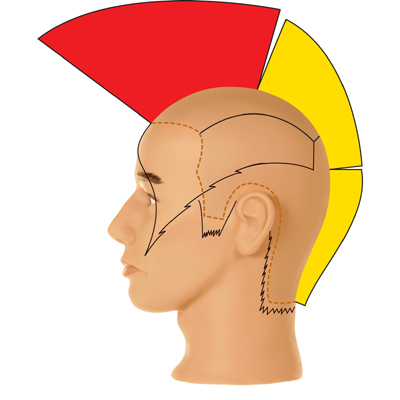
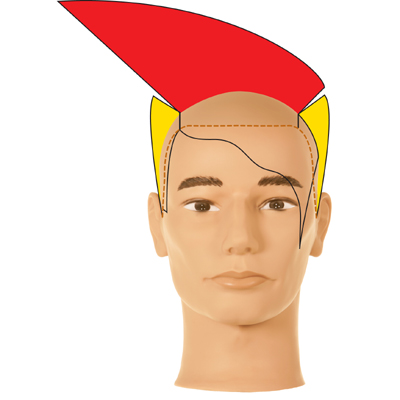
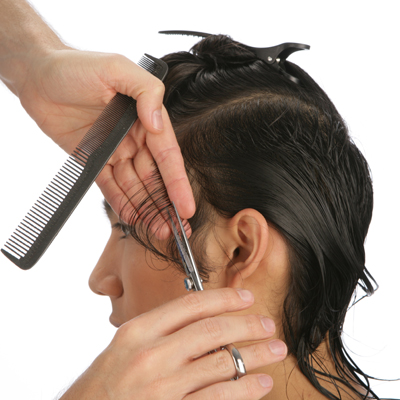
Section from the front recession areas above the crest toward the back to create an off-center point toward the left side in the back.
- 5Step 5 of 18
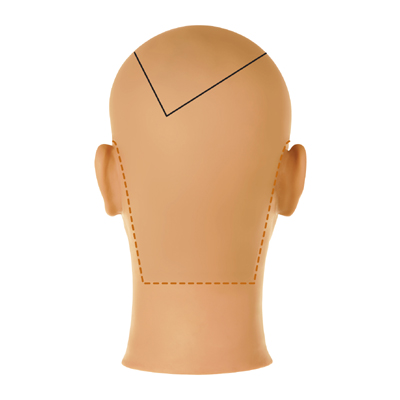
Section from the front recession areas above the crest toward the back to create an off-center point toward the left side in the back.
- 6Step 6 of 18
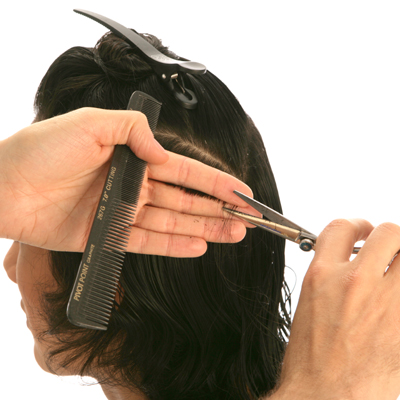
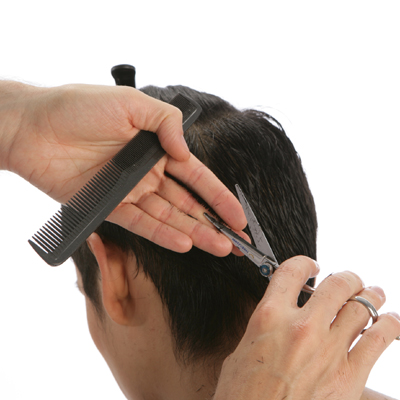
 Position the head upright and release a thin parting parallel to and just below the sectioning line on the left side. Project the hair straight out, position your fingers parellel to the parting and sculpt.
 - 7Step 7 of 18
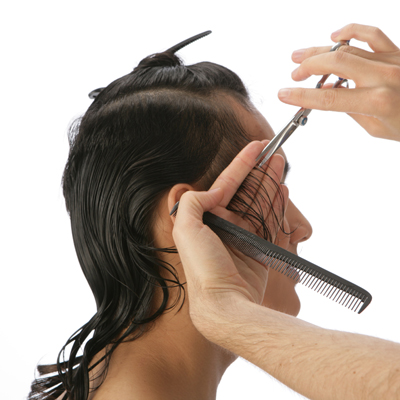
 Continue to sculpt along the sectioning line following the curve of the head with a parallel finger position to create a guideline. Work to the point in the back of the section. Move to the opposite side at the front hairline, project straight out and sculpt parallel to the sectioning line. Continue to the off-center point in the back of the head.
 - 8Step 8 of 18
 On the right side, release a steep diagonal-back parting, distribute perpendicular, project at a high angle and position your fingers parallel. Sculpt to connect with the previous established guideline. Use a mobile design line and continue to work toward the back.
 - 9Step 9 of 18
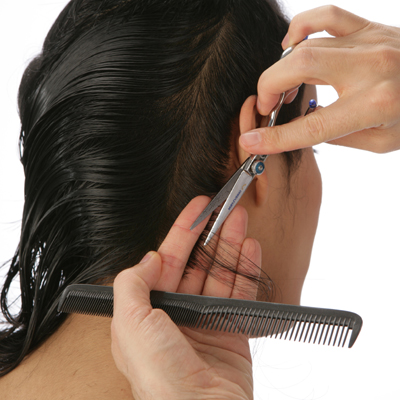 Behind the ear, extend the diagonal partings to the nape hairline and sculpt toward the center back.
 - 10Step 10 of 18
 Work until you reach the off-center point at the crest.
 - 11Step 11 of 18
Move to the opposite side. Release a steep diagonal-back parting at the front hairline, sculpt with perpendicular distribution and project a high angle.
- 12Step 12 of 18
 When you reach the off-center point in the back, connect the lengths with the opposite side.
 - 13Step 13 of 18
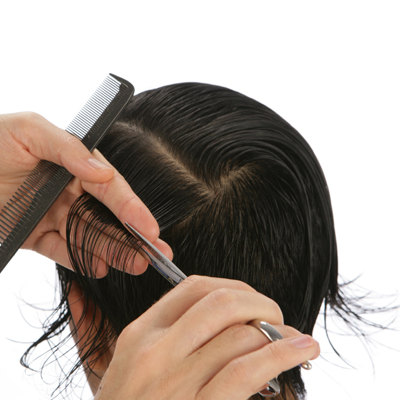 Move to the left side of the interior. Take a parting parellel to the sectioning line. Use a guide from the graduated lengths on the side, distribute perpendicular and project at a medium angle. Position your fingers parallel and sculpt. Repeat throughout the interior with a stationary design line.
 - 14Step 14 of 18
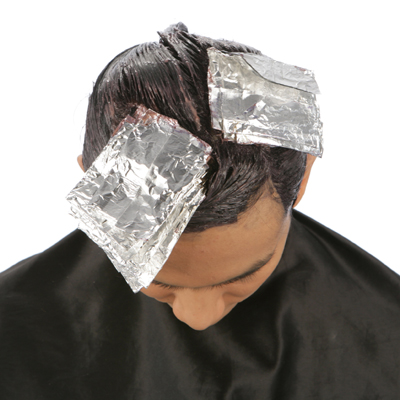
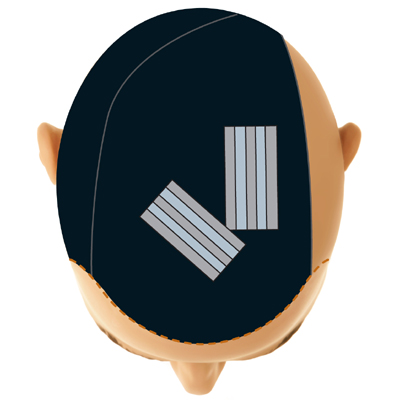 Decolorize an "L"-shaped section in the interior before applying color.
 - 15Step 15 of 18
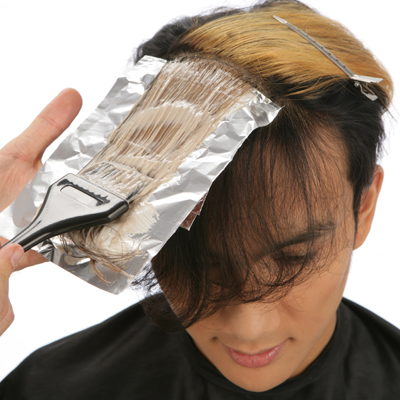 Apply an ash-silver demi-permanent color with developer to the first slice at the front of the section. On the second slice, apply a green-blue demi-permanent color with developer. Continue to alternate the color with back-to-back slices. Apply level 2, demi-permanent blue/black color with developer to the remaining hair.
 - 16Step 16 of 18
 Process, rinse, shampoo and condition before styling.
 - 17Step 17 of 18
- 18Step 18 of 18