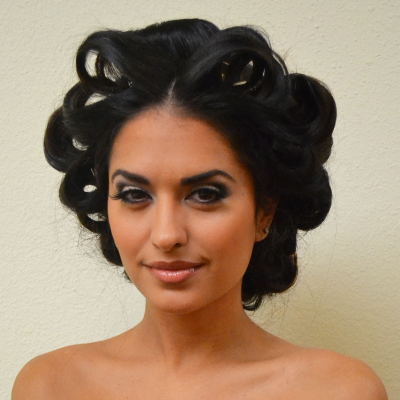
Who wouldn’t want to have voluminous, photo-ready hair? Hotheads shows you how!Who Did ItHair: Vicki CasciolaMakeup: Kimberly HillierPhotography: Sandra BuilesFor more information, visit www.hotheadshairwear.com Subscribe to behindthechair.com On Paper Magazine! SUBSCRIBE NOW! (more…)
- 1Step 1 of 9
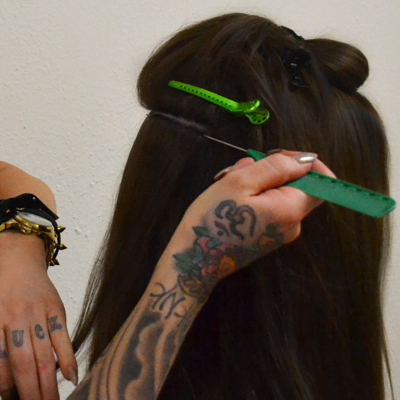 Step 1: Begin by taking a section of hair the same width and density as the extension.
 - 2Step 2 of 9
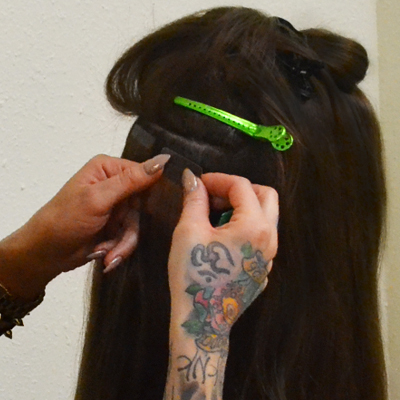 Step 2: Place the first extension facing up, about 1/8-inch below the section, roll the hair over the adhesive and place the second extension with the adhesive facing down on top of the first. Contine this, row by row, to apply a full head for length & volume (roughly 30 complete extensions).
 - 3Step 3 of 9
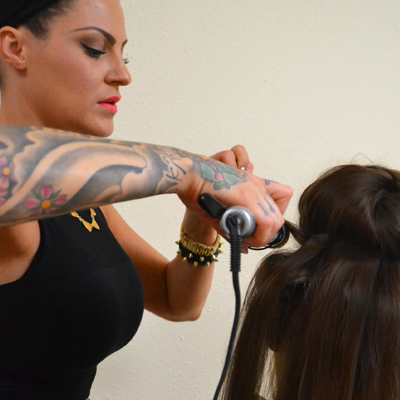 Step 3: To begin styling, section hair into a t-part. Start at the bottom of the nape, taking horizontal sections. Using a curling iron, place the iron at the root and wrap hair around the rod, setting each section as a barrel roll. Alternate each row with curls facing upwards and then downwards on the next row to achieve more volume.
 - 4Step 4 of 9
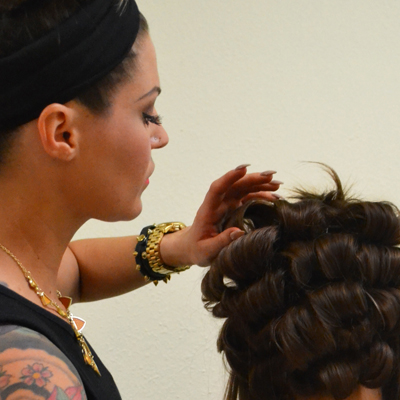 Step 4: When you reach the sides, make sure your curls are curled away from the face, and continue to alternate making the curls face upwards and downwards.
 - 5Step 5 of 9
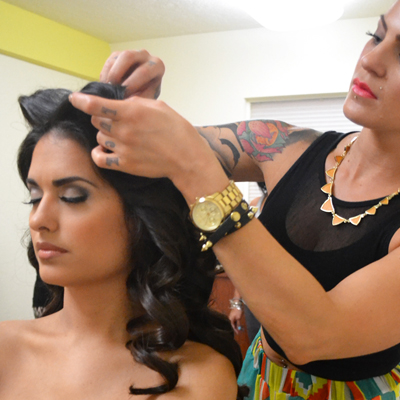
 Step 5: Let the set cool down while applying makeup to achieve maximum curl; roughly 20-30 minutes.
 - 6Step 6 of 9
 Step 6: After cooling, remove curls starting from the nape area and moving on to the crown and front.
 - 7Step 7 of 9
 Step 7: Spray each section using Schwarzkopf Osis Elastic Hairspray to get a flexible, yet durable hold.
 - 8Step 8 of 9
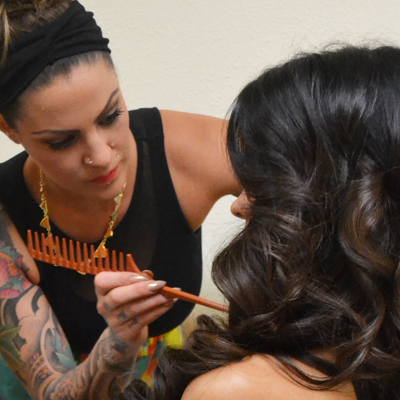 Step 8: Now that all the curls have been let down, use a wide-tooth tail comb to separate the curls.
 - 9Step 9 of 9


