- 1Step 1 of 14
- 2Step 2 of 14
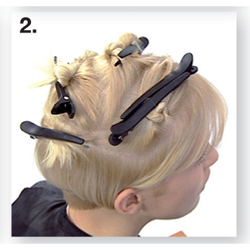
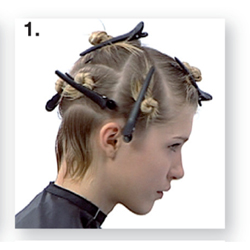 Section a triangle-shaped fringe from each recession area extending to the highest point of the head and clip away. Divide the front from the back vertically from ear to ear. Using upward curving partings, section the nape from ear to ear around the head. Make a second curved parting approximately 1-2 inches parallel above.
 - 3Step 3 of 14
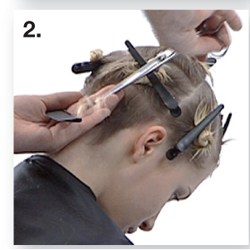 Start in the center back section, cut an upward curved guideline with the longest points behind the ears. Graduate the hair in this section by elevating very slightly to the guideline. Clean up the hairline.
 - 4Step 4 of 14
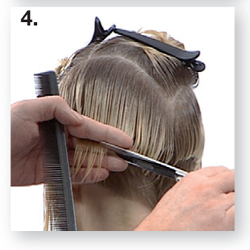
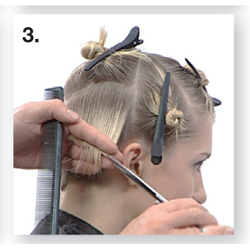 Cut the hair from the section above by directing to the guideline to create a soft bob line, elevating only slightly. Connect the sides allowing the curvature to become longer at the front.
 - 5Step 5 of 14
 Adjust all hair at the back and sides to the curved guideline shape. The elevation determines the amount of graduation.
 - 6Step 6 of 14
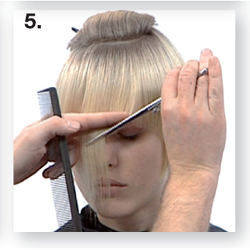 Blow-dry completely. Take fine sections and cut the fringe into an organic, asymmetric shape. Start at eye level and continue longer at the side. Do not connect the lone end with the side. Then start with a vertical section at the back to connect the graduation, work parallel to the head shape radiating around the head and pivoting from the top of the head. Then connect the length at the back with the fringe. Work from the shortest to the longest point at the front. Work all sections by radiating and pivoting from the top of the head and over-direct all sections to the short guideline maintaining length and asymmetrical shape.
 - 7Step 7 of 14

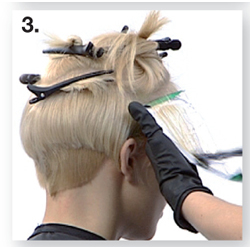
Section hair into three eyelets as shown. Color will be placed in horizontal slices within Eyelets 2 and 3 and in diagonal slices within Eyelet 1.
- 8Step 8 of 14
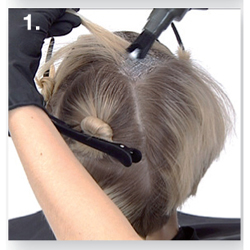
Using the classic cross parting technique, start at the back of the head and apply Formula A to all regrowth. Process for 45 minutes without heat; when 10-15 minutes remain, apply remaining color to the fine hair around the hairline. Rinse, shampoo and dry.
- 9Step 9 of 14
 Create the eyelet sections as shown in the sectioning diagrams.
 - 10Step 10 of 14
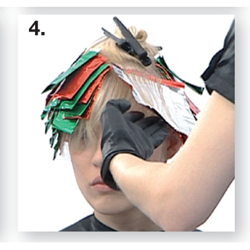
 Begin in Eyelet 1. Using the back-to-back foiling technique, slice slightly diagonally and apply alternating formulas B and C.
 - 11Step 11 of 14
 Repeat Step 3 in Eyelet 2.
 - 12Step 12 of 14
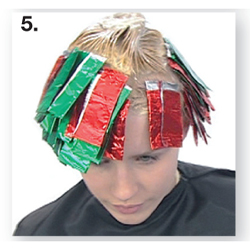 Continue as before in Eyelet 3. Place a connecting slice between Eyelet 1 and 3 and apply Formula B to this section. Apply Formula D to all remaining hair. Process 20 minutes without heat. Rinse, shampoo and condition.
 - 13Step 13 of 14
- 14Step 14 of 14
Color Formula A: Retouch
50ml 9% (30 vol) Topchic Lotion + 25 ml Topchic 11NColor Formula B: Pastel Mauve
30ml Colorance Lotion + 10ml Colorance 9PV + 5ml Colorance clearColor Formula C: Lowlights
40ml Colorance Intensive Lotion + 15ml Colorance 9BN + 5ml Colorance GG MixColor Formula D: Background Foundation
40ml Colorance Lotion + 20ml Colorance 10GN
Blonde
On Paper Exclusive: Goldwell's Electro-Magnetic
November 12, 2010·1 min read
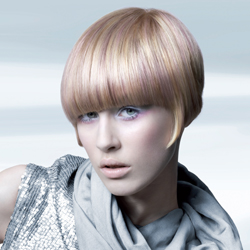
BTC On Paper Magazine Exclusive: Issue #1- Change -This sharply arced shape from Goldwell’s Trend Zoom Futeretec Virtualist collection is softened by the pastel mauve tones that shimmer throughout the pure blonde base. It strikes the perfect balance between sassy and sweet. Subscribe today! Tell us what you love about this look! (more…)
More to Read


