- 1Step 1 of 14
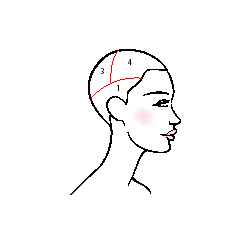
 On damp hair, create an off- center parting that begins at the front hairline, above the middle of left eyebrow and ends slightly below the occipital.
 - 2Step 2 of 14
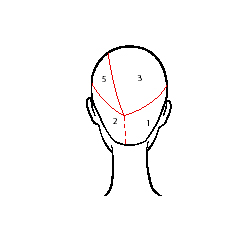 Create another parting starting at the left temporal region, following the curve of the head, and connecting to end point of the previously created parting. Repeat on the right side. The hair below the parting on the right side becomes section 1. On the left, hair below the parting becomes section 2.
 - 3Step 3 of 14
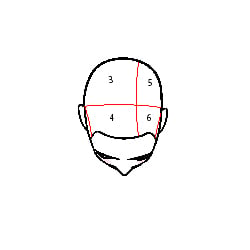
 From this parting, separate the front from the back by creating a parting which extends across the top of the head. The left front section will become section 6 and the back section becomes section 5. Isolate and secure both sections.
Isolate the hair in the front right which becomes section 4. Isolate remaining hair at the right back which is section 3. - 4Step 4 of 14
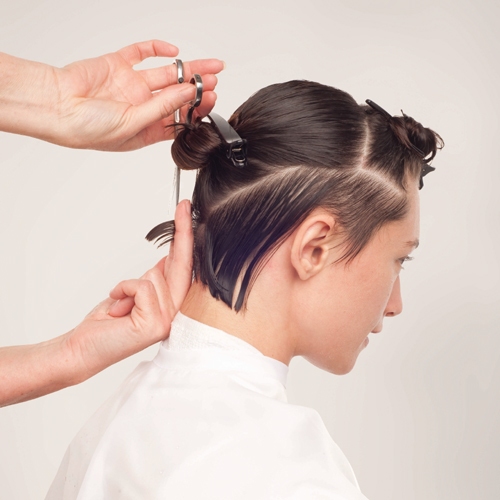
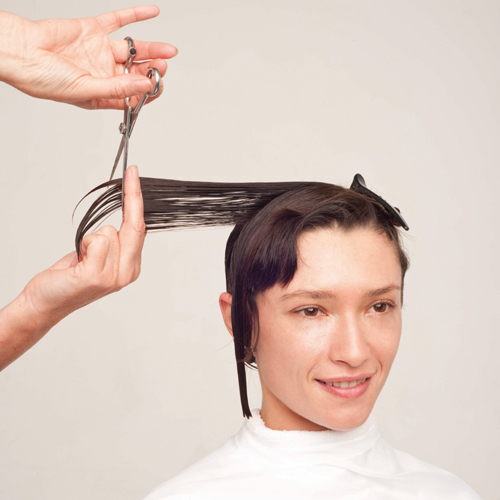
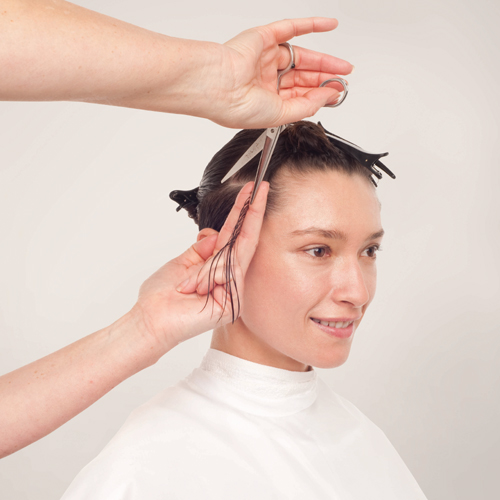 Begin in section 1. Create a 1" wide vertical sub-section at the right front hairline. Cut using a vertical finger position and one finger length from the head. Using this sub-section as a traveling guide, continue back until reaching the middle of the ear. Repeat on the left side, section 2.
 - 5Step 5 of 14
At the center of the nape section, create a 1" wide vertical sub-section.
Cut using a vertical finger position and one finger length. This will be your traveling guide. Continue working towards the face until reaching approximately ½" behind the right ear. Repeat on the left side, section 2.MASTERY POINT: There will be approximately a 1" wide section of hair left longer behind each ear.
- 6Step 6 of 14
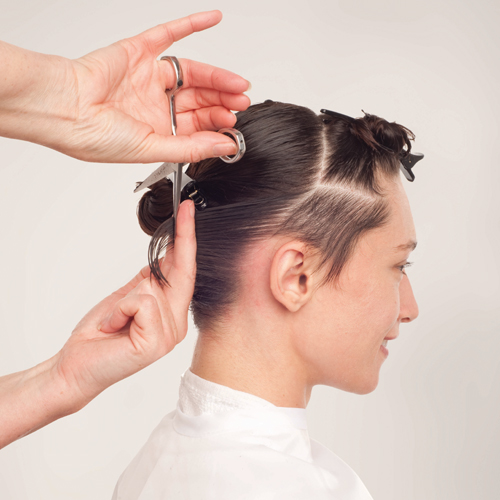 Over-direct the length remaining near the ear toward back right of the head. This will leave weight just behind the ear. Cut using a vertical finger position. Repeat in section 2 and direct toward back left.
 - 7Step 7 of 14
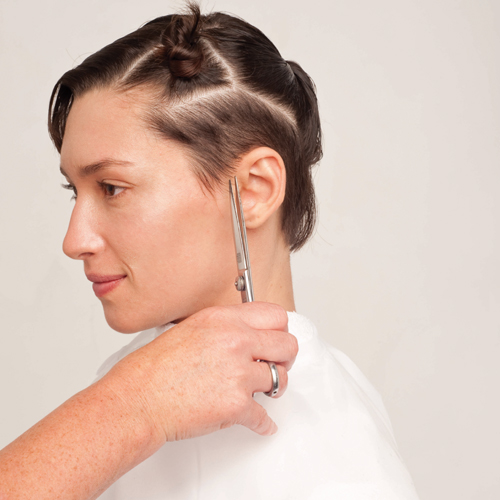
At the hairline, around the ear, use C.R.A.F.T Shallow Point Cutting Technique. Cut using the points of the scissors, working along the hairline.
MASTERY POINT: C.R.A.F.T. Shallow Point Cutting technique can be used to soften an edge and add detail.
- 8Step 8 of 14
Release sections 3 and 4. Sub-divide the sections horizontally and clip for control. Create a 1" wide vertical sub-section above the ear. Cut using 90 degree elevation and a vertical finger position. This sub-section becomes the stationary guide.
Continue taking vertical sub-sections in sections 3 and 4 and over-directing them to the stationary guide.
- 9Step 9 of 14
Release the previously secured top half of section 3 and 4. Repeat step 5, matching length to guide established in previous section and maintaining vertical finger position.
- 10Step 10 of 14
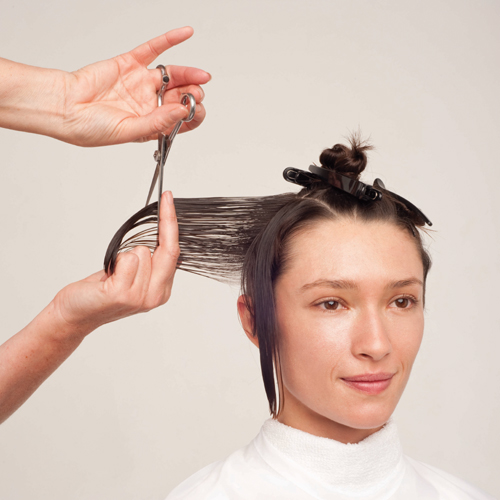
 Release section 5. Create a 1" vertical sub-section parallel to the back parting.
Comb hair directly out from the head. Cut to approximately 6", using a vertical finger position. Continue taking vertical subsections throughout section 5 and overdirecting to them to this stationary guide. - 11Step 11 of 14
 Release section 6. Over-direct the hair to the previously cut stationary guide. Cut using the same elevation and finger position as in step 7.
 - 12Step 12 of 14
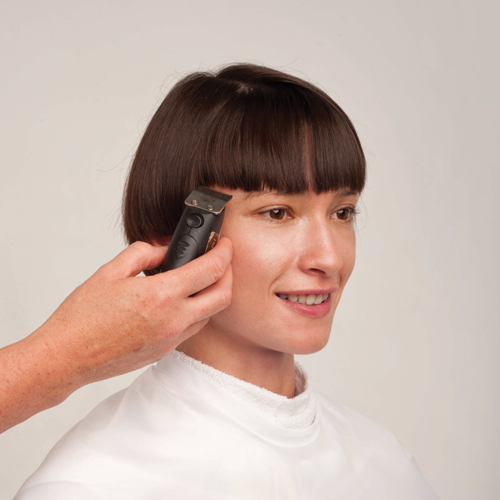 Blow-dry hair straight. In the fringe area, use an edger to create a slight arch parallel to the right eyebrow. Begin at the outside corner and work towards the center of the fringe area. Repeat on the left side.
 - 13Step 13 of 14
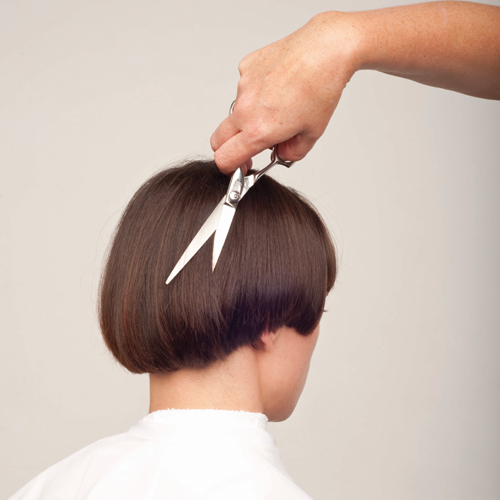
Using the C.R.A.F.T. Freehand Cutting Technique, work around the head cutting the hair with minimal tension.
MASTERY POINT: C.R.A.F.T. Freehand Cutting Technique creates movement and removes weight from the hair.
- 14Step 14 of 14
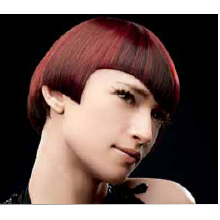 Get the Look:
• Cleanse and treat with NEW Total Results Color Care Shampoo and Color Care Conditioner.
• Towel dry to remove excess water.
• Apply a small amount of Design Pulse Mix in Shine to the hair. Blow-dry straight using a paddle brush.
• Use a flat iron for additional smoothing. Finish by using Vavoom ShapeMAKER Shaping Spray.
Haircuts
MEMBERS ONLY: Laser-Straight Asymmetrical Cut From Matrix
October 5, 2011·1 min read
Strong laser-cut lines are set off with soft asymmetry in this Matrix Red Edge cutting how-to. Get this look with proper sectioning and precise cutting techniques. Subscribe to behindthechair.com “On Paper” Magazine–5 issues only $29.95! (more…)
More to Read


