- 1Step 1 of 11
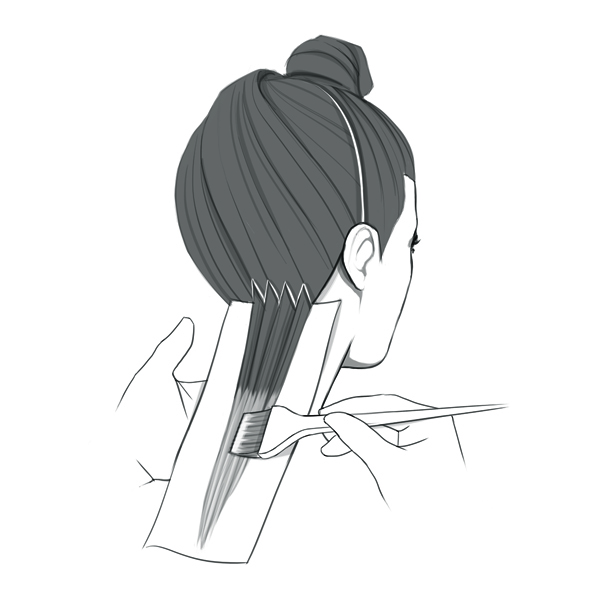
Starting in the back and working from the bottom up, take a horizontal slice and place on the foil. Then, using a side-brushing technique, apply Formula A approximately 2 inches away from the scalp area. With a sponge or dry brush, feather the formula upward to avoid any harsh lines. Repeat application method until entire head is complete. Process until desired lightness is achieved or up to 50 minutes. Rinse thoroughly, lightly cleanse and blow-dry.
- 2Step 2 of 11
Apply Formula B globally to tone. Let process up to 20 minutes, rinse thoroughly and dry. Then, to achieve the color melt effect, apply Formula C to the scalp area and down a few inches, and then alternate Formula B and D from the midlengths through the ends. Work around the head in a circular pattern.
Next, apply BOND Ultim8 Step 2 and let process for 10 minutes. Rinse thoroughly, cleanse and condition with Total Results High Amplify Shampoo and Conditioner.
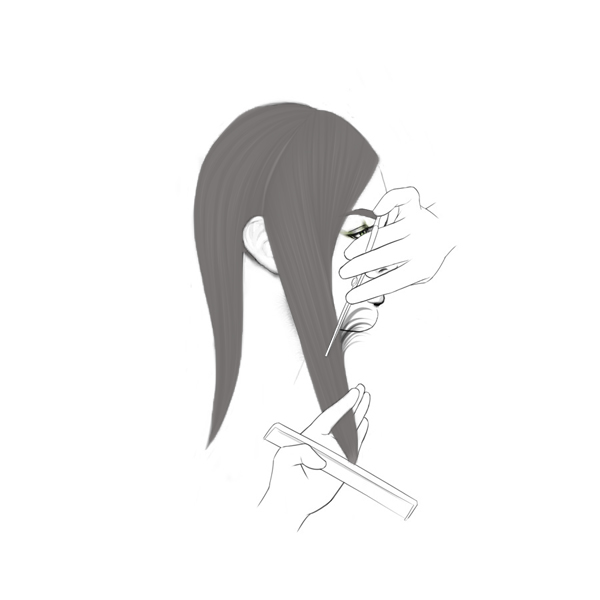
- 3Step 3 of 11
- 4Step 4 of 11
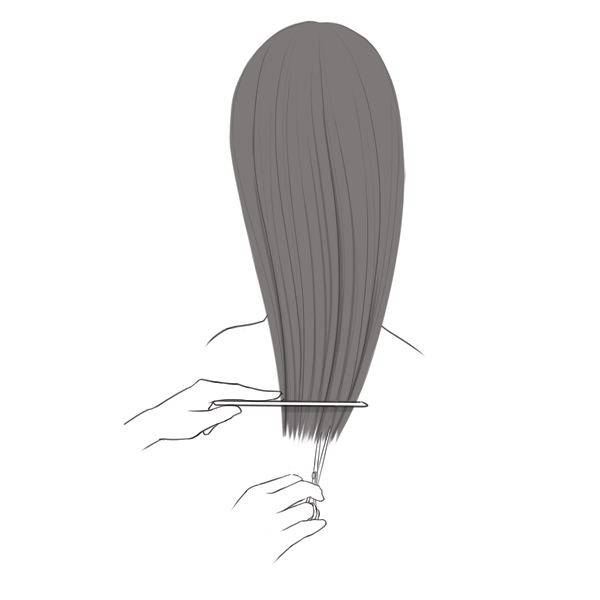
For the cut, comb the hair into its a natural fall and point-cut the perimeter.
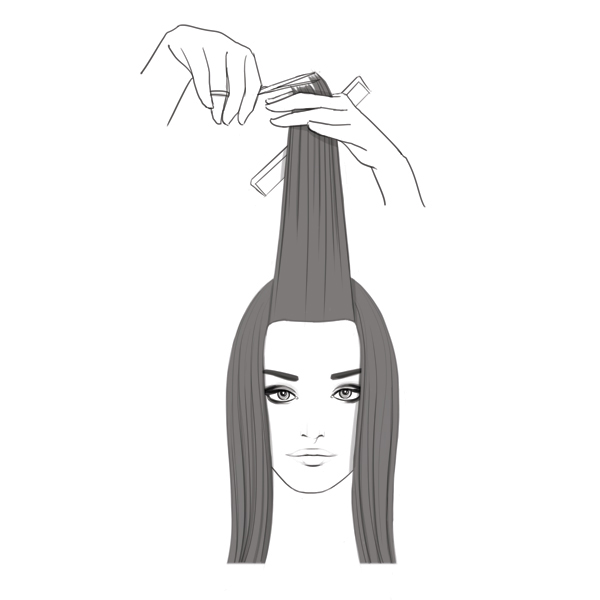
- 5Step 5 of 11
Separate the hair into three sections. Create an ear-to-ear radial parting and then a center profile part from the front hairline to the radial parting. Overdirect the front two sections slightly forward and slide-cut from the bottom of the chin to the perimeter.
- 6Step 6 of 11
Next, create a rectangular section at the top of the head along the parietal ridge and the crown. Establish the guideline for long layers.
- 7Step 7 of 11
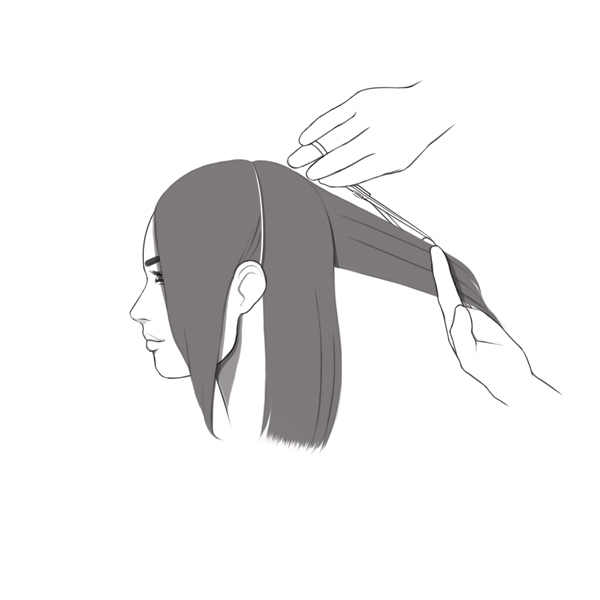
Connect the top layer to the perimeter at a slight angle to soften the look. Then, holding the hair at a 90-degree angle from the head, randomly slide-cut pieces from the midlengths to the ends to create texture.
- 8Step 8 of 11
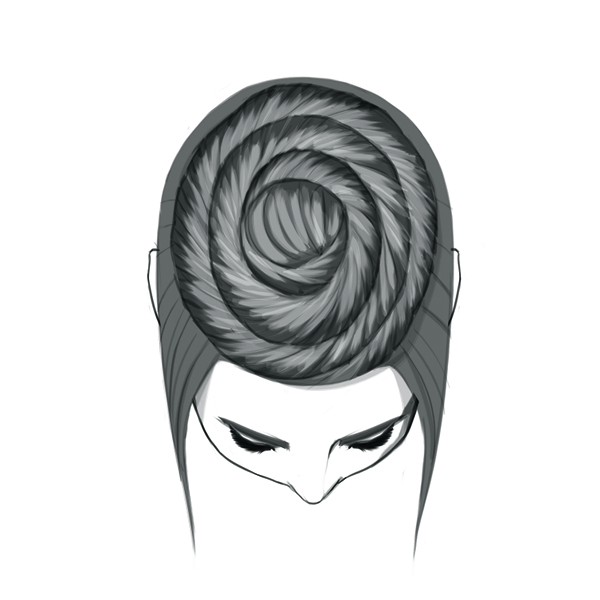
To style, apply Style Link Volume Builder to damp hair and blow-dry. Create 4 (or more) equal sections depending on density and secure a ponytail at the top center of each of the sections, leaving the top section isolated.
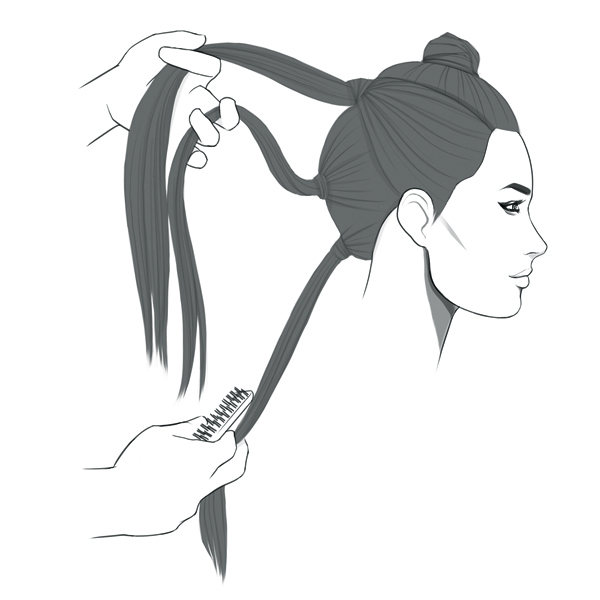
- 9Step 9 of 11
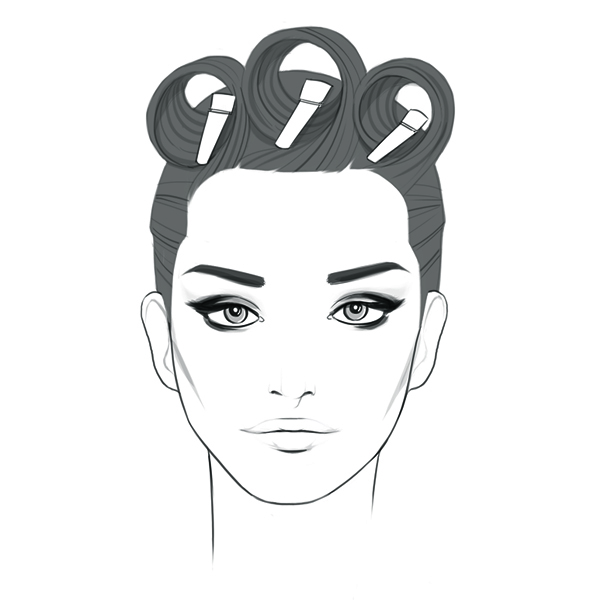
Starting at the lowest ponytail, loop the hair upward and pin underneath the ponytail above. Continue up the head until reaching the top section. Release the top section and create three on-base barrel curls and secure. Mist Style Link Rough Me Up onto hair.
- 10Step 10 of 11
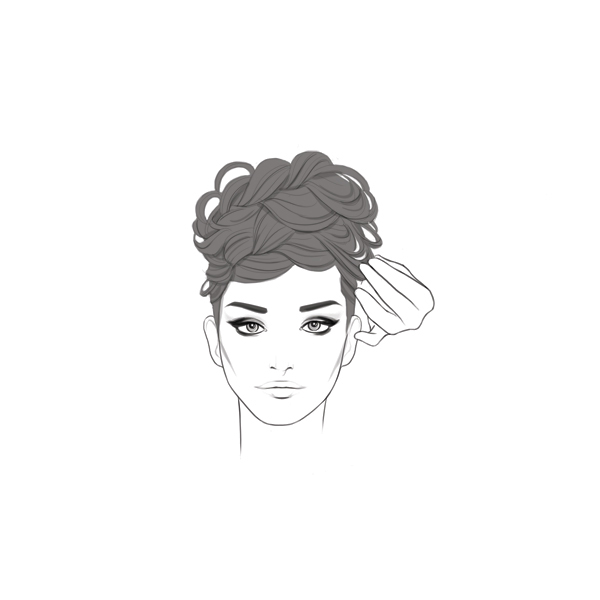
Separate barrel curls and loosely deconstruct. Finish with Style Link Style Fixer.
- 11Step 11 of 11
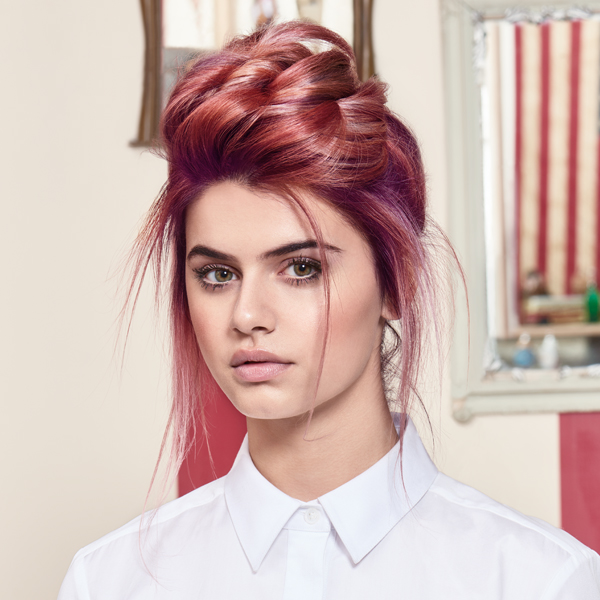
Finished Look
Color Melt
Mauve Melt
July 17, 2017·1 min read
Color melting is the new it technique to master—and whether you’re blending natural color or fashion colors, the application, cut and style all play a major role in creating the perfect end result. Get the complete how-to for this stunning mauve melt, from the color formulas and technique to the final details of the cut and style. More About The Mauve Melt Recently, Matrix introduced a new VIRTUAL way to learn, and their first 360-degree experience featured their arcade-inspired color collection. This time around, their newest color collection is a little bit…sweeter. In the video here, you can use your finger or mouse to (more…)
More to Read


