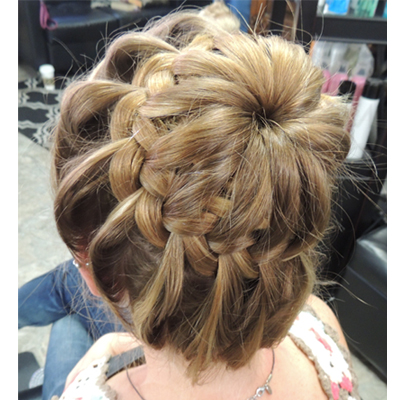
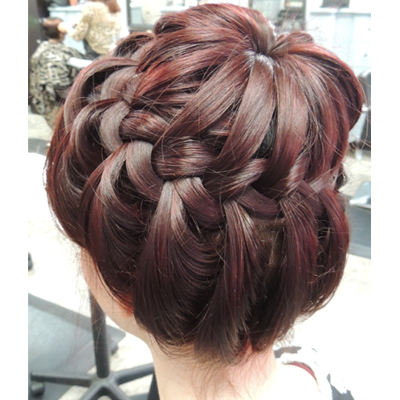
This laced, top knot braid is perfect for weddings, proms, an evening out, or even a hip music fest. Inspired by the Boho trend, stylist Missy Craig from Diablo Beauty Salon in Danville, CA, came up with this elegant looking plait. “Top knots and braids are everywhere right now, so these looks together just make sense,” says Missy. Completely versatile, this braid looks good dressed up or down. We predict this laced top knot is sure to quickly become one of your most-requested looks!Check out more incredible work on BTC’s Insta! (more…)
- 1Step 1 of 10
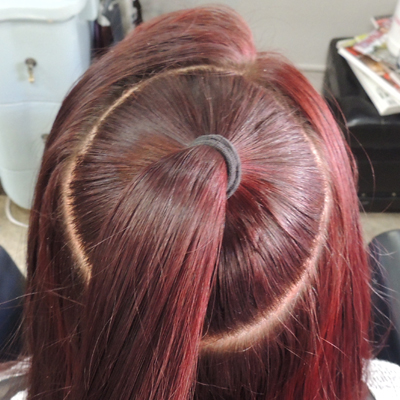 Take a circular section of hair at the top of the head and secure it with a ponytail. The hair around the perimeter should be left out.
 - 2Step 2 of 10
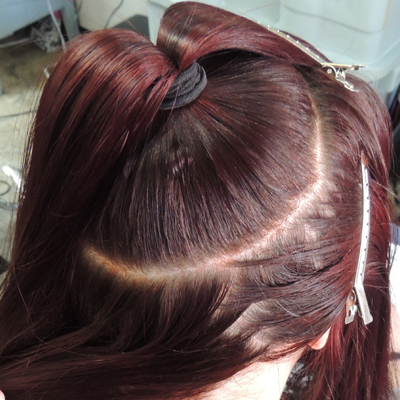 Section the ponytail into two halves, clipping the top half toward the front of the head. Behind the right ear, take a diagonal parting and section toward the face.
 - 3Step 3 of 10
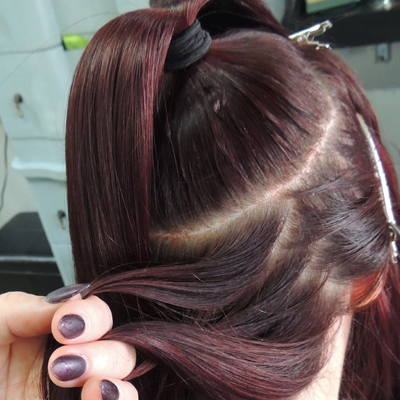 Take your first section and split it into three.
 - 4Step 4 of 10
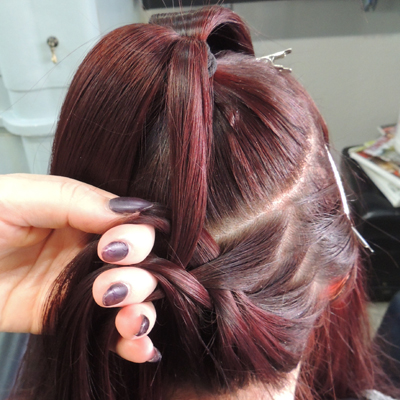 Begin a three strand braid. Every time the left crosses over, grab hair from the ponytail and add it to the section. Every time the right crosses over, grab hair from the hairline and add it to the section. *Note: The ponytail should be distributed evenly throughout the entire braid...don't grab too much!
 - 5Step 5 of 10
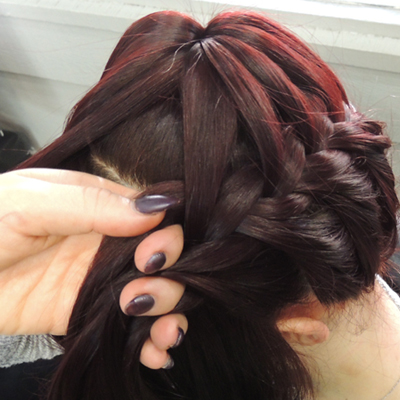 Continue braiding around the head. Once you reach the left ear, start working with the top section of the ponytail.
 - 6Step 6 of 10
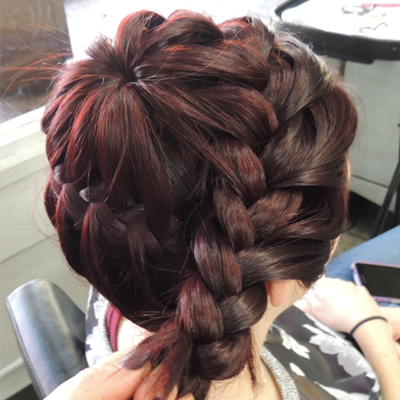 Once your braid has gone all the way around, continue to braid out a few more inches (depending on the length of your clients hair). Secure with a hair elastic so loose ends don't get crazy.
 - 7Step 7 of 10
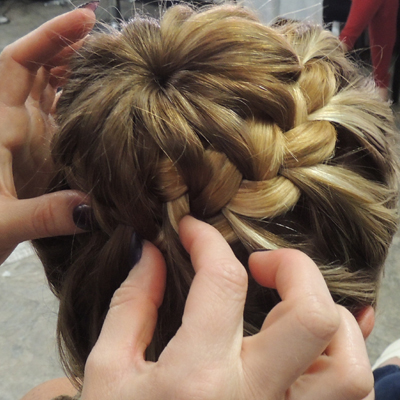
 Tuck the braid into the top knot and wrap it around the base of the ponytail inside. Secure loose layers and loose ends with bobby pins, and adjust sections to achieve symmetry.
 - 8Step 8 of 10
- 9Step 9 of 10
- 10Step 10 of 10