Learn step-by-step how to create one of the stunning styles in Joico’s Primaries Collection.THEN TRY THE COLOR TO COMPLEMENT THIS CUT. AND CHECK OUT ALL THE FULL COLLECTION! For more information please log on to: www.joico.com (more…)
- 1Step 1 of 14
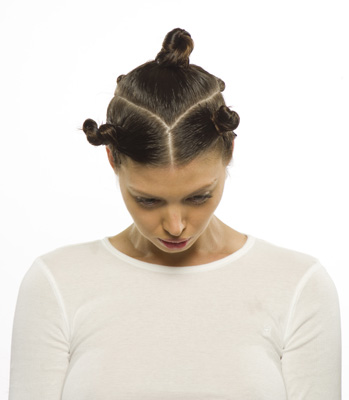 View of sectioning pattern.
 - 2Step 2 of 14
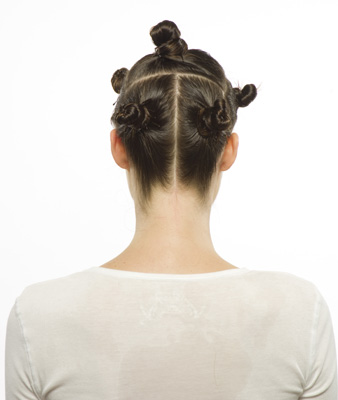 View of sectioning pattern.
 - 3Step 3 of 14
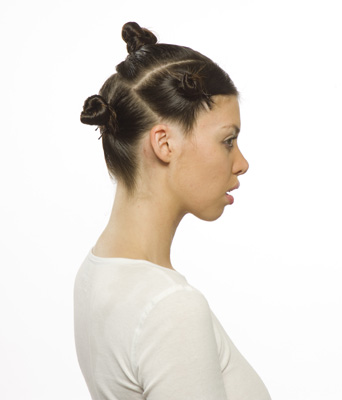 View of sectioning pattern.
 - 4Step 4 of 14
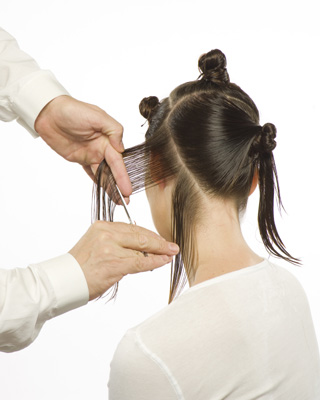
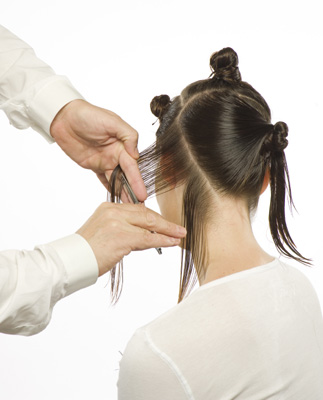
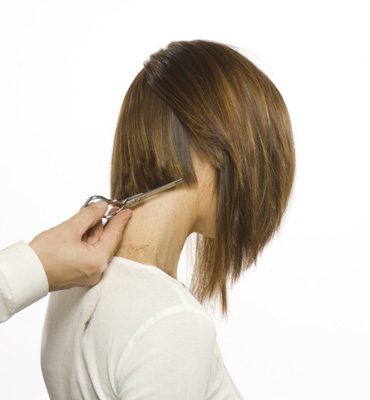
Start first guide behind ear/ nape area, take a ¼-inch diagonal parting, elevate and cut a diagonal line.
- 5Step 5 of 14
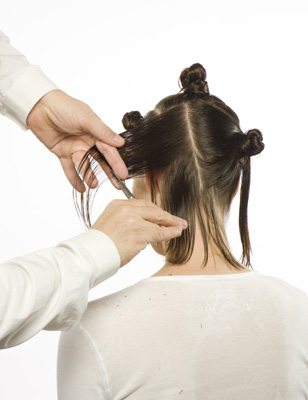
 Continue as before, over directing each parting to the first, and elavating each parting to create a graduated outline.
 - 6Step 6 of 14
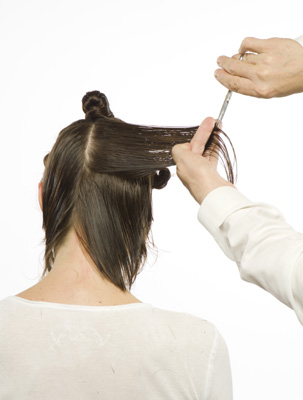
 View of last section over directed to first. Amount and degree of over direction/elevation may vary based on face shape, hairline and overall look.
 - 7Step 7 of 14
 Continue on opposite side. Note: Lengths can vary from side-to-side; symmetrical and asymmetrical.
 - 8Step 8 of 14
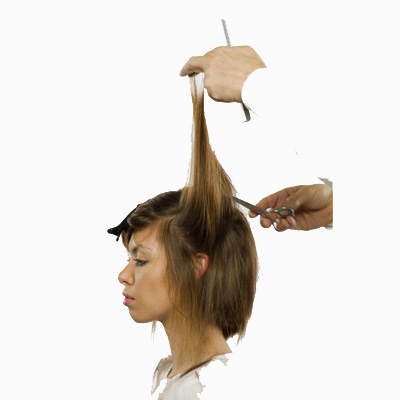
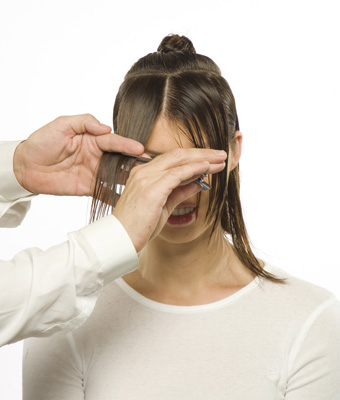 Proceed to fringe area and cut a heavy, square or asymmetrical, pointed or rounded fringe to create the appearance of an oval face shape. Blow-dry hair with a Denman brush.
 - 9Step 9 of 14
 Refine outline by pointing/chipping into hair. Always work with and compliment the natural hairline growth pattern.
 - 10Step 10 of 14
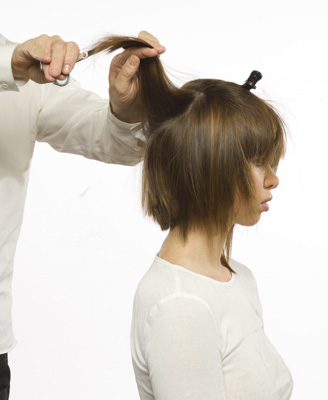
 Note: Side areas do not connect in to fringe and back areas. Take vertical partings and cut into hair liberally, creating a light, layered internal structure and translucent, ragged perimeter.
 - 11Step 11 of 14
 Repeat process on opposite side. Note: Sides are not symmetrical, creating an off-balanced appearance.
 - 12Step 12 of 14
- 13Step 13 of 14

- 14Step 14 of 14