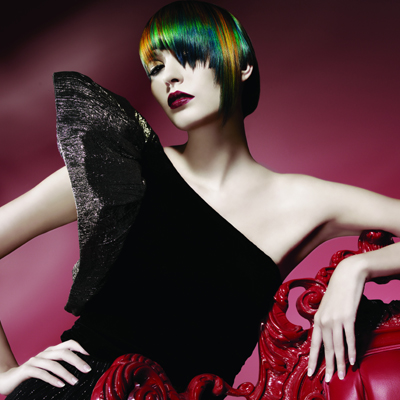
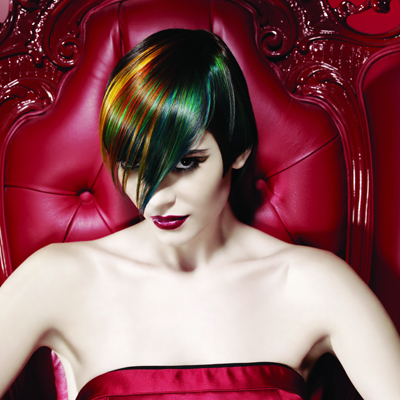
For the cuts in Joico’s Visionare Collection, Damien Carney looked beyond the obvious – the hairstyles of the 1920s and 30s – and finds inspiration in the timelessly modern line of Art Deco architecture. Carney used a pivotal application around the natural head shape to create a strong core surrounded by varying asymmetrical planes of roundness and flatness, which mimic the straight lines and curves of Art Deco architecture. Love the color? Try the Step-by-Step! Keyword: educationjoico (more…)
- 1Step 1 of 13
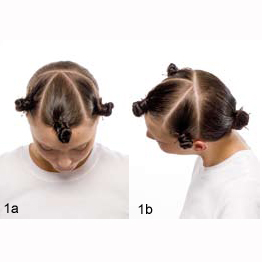 View of sectioning pattern. This may vary based on density, hair texture and overall desired result.
 - 2Step 2 of 13
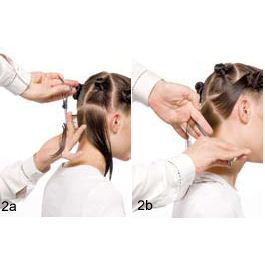 2a. Take a ¼-inch vertical parting, elevate approximate 45 degrees (angle will vary based on head shape, density, hair texture) and cut to desired length.
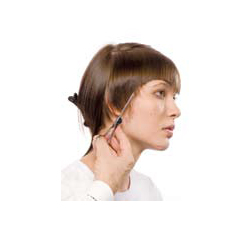
2b. Pivot out toward the back of the ear. Guideline is a traveling guide. - 3Step 3 of 13
 3a. Cross-check horizontally as shown, or diagonally.
3b. Go back to first guideline and repeat the process on opposite side. - 4Step 4 of 13
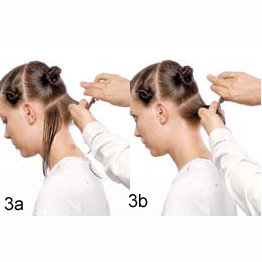
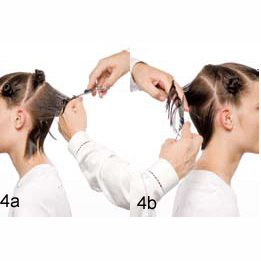 4a. Connect hair above the occipital bone area. Continue to follow established guideline. Take diagonal partings and elevate approximately 45 degrees. Establish a smooth buildup of graduation.
4b. View of last remaining parting, lift and elevate to ensure a perfect balance of graduation, which creates a strong, compact head shape. - 5Step 5 of 13

5a. Take a diagonal parting from the top of head (crown area working toward the temple area) and cut to desired length.
5b. Proceed to take parallel partings over-directed to first guide to maintain length, internally and externally. Over-direction will vary based on overall desired end result.
- 6Step 6 of 13
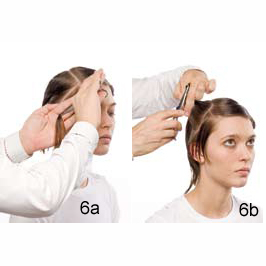 6a. Work through side area. Take a diagonal parting and cut to desired length.
6b. Continue to work toward the back of the ear. Optional vertical partings will create a closer, flatter head shape, while diagonal partings will create a slightly fuller, rounder, softer shape. - 7Step 7 of 13
 7. Blow-dry hair using a Denman brush, wrapping hair back and forth around the natural head shape. Do not force dry the hair into an unnatural state; the hair should be cut to lengths that are easy to blow-dry and maintain. Refine perimeter to create an outline that complements the natural hairline growth pattern.
 - 8Step 8 of 13
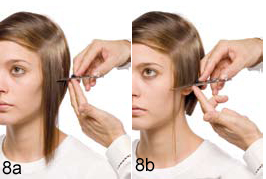 8a. Establish heavy area and cut to desired length.
8b. Point-cut to achieve a heavy line with a soft finish to the edges. - 9Step 9 of 13
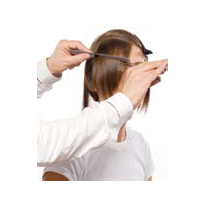 9. Establish fringe. Shapes and length can vary depending on overall desired look/finish.
 - 10Step 10 of 13
 10. Continue to refine outline on opposite side. Curve or arch shapes produce the illusion of softness. Stronger angular lines appear stronger and graphic -like in appearance.
 - 11Step 11 of 13
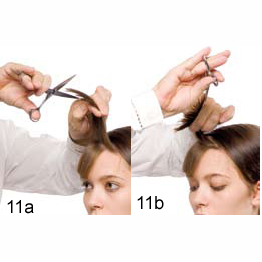 11a./11b. Always elevate, chip and point to ensure balance and fluidity of haircut. Hair is now ready for color placement. Always re-evaluate hair cut after color to ensure cut and color are perfectly balanced.
 - 12Step 12 of 13
- 13Step 13 of 13