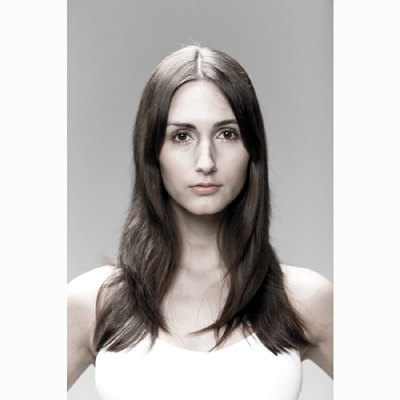
Create a timeless shape with a strong, heavy square line with this sleek how-to. The sole focus is the outline of the haircut, as no internal cutting is used. This is ideal for straight texture with body, and clients who have even growth patterns with a good crown area. This look is suitable for a multitude of face shapes, and a square heavy fringe is optional. Learn the J-Color Diagonal, Vertical, Horizontal How-To from Vero K-PAK International Creative Director Sue Pemberton. Keyword: educationjoico (more…)
- 1Step 1 of 28
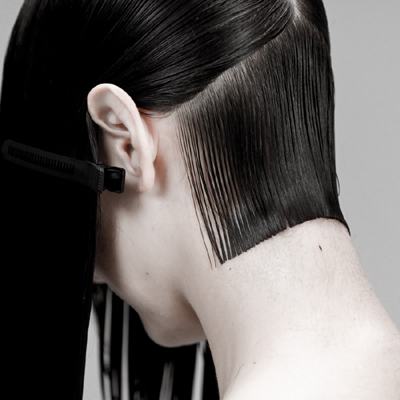
 Start by determining a suitable parting based on the natural hair texture and density of the wearer.
 - 2Step 2 of 28
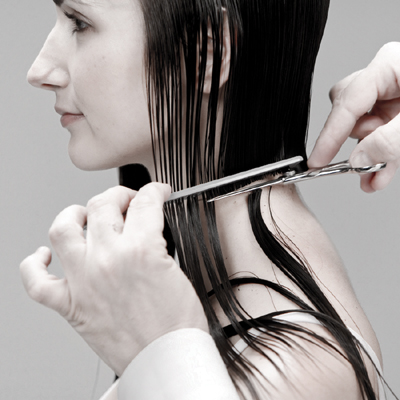
 Take a section from the crown to the nape area, then divide the hair into diagonal subsections.
 - 3Step 3 of 28
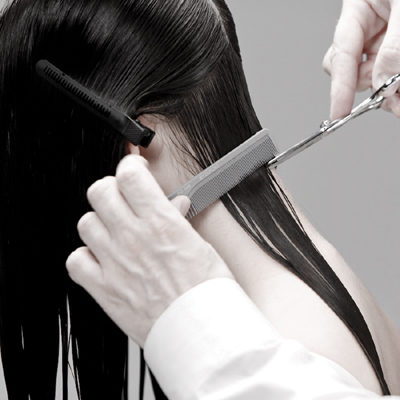
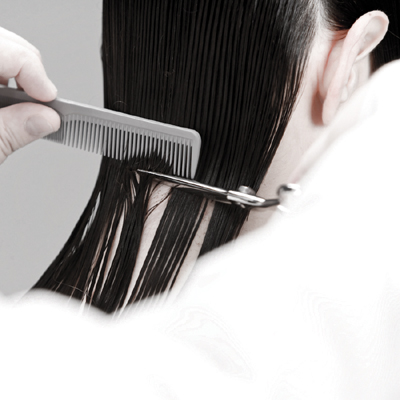
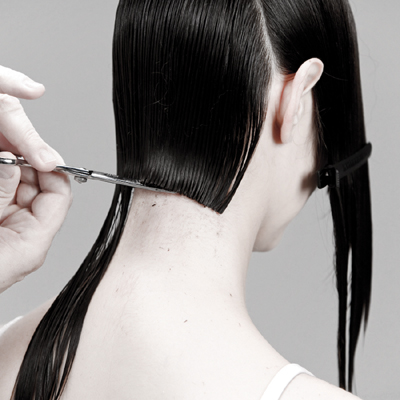
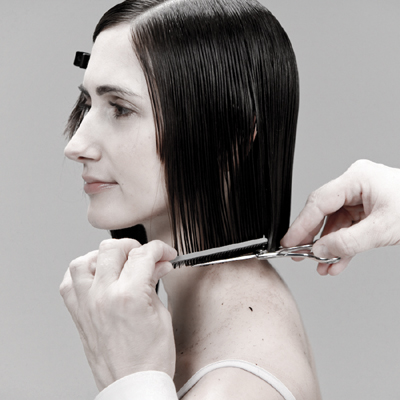
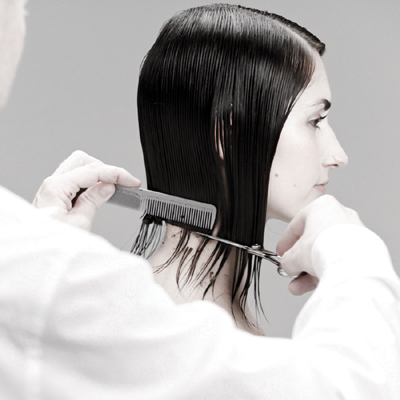
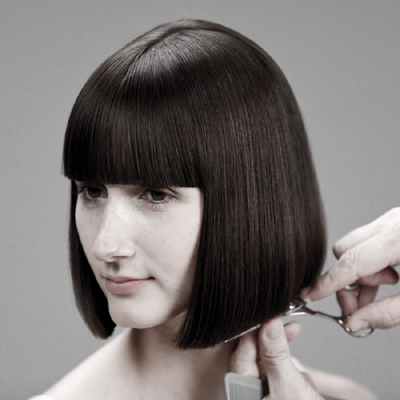
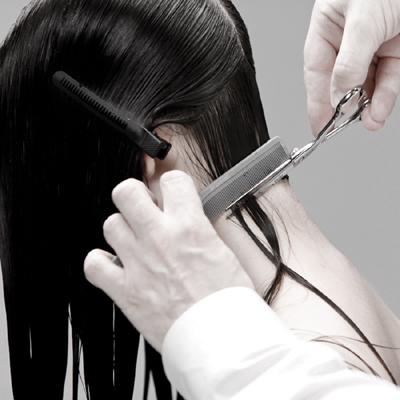 Cut the hair closely against the skin in a very neat, controlled manner. For optimal control, work from the center nape area out toward the length. Work on the left and right sides simultaneously, or complete one side and then the other.
 - 4Step 4 of 28
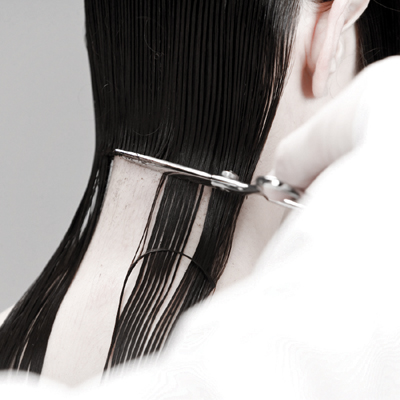
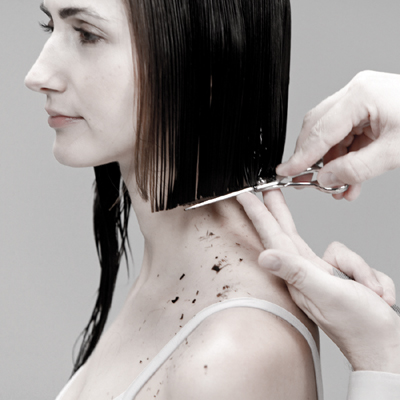
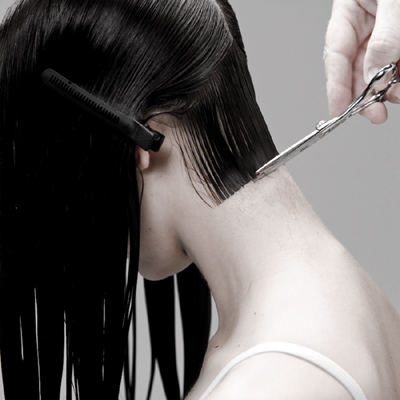 Refine line without tension.
 - 5Step 5 of 28
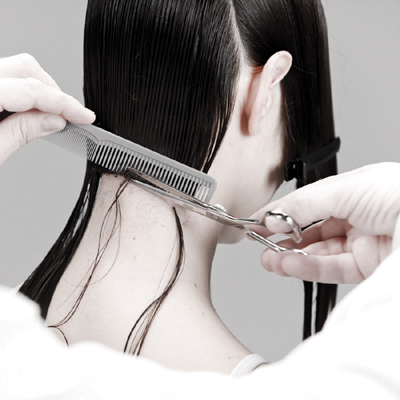
 View of the square line.
 - 6Step 6 of 28
 Continue to work up toward the crown area, taking slightly diagonal partings.
 - 7Step 7 of 28
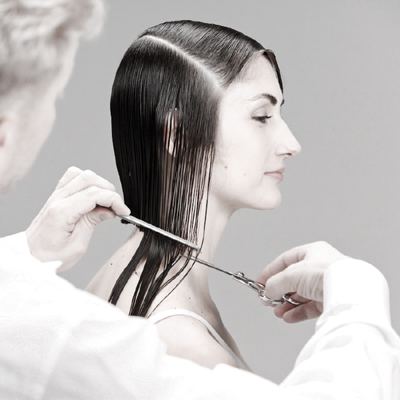
 Comb the hair down onto the original guide. Control the line by cutting through the comb, or using the fingers to control the hair.
 - 8Step 8 of 28
 Comb the hair down onto the original guide. Control the line by cutting through the comb, or using the fingers to control the hair.
 - 9Step 9 of 28
 Comb the hair down onto the original guide. Control the line by cutting through the comb, or using the fingers to control the hair.
 - 10Step 10 of 28
 Comb the hair down onto the original guide. Control the line by cutting through the comb, or using the fingers to control the hair.
 - 11Step 11 of 28
 View of last partings. Be aware of the crown area lifting; this can be connected at a later stage. Check the hair for balance.
 - 12Step 12 of 28
 View of last partings. Be aware of the crown area lifting; this can be connected at a later stage. Check the hair for balance.
 - 13Step 13 of 28
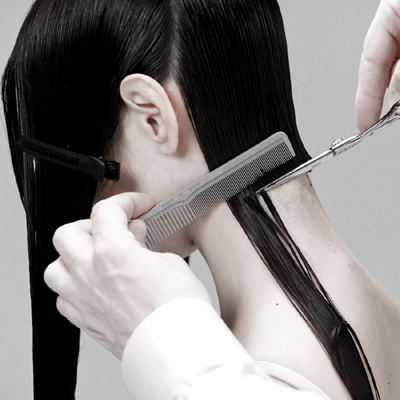
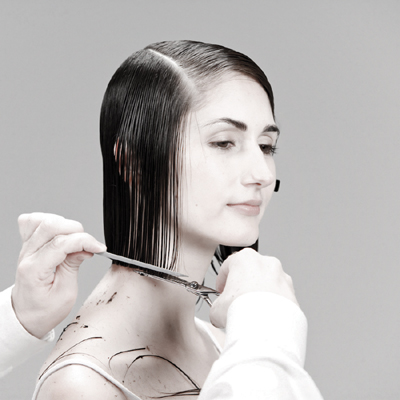
 Continue working through the side area just below the crown. Take diagonal partings through the side to extend the line from the back to the side area. Cut the hair through the comb and allow it to fall naturally with very little tension. This line can be refined through the fingers, or later after the hair has been dried.
Tip: Avoid applying excessive tension through the fingers, as this can create an undesirable gap in the line. - 14Step 14 of 28
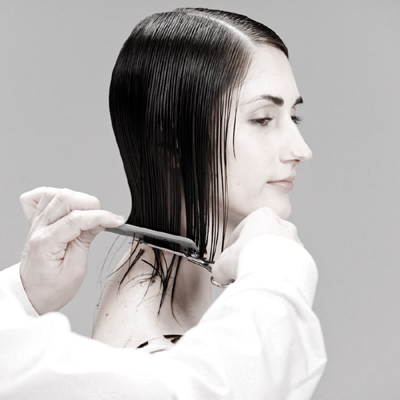
 Allow the hair to fall naturally and refine the line. This line can be refined through the fingers, or later after the hair is dried.
Tip: Note that while working up toward the last parting of hair, the position of the head should be in a natural, upright position. - 15Step 15 of 28
 At this point, it is important to keep the hair evenly combed and consistent through the front area. Use a widetooth comb to minimize tension, secure the hair, and then continue the line.
 - 16Step 16 of 28
 Proceed to the opposite side and repeat the process. Ensure that both sides are perfectly balanced by checking through the fingers and visually assessing the shape.
 - 17Step 17 of 28
 Be careful to not apply excessive tension around the protrusion of the ear.
 - 18Step 18 of 28
 Be careful to not apply excessive tension around the protrusion of the ear.
 - 19Step 19 of 28
 Be careful to not apply excessive tension around the protrusion of the ear.
 - 20Step 20 of 28
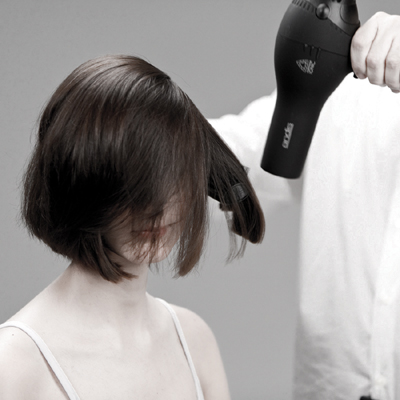
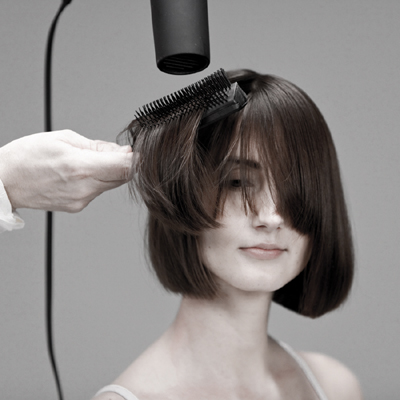 Blow-dry the hair with a Denman brush using the wrapping technique. Brush hair forward and back using the round surface of the head to smooth the hair.
 - 21Step 21 of 28
 Blow-dry the hair with a Denman brush using the wrapping technique. Brush hair forward and back using the round surface of the head to smooth the hair.
 - 22Step 22 of 28
 Blow-dry the hair with a Denman brush using the wrapping technique. Brush hair forward and back using the round surface of the head to smooth the hair.
 - 23Step 23 of 28
 Blow-dry the hair with a Denman brush using the wrapping technique. Brush hair forward and back using the round surface of the head to smooth the hair.
 - 24Step 24 of 28
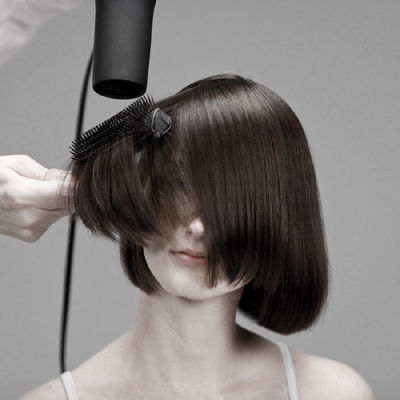
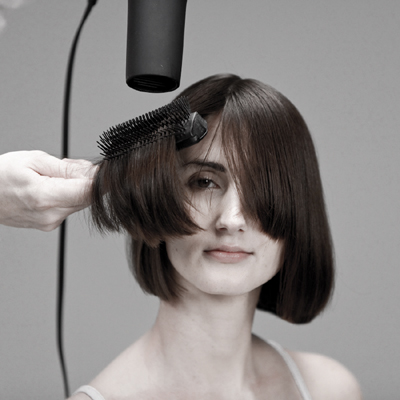
 Ensure that the hairline is smooth prior to cutting the fringe.
 - 25Step 25 of 28
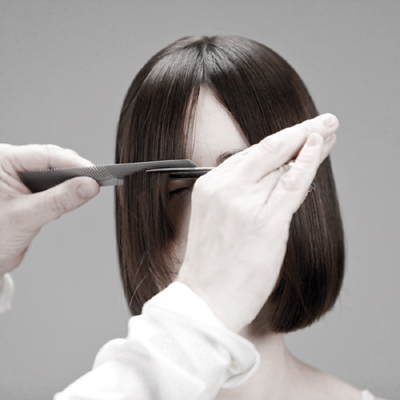
 Establish the center point of fringe, section the hair out (as shown), then cut toward the temple.
 - 26Step 26 of 28
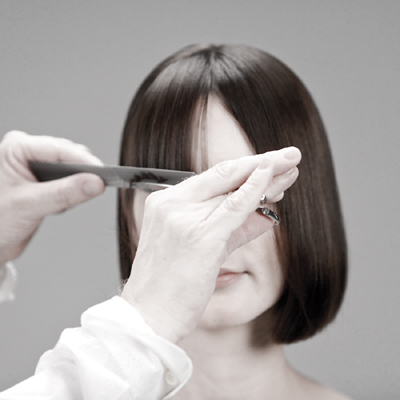
 Cut the hair through the comb and allow it to fall naturally.
 - 27Step 27 of 28
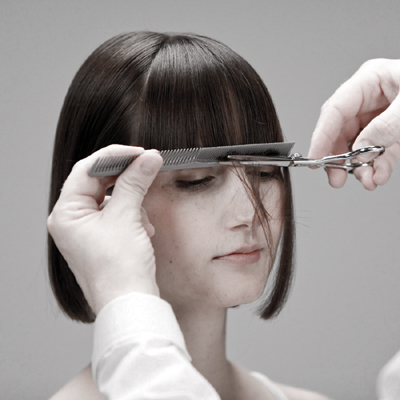
Optional: Refine the line by cutting the hair through the fingers.
Tip: There are many options for cutting the fringe area: The hair can be elevated to create a soft yet solid line or it can be combed flat to the head for the heaviest line.
- 28Step 28 of 28


