- 1Step 1 of 11
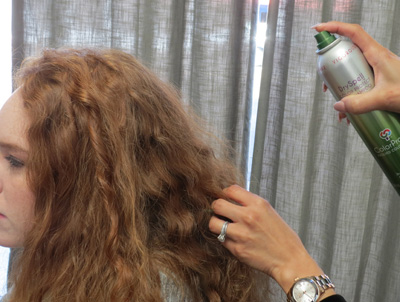
Mist dry hair with ColorProof DrySpell Color Protect Dry Shampoo to produce texture and “grip” that will prevent the braid from slipping.
- 2Step 2 of 11
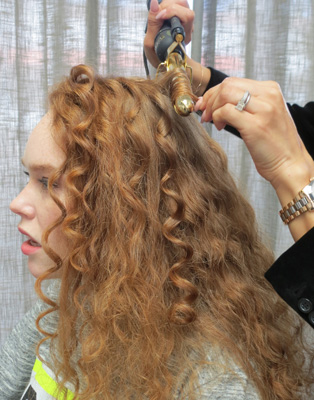
Wind random strands around a closed curling iron or curling wand for polish and control. Twist each section, wrap the twisted hair around the barrel, hold and release.
- 3Step 3 of 11
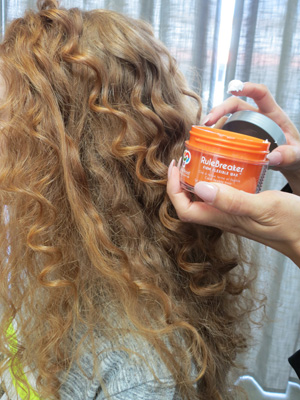
Gently work ColorProof RuleBreaker Firm Flexible Wax through strands for definition and control.
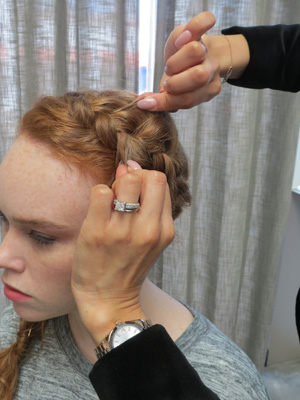
- 4Step 4 of 11
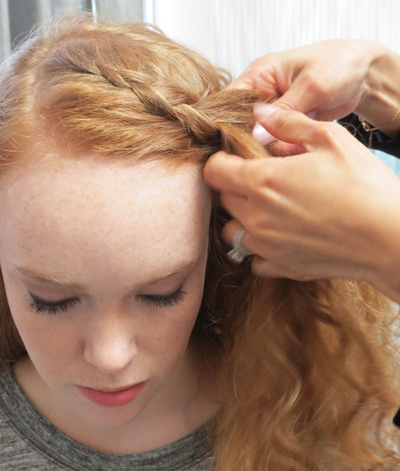
Create a side part. With the start point at the parting, begin a Dutch (inside out) braid, incorporating hair from the hairline and from the other side of the section.
- 5Step 5 of 11
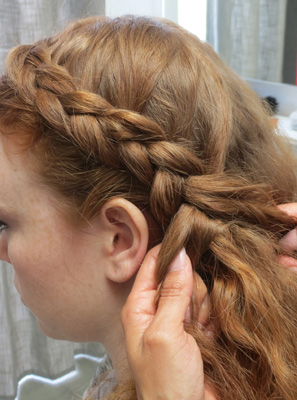
Continue braiding, curving the braid around the head, behind the ear.
- 6Step 6 of 11
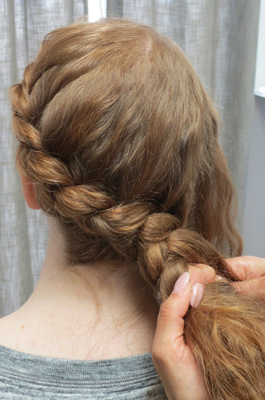
At the nape, begin incorporating all of the hair into the braid.
- 7Step 7 of 11
Complete the braid, secure with elastic and wrap a small section of hair from the tail around elastic to conceal the band.
- 8Step 8 of 11
Insert pins into the braid at intervals along the head, to secure it and prevent bulging.
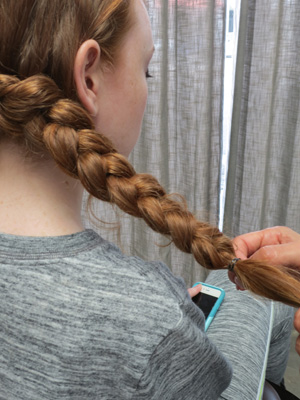
- 9Step 9 of 11
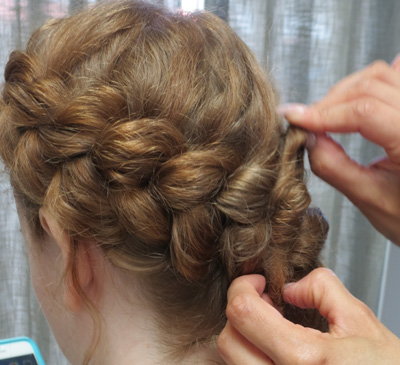
“Pancake” the braid by gently stretching the sides of each loop.
- 10Step 10 of 11
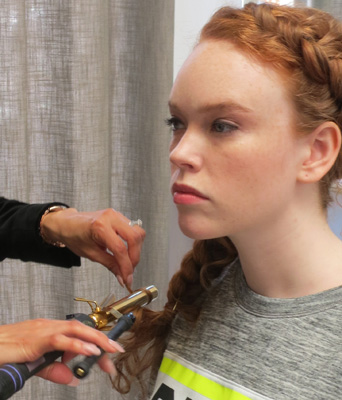
Curl the ends with a curling iron and mist once more with DrySpell, followed by WickedGood Weightless Shine Spray.
- 11Step 11 of 11

Finished look.
Styling
Speedy Bridal Side Braid
March 20, 2016·1 min read
One bride, six bridesmaids, two moms and three flower girls. Two of the bridesmaids have more hair than Lady Godiva. And oh yeah, the wedding’s in two hours. Ok, deep breath. When we dropped in to get the scoop at ColorProof’s recent shoot for their new collection, we discovered ColorProof Platform Artist Ruth Tedmori creating this romantic side braid in NO TIME FLAT! Wedding crunch time, solved! Here’s Ruth’s how-to. (more…)
More to Read


