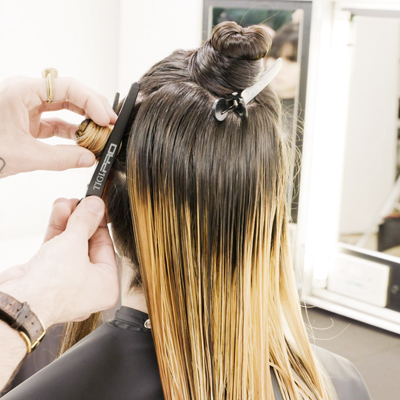
- 1Step 1 of 9

To achieve a lighter canvas, apply Formula A 3 inches away from the hairline through the midlengths and ends.
- 2Step 2 of 9
Begin by taking an irregular shape behind the fringe area, finishing at the top crown.
- 3Step 3 of 9
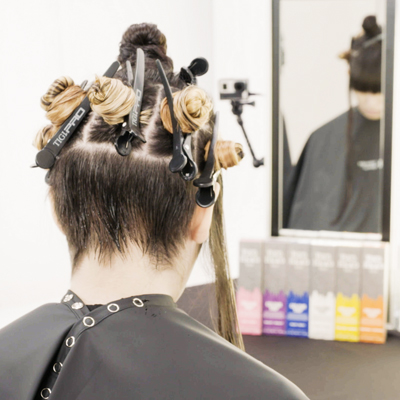
To continue, create five sections underneath the top crown, giving you a total of six sections. Leave the front hairline, including the fringe, unclipped.
- 4Step 4 of 9
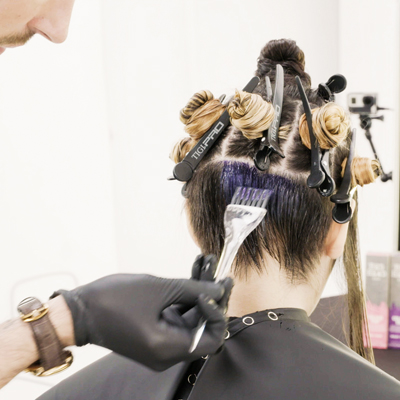
Begin at the nape area and apply Formula B to the entire undercut section.
- 5Step 5 of 9
Progressing onto the side, apply Formula B to the new growth, and use a freehand blending technique to apply Formula C to the lengths and ends.
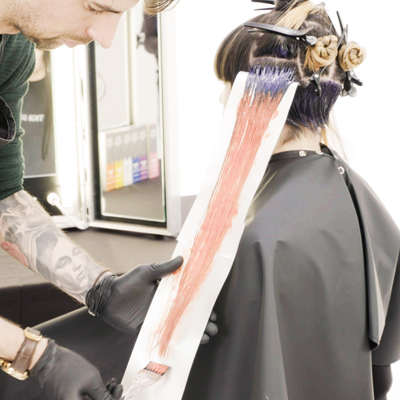
- 6Step 6 of 9
Continue working in the same way through the remaining sections, applying Formula B to the new growth, then alternating between Formulas D, E and F, then D again.
- 7Step 7 of 9
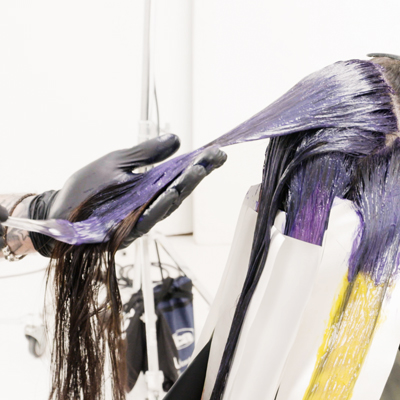
Proceed onto the top section and the front hairline. Apply Formula B from the new growth through the midlengths and ends. Continue until the section is complete.
- 8Step 8 of 9
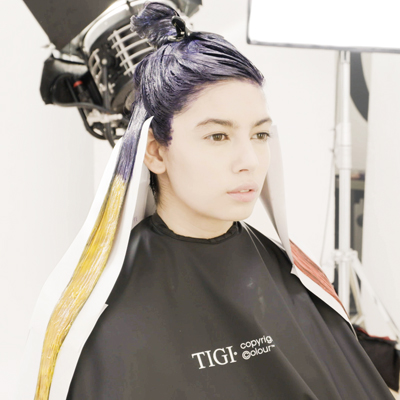
Process for up to 30 minutes. Emulsify, rinse and remove using the Bed Head Colour Goddess range.
- 9Step 9 of 9

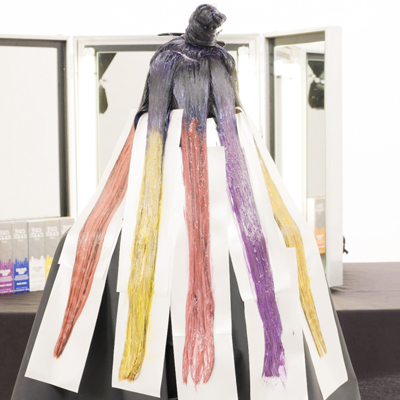
Color Melt
How-To: Ribbon Pop
August 9, 2016·1 min read
Push the boundaries of color with the new Bed Head Colour Trip semi-permanent line from TIGI®! This look focuses on a high-shine root area with a spectrum of colors throughout. Want to go even further? Download the TIGI® 24/7 app in the App Store. (more…)
More to Read


