- 1Step 1 of 18

Before
- 2Step 2 of 18

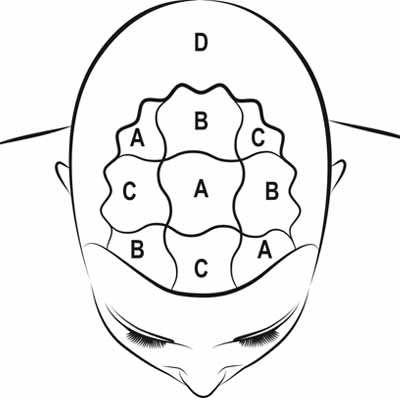
To create a deep, shadowy root, apply Formula D to the root area and blend 1 cm down the hair.
- 3Step 3 of 18
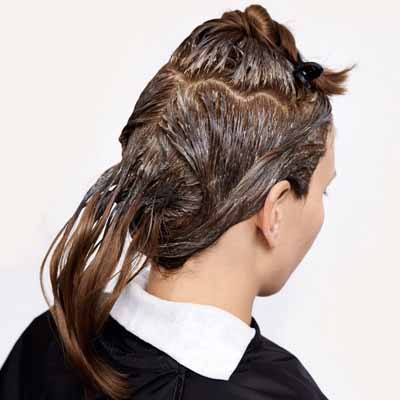
Create two wavy oval sections, one on top of the head and another in the occipital area.
- 4Step 4 of 18

Apply Formula D to all the remaining hair.
- 5Step 5 of 18

Start with the section in the occipital area, dividing it in half horizontally. Apply formula A to the midlengths and ends of the lower half.
- 6Step 6 of 18
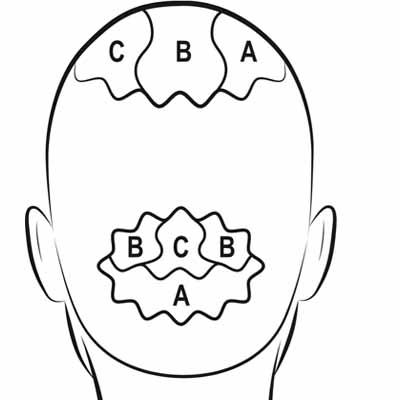
Then divide the top half vertically into three sections (see illustration) and apply Formulas B and C alternately to the midlengths and ends of the three sections.
- 7Step 7 of 18

Take small square sections and alternate Formulas A, B and C through the midlengths and ends.
- 8Step 8 of 18
- 9Step 9 of 18

For the cut, start at the nape to create your baseline length. Move to the center nape, elevate and cut soft layers.
- 10Step 10 of 18

Move to the top of the head, elevate straight up and cut at a horizontal finger angle.
- 11Step 11 of 18

Cut a rounded fringe falling just above the tip of the nose.
- 12Step 12 of 18

Direct the sides forward, blending the sides and the top.
- 13Step 13 of 18

Remove the corners to create soft lines.
- 14Step 14 of 18

To style, apply EIMI Root Shoot on the roots for additional lift and twist the hair before drying.
- 15Step 15 of 18

Accentuate the movement of the twists with a small round brush and apply EIMI Grip Cream to create the final texture.
- 16Step 16 of 18

Blow-dry the hair.
- 17Step 17 of 18

Use a small round brush while drying to create a soft, natural texture.
- 18Step 18 of 18

Finished look.
Bobs & Lobs
Marbled Stone
January 4, 2016·1 min read
Inspired by the way light plays off mineral layers within rocks, Wella Professionals Marbled Stone color technique offers the perfect balance of dimensional color with natural-looking highlights. To accentuate the color, long layers are added to a classic bob and then blown natural for an easy-going finish. Here’s how to recreate the entire color, cut and style. (more…)
More to Read


