By now you’re on to those clever girls who stroll the red carpets in Hollywood. “Oh,” you tell your clients confidently when they show you a photo of a starlet’s long, luscious locks, “that’s not her real hair. Those are extensions.” Yes, but the question is, what kind of extensions? And in many cases, the answer is Simplicity Hair Extensions. That’s right—Hollywood loves Simplicity for several reasons. They’re, well, simple—simple to apply, easy to wear. They feature Simplicity’s revolutionary Comfort Grip adhesive technology that binds quickly, securely and easily to the client’s natural hair—and the client doesn’t feel a thing. No weaving, sewing, braiding or (more…)
- 1Step 1 of 10
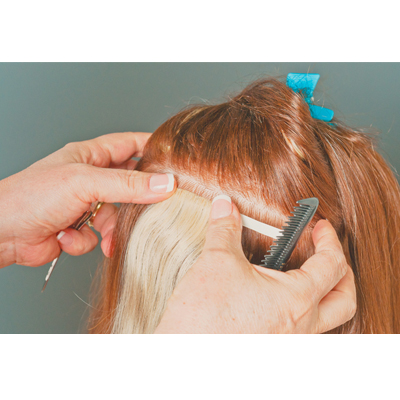
 Complete the pre-application process and design your placement plan. Make sure the hair is totally dry and free of conditioner. Begin the application in nape area and work upward in a bricklay pattern. Section the client’s natural hair to create clean horizontal partings. Be sure the partings form a perfect line in order to properly place the extension.
 - 2Step 2 of 10
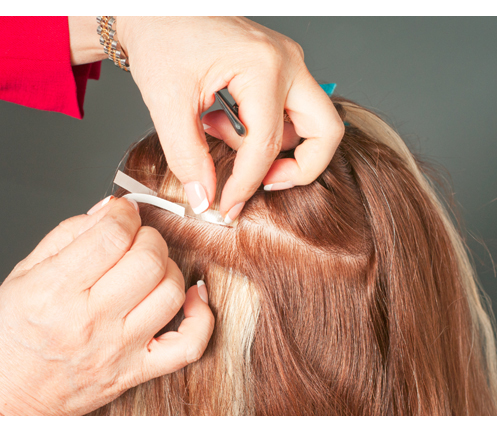
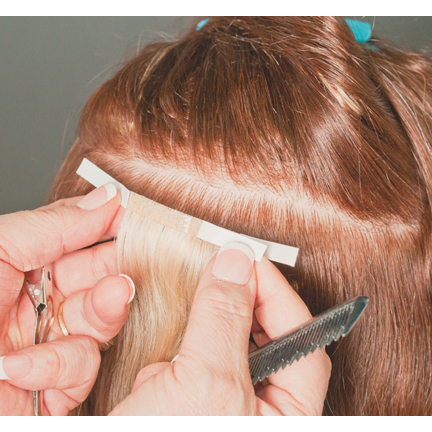 Remove the tape backing from the center section of the extension and place the extension ¼-inch below the parted section.
 - 3Step 3 of 10
 Press gently by gliding your thumbs in an inward-out motion across the attachment. Be sure to do this only one time and only use 30% pressure when gliding your thumbs across. Picking up too much hair will fail to create a maximum bond and may cause premature release of the extension.
 - 4Step 4 of 10
 Flip hair up and over the top of the part line. Make sure that just the right amount of hair has been secured to the adhesive section. Picking up too much hair will reduce the bonding effect. Remove all excess or stray hair from the adhesive site, as any stray hair caught in the adhesive can cause pulling and discomfort.
 - 5Step 5 of 10
 Remove the tape backing from the right wing.
 - 6Step 6 of 10
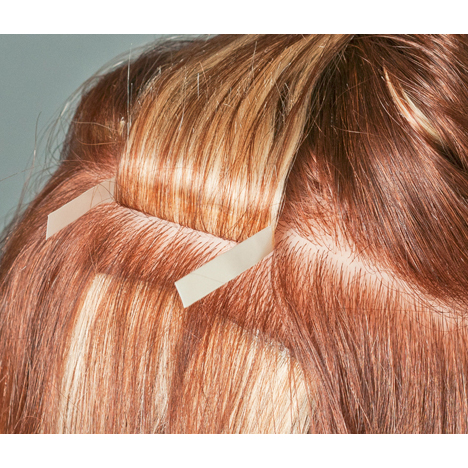
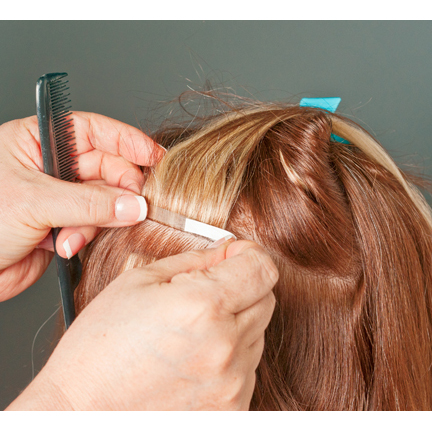 Secure in place by bringing it in towards the middle section, overlapping precisely the existing adhesive area of the extension. Repeat process to the left wing. Return hair extension to its natural hair flow position and press firmly by gliding your thumbs in an inward-out motion across the extension’s attachment. It is imperative that the wing is perfectly aligned to the top adhesive section.
 - 7Step 7 of 10
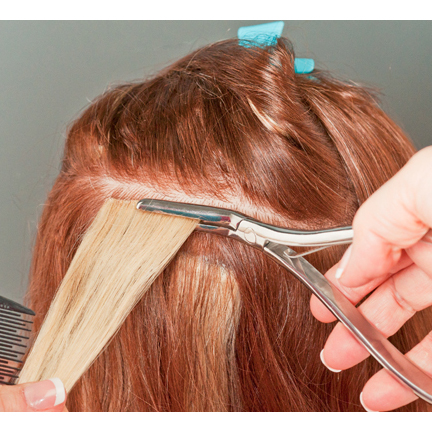 Using the Simplicity Pressing Tool, press first on each end of the wing and then evenly across the entire adhesive area. The Pressing Tool will eliminate any air pockets and guarantee maximum hold.
 - 8Step 8 of 10
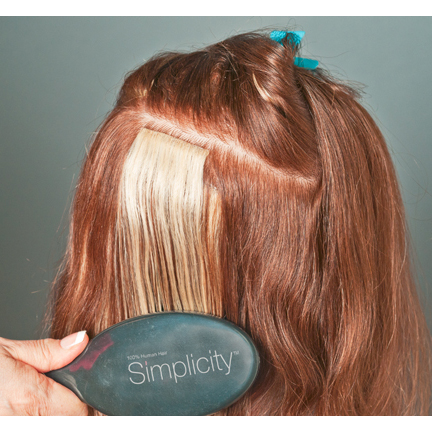 Using the Simplicity Loop Brush, gently brush through the client's hair.
 - 9Step 9 of 10

- 10Step 10 of 10