- 1Step 1 of 20
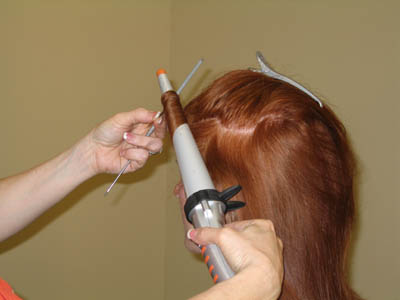
Created with the innovative HAIelite ROD for large curls all over the head, then swept up in large roll curls, one on each side in the front, and sweeping sections with matching rolls in the back.
Create soft curls all over the head.
Start at the front hairline and work your way up to the top on both sides. Start close to the scalp with the larger end of the ROD and wrap the hair around the rod till you reach the ends, lay ends over the top of the hair to avoid burning fingertips.
- 2Step 2 of 20
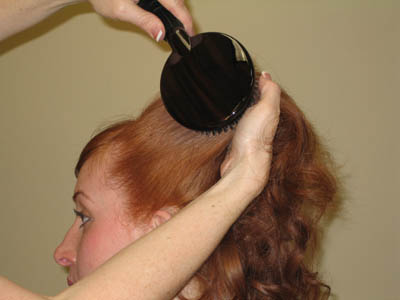
 Secure curls in place with a bobby pin.
 - 3Step 3 of 20
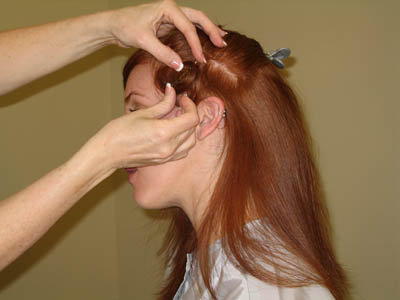
 Starting in the front take a section from the fringe area to the top of the ear, smooth by brushing up into desired placement.
 - 4Step 4 of 20
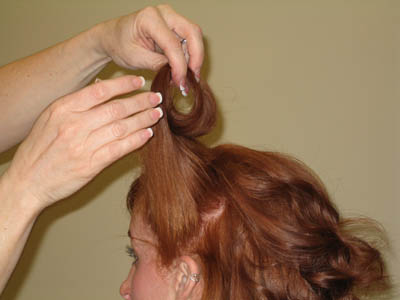 Once desired position is determined roll a large open curl into place using your hands.
 - 5Step 5 of 20
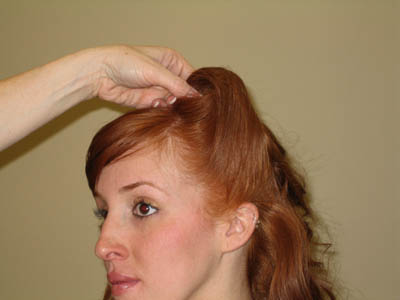 Secure the curl by placing bobby pins in the center from each direction crossing them inside the curl.
 - 6Step 6 of 20
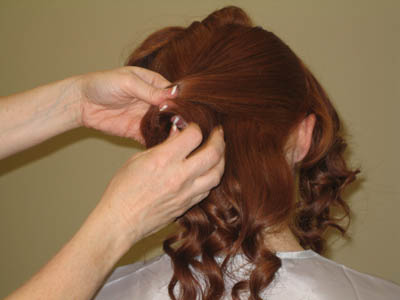 Move to the back of the head, and take a pie shaped section from the crown to the top of the ear, smooth thru curls. Next sweep hair over to the right side of the head and create open curl and secure.
 - 7Step 7 of 20
 Sweep left back section over to the other side, and secure with pins, while keeping the nape area in loose curls.
 - 8Step 8 of 20
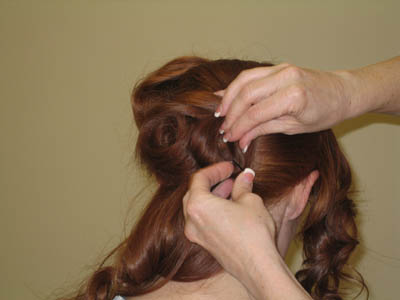 Secure remaining front section.
 - 9Step 9 of 20
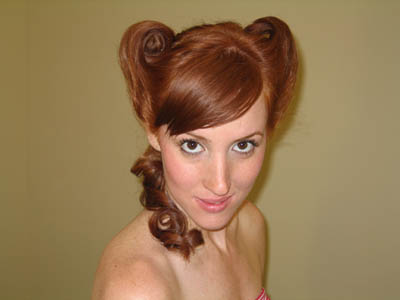
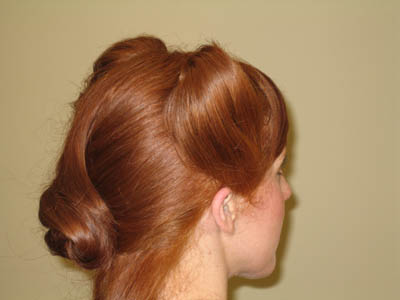
The finished look from the front is simple elegant and offers up a 50’s flair.
She could be wearing a poodle skirt and chewing gum and she would fit right in with the Happy Days gang, or she could put on an elegant gown and strut her stuff at the opera, you choose.
- 10Step 10 of 20
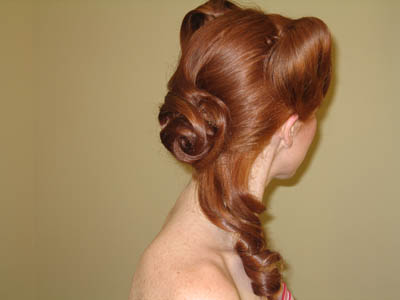 The finished look from the back.
 - 11Step 11 of 20
Created with the innovative HAIelite ROD for large curls all over the head, then swept up in large roll curls, one on each side in the front, and sweeping sections with matching rolls in the back.
Create soft curls all over the head.
Start at the front hairline and work your way up to the top on both sides. Start close to the scalp with the larger end of the ROD and wrap the hair around the rod till you reach the ends, lay ends over the top of the hair to avoid burning fingertips.
- 12Step 12 of 20Secure curls in place with a bobby pin.
- 13Step 13 of 20Starting in the front take a section from the fringe area to the top of the ear, smooth by brushing up into desired placement.
- 14Step 14 of 20Once desired position is determined roll a large open curl into place using your hands.
- 15Step 15 of 20Secure the curl by placing bobby pins in the center from each direction crossing them inside the curl.
- 16Step 16 of 20Move to the back of the head, and take a pie shaped section from the crown to the top of the ear, smooth thru curls. Next sweep hair over to the right side of the head and create open curl and secure.
- 17Step 17 of 20Sweep left back section over to the other side, and secure with pins, while keeping the nape area in loose curls.
- 18Step 18 of 20Secure remaining front section.
- 19Step 19 of 20
The finished look from the front is simple elegant and offers up a 50’s flair.
She could be wearing a poodle skirt and chewing gum and she would fit right in with the Happy Days gang, or she could put on an elegant gown and strut her stuff at the opera, you choose.
- 20Step 20 of 20The finished look from the back.
Tools
HAIelite Curls With a 50's Flair
August 6, 2007·1 min read
Sweeping and dramatic, this 50’s inspired style is easy to create and striking to wear! Check out the HAIelite Style Gallery DVD in the BTC Bookstore! For more information please log on to: www.hai-elite.com (more…)
More to Read


