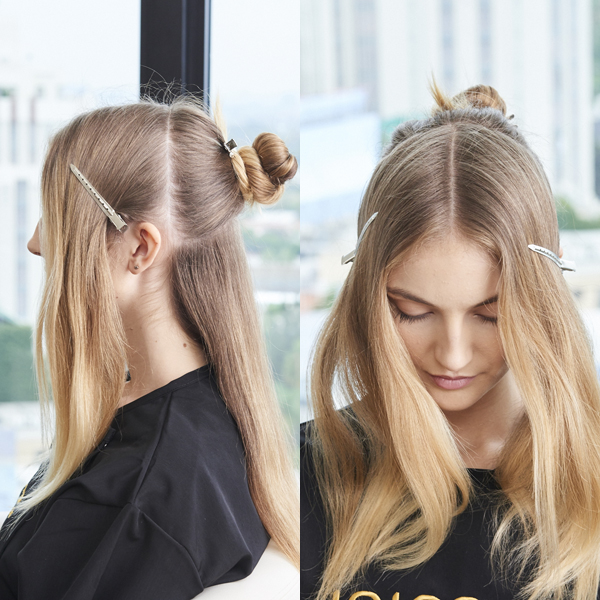
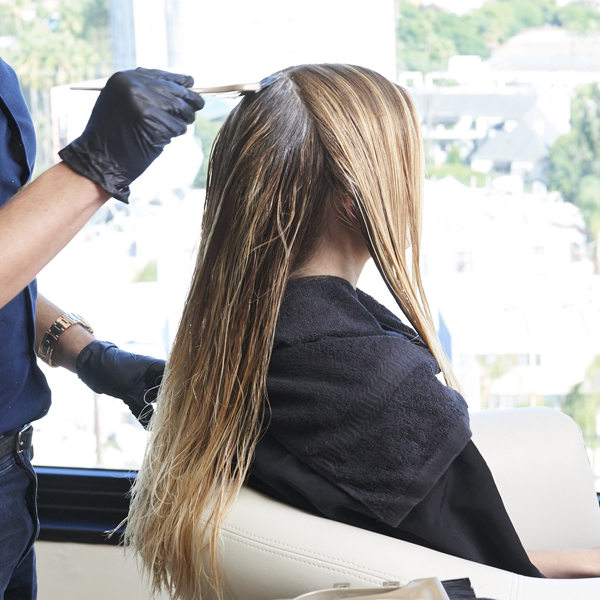
- 1Step 1 of 16

Before. To start, Denis prepped the hair with Joico Blonde Life Masque as a pre-shampoo treatment to neutralize and remove trace minerals, product build-up and chlorine, and restrengthen the hair before a color service. He followed with Blonde Life Shampoo and Conditioner.
- 2Step 2 of 16
Begin with a center part and start sectioning off the hair. Create two sections on either side of the part from just behind the ears forward, and clip them out of the way. Then take the back section and split it in half horizontally from the tops of the ears. Clip the top half out of the way.
- 3Step 3 of 16
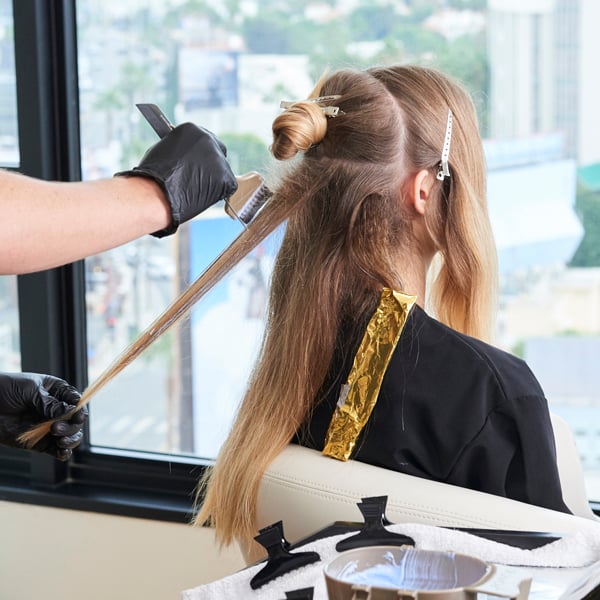
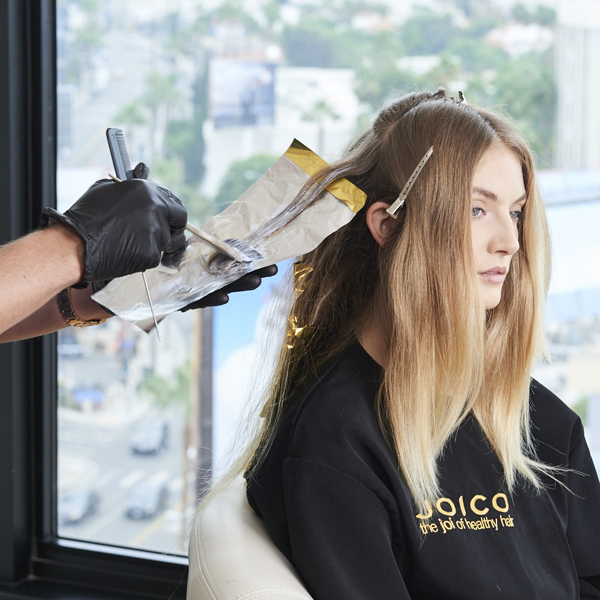
Starting in the nape, take a triangular subsection in the corner of the nape. The width and density will be adjusted to the density and head shape of the client. Tease this section, holding the comb at a diagonal and lightly pushing the comb forward. Do this just at the root area to not over-tease. Apply Formula A in a foilayage technique, which means use a balayage sweeping motion, then place a foil under the section and saturate the midlengths and ends. Repeat on other side.
- 4Step 4 of 16
Take down a 1-inch horizontal section from the top section and take a thin, 3-inch slice from the middle of that section. Tease the hair towards the roots and repeat the same painting technique with Formula A.
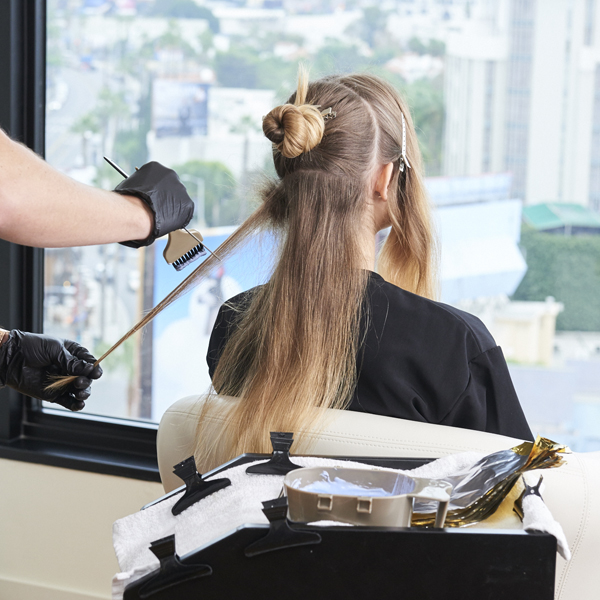
- 5Step 5 of 16

- 6Step 6 of 16
Continue to take down sections from the top section and fill in the gaps in a bricklaying pattern until you reach just about the top of the ears. You’ll notice none of the foils lay on top of each other in this bricklaying pattern. This is important because it creates more dimension through the hair.
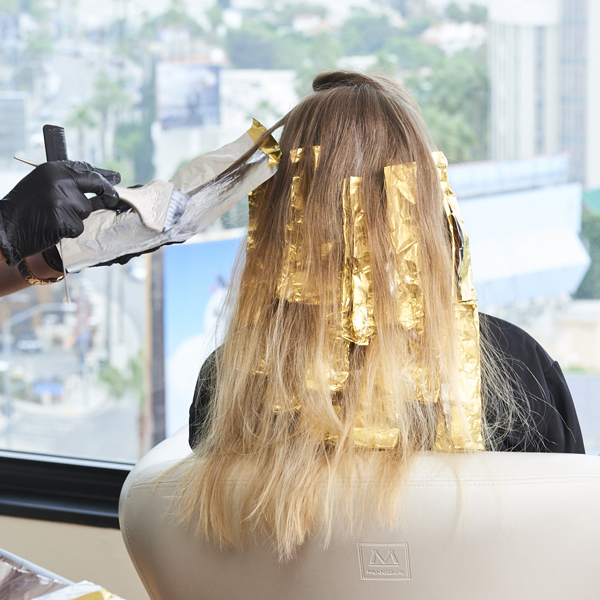
- 7Step 7 of 16
Once you reach the top of the ears, start to make the sections thicker. This is where the sun would naturally lighten the hair and where you want to create more dimension and more pops of color. Continue the foilayage technique until you reach the crown of the head in the back section. Don’t tease these sections, as you want to break up the color more and create more rich pieces.
- 8Step 8 of 16
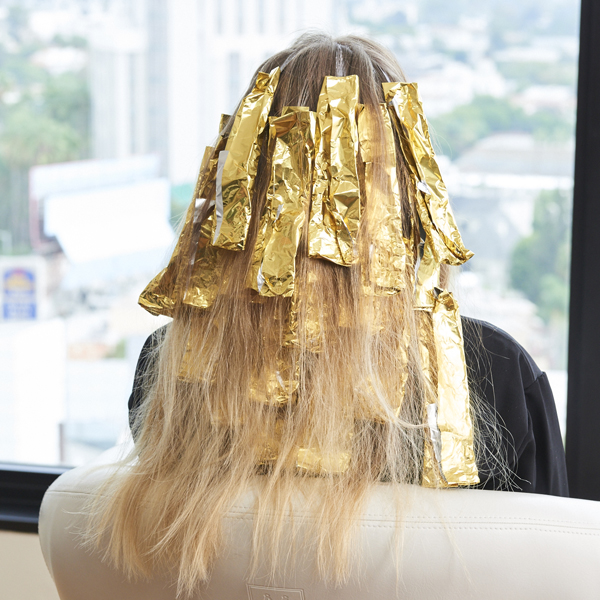
Completed back.
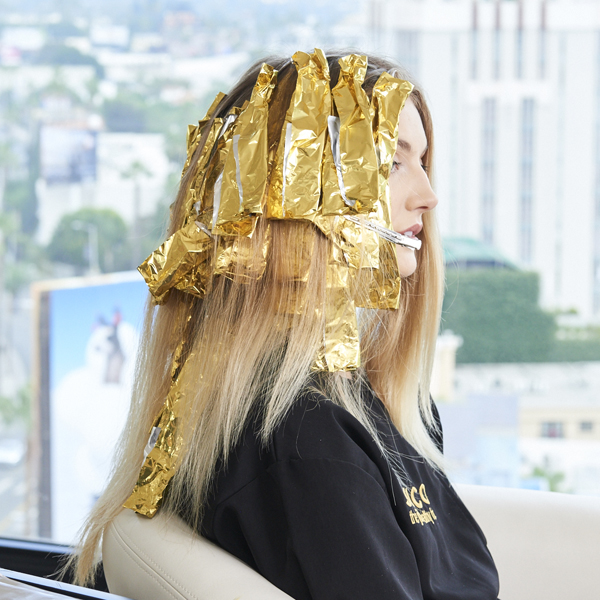
- 9Step 9 of 16

Move onto the side sections. Start with a thin slice along the hairline that frames the face and use the foilayage technique to paint on the color, making sure to completely saturate the ends.
- 10Step 10 of 16

Next, take another section behind that and divide that in half, leaving the front pieces out. The hair that’s left out will give contrast and dimension. Tease the hair behind that, balayage and saturate the ends.
- 11Step 11 of 16
Continue to work your way up in a bricklaying pattern until you reach the brows. Here, balayage thicker pieces without teasing. This will make the hair look more blonde overall rather than looking ombre. Continue until you reach the part and repeat on the other side.
- 12Step 12 of 16

Once all the highlighting is completed, process for about 20 minutes or until the hair has reached the Level 9 (pale yellow) stage. Shampoo with Blonde Life Brightening Shampoo, then towel-dry the hair with two towels, making sure to squeeze the hair instead of rough-drying to protect the cuticle.
- 13Step 13 of 16
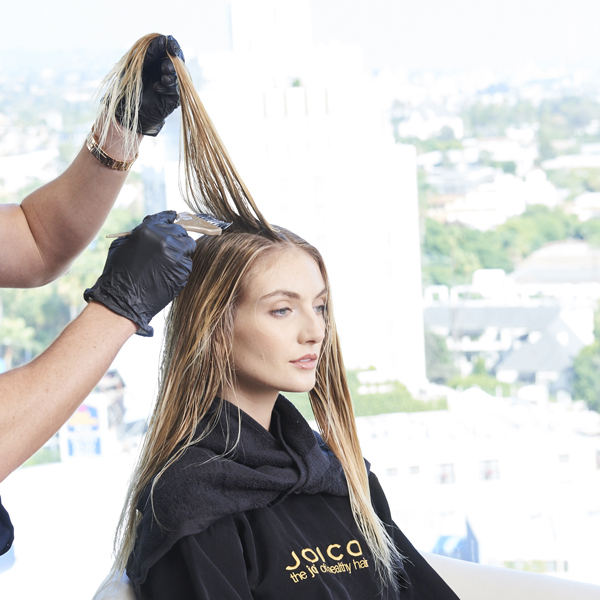
Using a bowl and brush or a bottle color applicator, apply Formula B from the root area and down about 2 inches. This will create a shadow root effect and a rich deeper base.
- 14Step 14 of 16
Apply Formula C to the midlengths and ends. Make sure to blend where the two formulas meet to create a seamless transition. Process for 10 minutes or until the right amount of warmth refinement is achieved. Rinse with Blonde Life Brightening Shampoo and Blonde Life Brightening Conditioner.
- 15Step 15 of 16
- 16Step 16 of 16Watch the video ↗
Blonde
Foilayage Blonde
June 15, 2017·1 min read
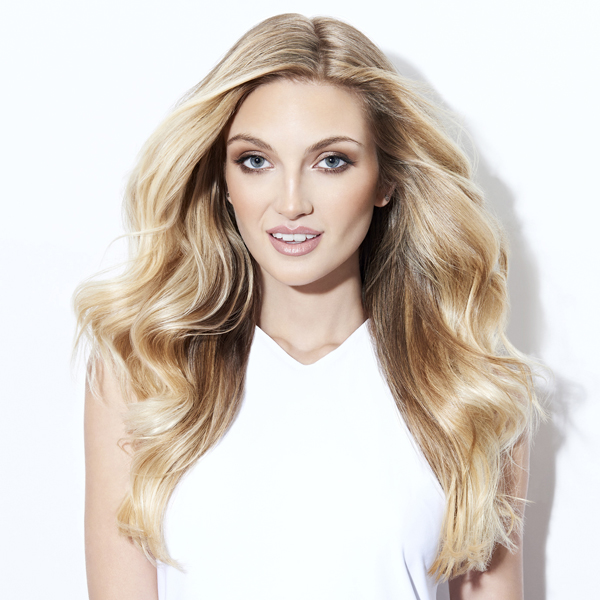
This is the technique to use on your radiant blondes. Joico Celebrity Colorist Denis de Souza prepped the hair with Joico Blonde Life Masque as a pre-shampoo treatment to neutralize and remove trace minerals, product buildup and chlorine and to strengthen the hair before the service. Then he used a foilayage technique for bright, dimensional highlights. Finally, he glazed with two formulas for a multi-spectrum shine. Check it out! S See more from Joico at BTC’s COLOR, Cut & Style Show, Aug. 20-22. Get your tickets now (more…)
More to Read


