- 1Step 1 of 46
- 2Step 2 of 46
- 3Step 3 of 46
- 4Step 4 of 46
- 5Step 5 of 46
- 6Step 6 of 46
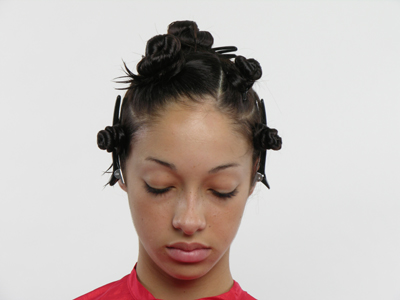
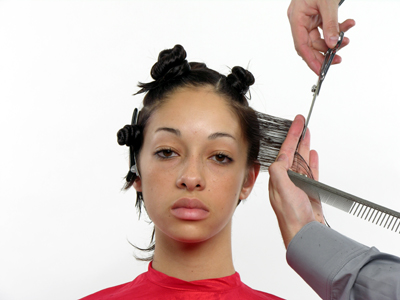
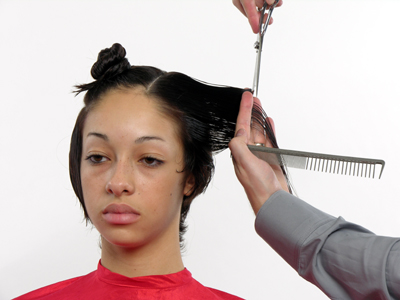
Divide the front section vertically from center left eyebrow.
See Diagram 4.
- 7Step 7 of 46
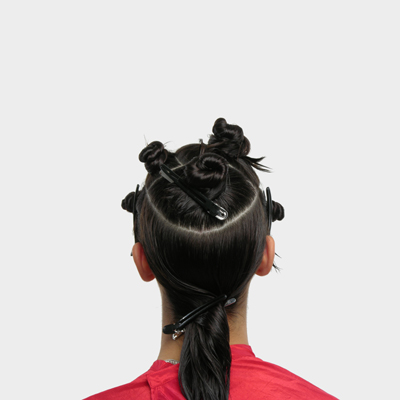
Divide the back section following the parietal ridge in a curve.
See Diagram 2.
- 8Step 8 of 46
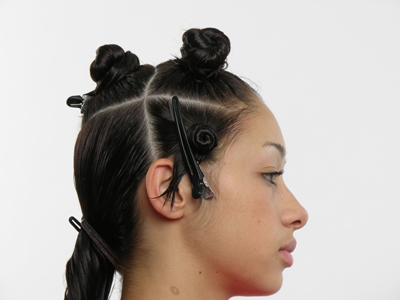
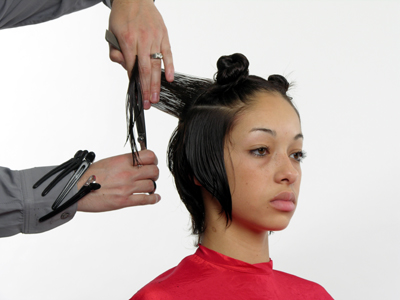
Section from ear to ear through apex.
Isolate front side sections on both sides.
See Diagrams 1 & 3.
- 9Step 9 of 46
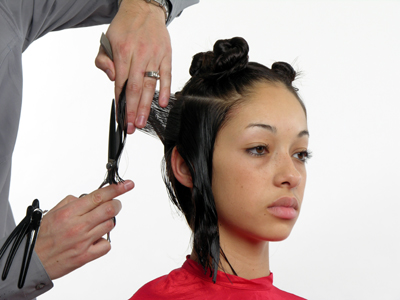
Left Back Section: Start from the middle of the back section by taking a vertical section.
- 10Step 10 of 46
Left Back Section: Comb the section straight out from the base and blunt cut to a square layer.
- 11Step 11 of 46
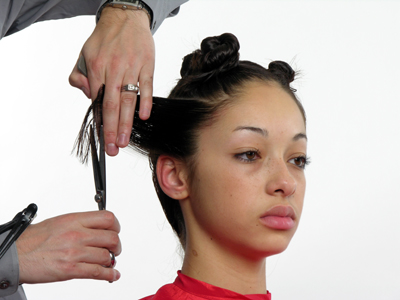
Left Back Section: Continue to work in the same manner using this length as your traveling guide line throughout the left back section.
- 12Step 12 of 46
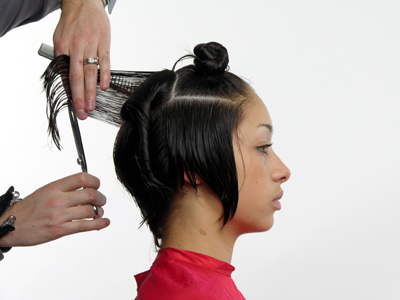
Right Back Section: Repeat the same thing on the right side.
- 13Step 13 of 46
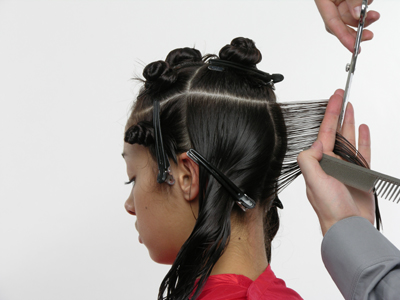
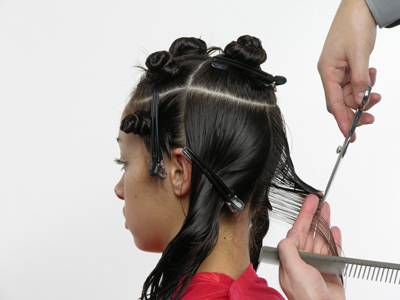
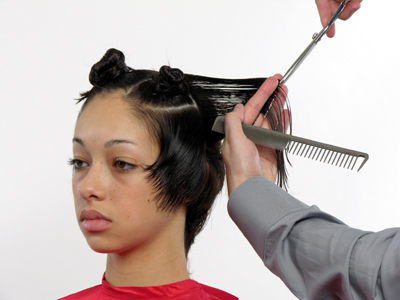
Left Front Side Section: Use your previous length as your traveling guide line for the whole front side section and blunt cut in square layers.
- 14Step 14 of 46
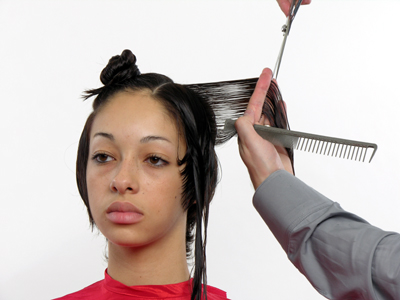
Right Front Side Section: Over direct all the hair to this point and blunt cut in square layers.
- 15Step 15 of 46
Right Front Side Section: Over direct all the hair to this point and blunt cut in square layers.
- 16Step 16 of 46
Crown Area: Take a middle section on the crown area and cut with a square layer, connecting with your length underneath.
- 17Step 17 of 46
Crown Area: Use this length as a traveling guide line for the left side.
- 18Step 18 of 46
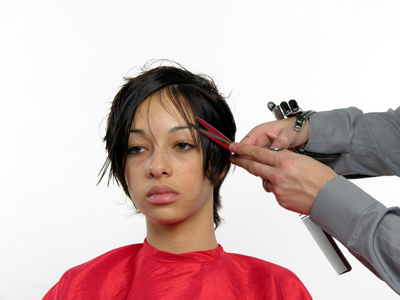
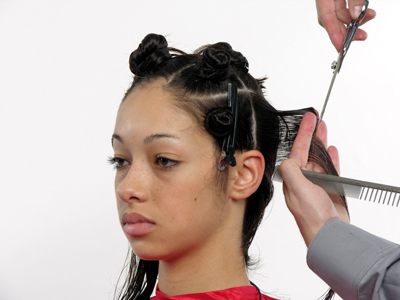
Fringe: Cut a curved line for the fringe section free hand to desired length and texture.
- 19Step 19 of 46
Crown Area: Repeat the same thing on the other side.
- 20Step 20 of 46
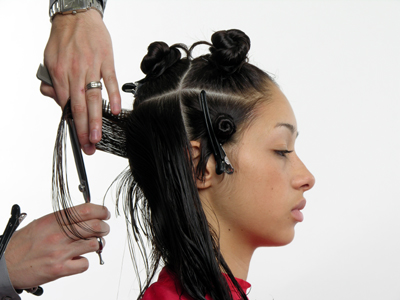
Left Top Section: Start at the ear point use your previous length underneath as your stationary guide line.
- 21Step 21 of 46
Left Top Section: Over direct everything to this point and blunt cut into square layer.
- 22Step 22 of 46

Right Top Section: Repeat in the same manner.
- 23Step 23 of 46
Read the step-by-step and check out the diagrams that follow.
- 24Step 24 of 46
- 25Step 25 of 46
- 26Step 26 of 46
- 27Step 27 of 46
- 28Step 28 of 46
- 29Step 29 of 46
Divide the front section vertically from center left eyebrow.
See Diagram 4.
- 30Step 30 of 46
Divide the back section following the parietal ridge in a curve.
See Diagram 2.
- 31Step 31 of 46
Section from ear to ear through apex.
Isolate front side sections on both sides.
See Diagrams 1 & 3.
- 32Step 32 of 46
Left Back Section: Start from the middle of the back section by taking a vertical section.
- 33Step 33 of 46
Left Back Section: Comb the section straight out from the base and blunt cut to a square layer.
- 34Step 34 of 46
Left Back Section: Continue to work in the same manner using this length as your traveling guide line throughout the left back section.
- 35Step 35 of 46
Right Back Section: Repeat the same thing on the right side.
- 36Step 36 of 46
Left Front Side Section: Use your previous length as your traveling guide line for the whole front side section and blunt cut in square layers.
- 37Step 37 of 46
Right Front Side Section: Over direct all the hair to this point and blunt cut in square layers.
- 38Step 38 of 46
Right Front Side Section: Over direct all the hair to this point and blunt cut in square layers.
- 39Step 39 of 46
Crown Area: Take a middle section on the crown area and cut with a square layer, connecting with your length underneath.
- 40Step 40 of 46
Crown Area: Use this length as a traveling guide line for the left side.
- 41Step 41 of 46
Fringe: Cut a curved line for the fringe section free hand to desired length and texture.
- 42Step 42 of 46
Crown Area: Repeat the same thing on the other side.
- 43Step 43 of 46
Left Top Section: Start at the ear point use your previous length underneath as your stationary guide line.
- 44Step 44 of 46
Left Top Section: Over direct everything to this point and blunt cut into square layer.
- 45Step 45 of 46
Right Top Section: Repeat in the same manner.
- 46Step 46 of 46
Read the step-by-step and check out the diagrams that follow.
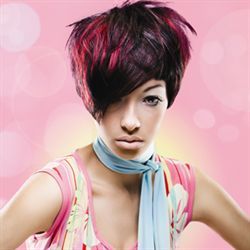
Coloring Curls/Texture
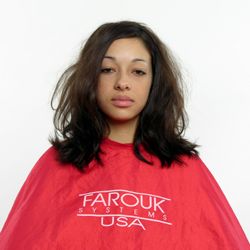
Farouk Contra Cut Step-By-Step
February 16, 2006·1 min read
Farouk Contra Cut! Go step-by-step to see how this look took shape! See the entire Farouk Ambience Collection and learn Contra Color step-by-step! For more information please log on to: www.farouk.com (more…)
More to Read


