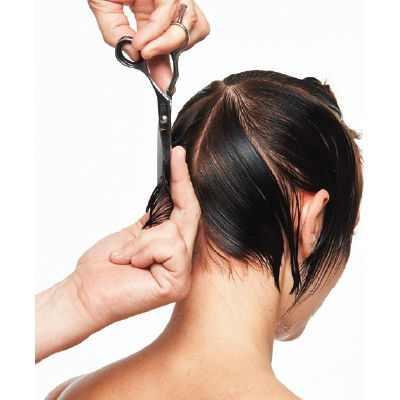
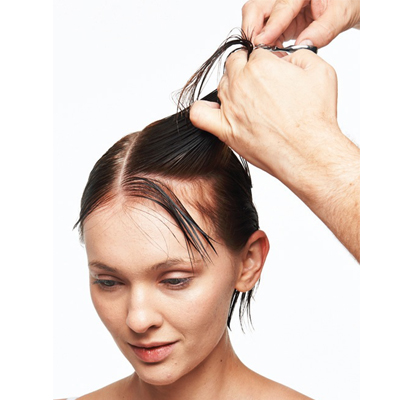
- 1Step 1 of 15

- 2Step 2 of 15
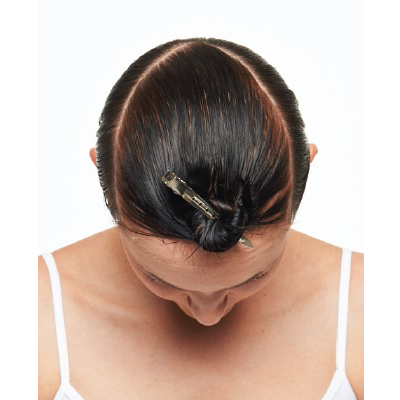
View of sectioning pattern. Adjust the sectioning to suit the individual crown, growth pattern, hair density, hair type, facial features and overall desired design.
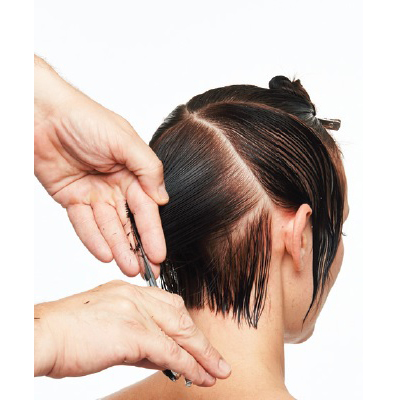
- 3Step 3 of 15
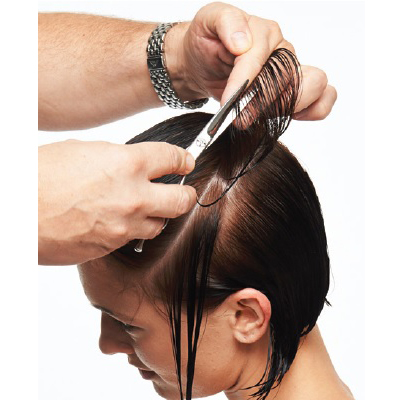
Take a parting that extends from the crown to the temple. Hold hair at an approximately 90-degree angle and cut to the desired length. The objective is to create a flatter, tighter head shape in this area.
- 4Step 4 of 15
Continue working in the same manner, overdirecting each parting to the first guide.
- 5Step 5 of 15
View of last parting overdirected to the first guide. Repeat on the opposite side.
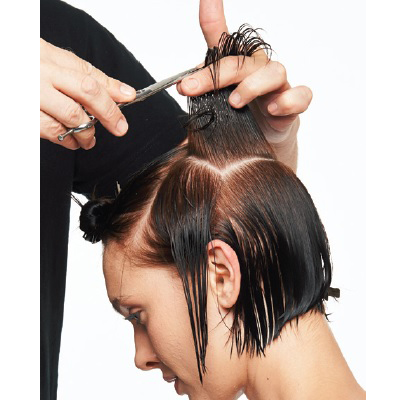
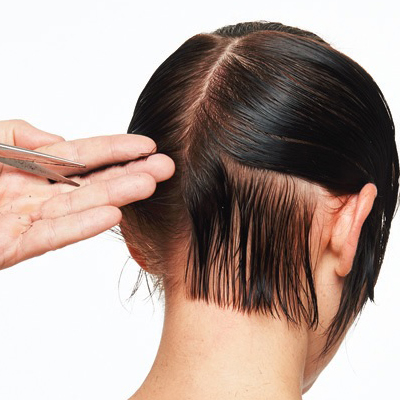
- 6Step 6 of 15
Refine to create a tighter central nape area. Take a vertical parting that extends from the crown to the nape, and cut so that length flows from shorter at the nape to longer at the crown. Pay particular attention to the crown area: always work with the natural growth pattern and adjust tension accordingly.
- 7Step 7 of 15
Continue to pivot off the crown area and overdirect each parting to the first guide. This will maintain extra length behind the ear area.
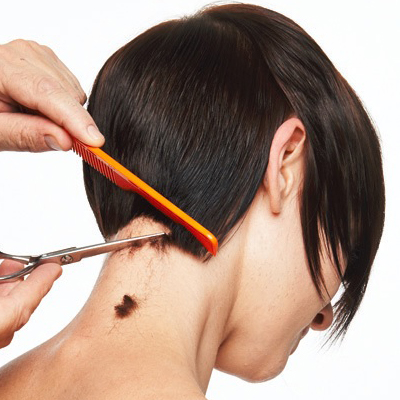
- 8Step 8 of 15
Cross-check frequently. Note that the center is shorter to maintain length behind the ear area.
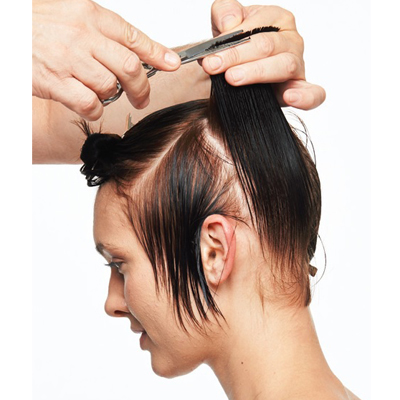
- 9Step 9 of 15
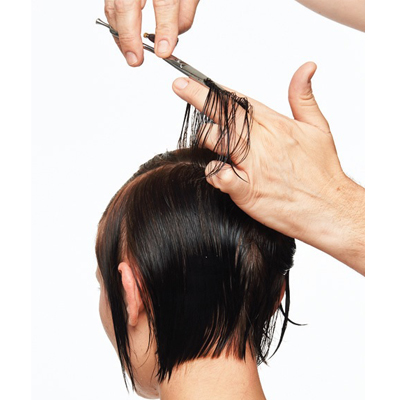
Elevate hair to an approximately 90-degree angle and connect the top area to the crown area ONLY. Note that the side areas underneath are disconnected from the top areas. Cut the top area to a length that removes bulk and excess weight, yet is long enough to retain softness, texture
and movement. - 10Step 10 of 15
Continue to pivot off the crown area and overdirect partings to first guide. Adjust the overdirection to suit the individual hair density, texture, etc. Blow-dry hair smooth with a Denman brush. Note that this technique is equally effective on wavy/curly hair, as long as you adjust the length and angles to suit the overall individual hair design.
- 11Step 11 of 15
Refine the hairline when the hair is dry for ultimate control. Create a clean, soft, head-hugging silhouette using point-cutting, chipping and elevation, always working with the hairline growth pattern.
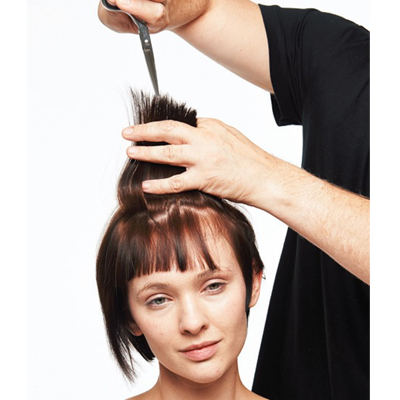
- 12Step 12 of 15
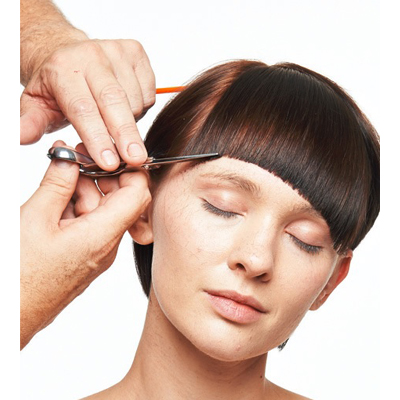
Section hair as shown to isolate the fringe area. Cut a curved fringe to open the face shape, enhance the cheekbones and draw attention to the eyes and eyebrows. Point-cut and chip into the fringe to soften the line and enhance movement and texture.
- 13Step 13 of 15
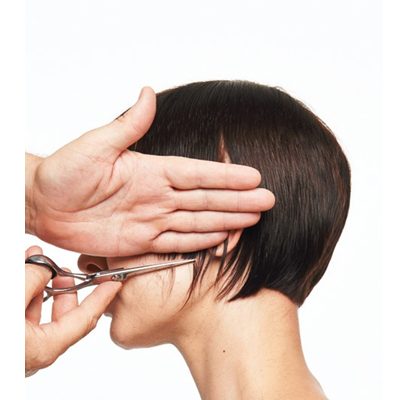
(Optional): Remove length on one side to create asymmetry in the side areas. Note that the line does not connect to the length behind the ear.
- 14Step 14 of 15
Point-cut all the internal lengths to create softness and fluidity in the disconnected areas. Further refine hair after the color process to ensure the haircut and color flow seamlessly.
- 15Step 15 of 15
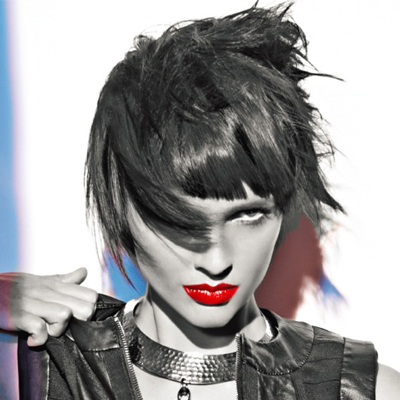
Bobs & Lobs
Edgy, Asymmetrical Bob From Joico
January 19, 2014·1 min read
If it’s not the pixie—it’s the bob, or lob as we like to call it. It’s short, yet chic—perfect for your scissor shy clients who aren’t ready to go super short, but want to remove some length. This trendy, asymmetrical bob is short, sassy and hip. Perfect for the client looking for an edge. After more than two decades of subtlety and minimalism, In-Excess, Joico‘s new trend collection, heralds a return to the extravagance of the 1980s. But rather than reproduce the past, Joico International Artistic Directors Damien Carney and Sue Pemberton did as many fashion designers did for their (more…)
More to Read


