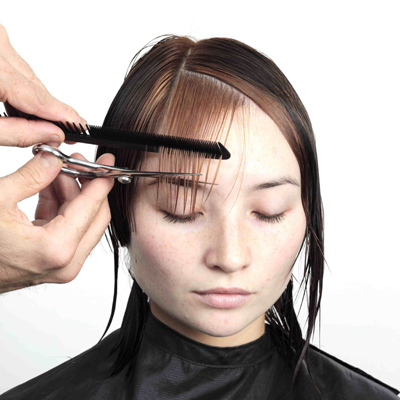
- 1Step 1 of 16
- 2Step 2 of 16
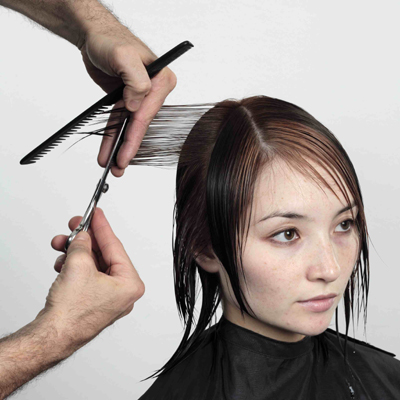
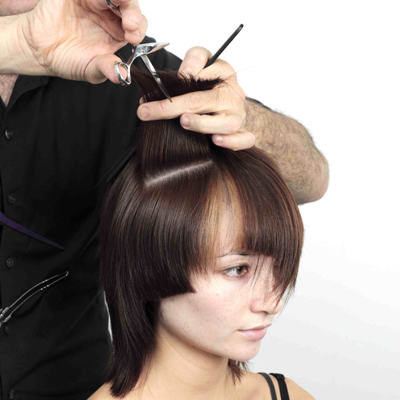
Step 1: Starting at the sides take a diagonal forward section, bring back to a vertical at the centre of the ear, and cut your guide in at 90 degrees, to your desired length. Follow this pattern all the way to the front over-directing back to a stationary guide at the centre of the ear.
- 3Step 3 of 16
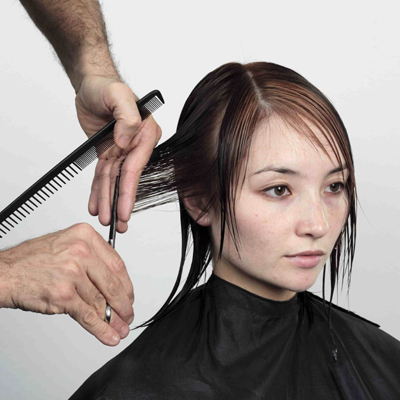
Step 2: Continue working through Step 1.
Step 1 Repeat - Starting at the sides take a diagonal forward section, bring back to a vertical at the centre of the ear, and cut your guide in at 90 degrees, to your desired length. Follow this pattern all the way to the front over-directing back to a stationary guide at the centre of the ear.
- 4Step 4 of 16
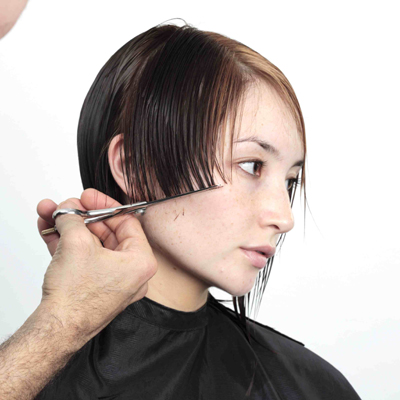 Having completed the side, now take a slight diagonal back section, and cut a solid perimeter to the skin, with no elevation or tension. The design line should be on a slight upward slope. Continue all the way to top of this section
 - 5Step 5 of 16
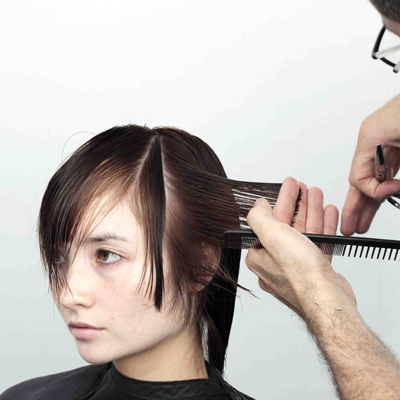
 Take a slight diagonal section from the parting to the right eye. Over-direct this section slightly toward the opposite eye and cut an asymmetric design line as the fringe. Continue back toward the crown area.
 - 6Step 6 of 16
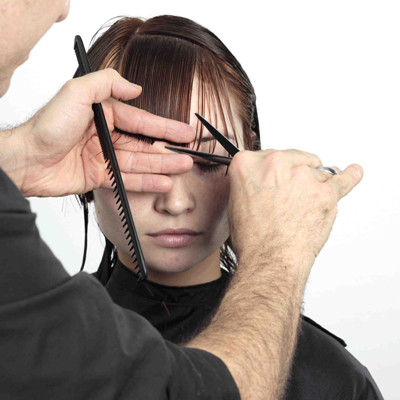
Repeat Step 4 - Take a slight diagonal section from the parting to the right eye. Over-direct this section slightly toward the opposite eye and cut an asymmetric design line as the fringe. Continue back toward the crown area.
- 7Step 7 of 16
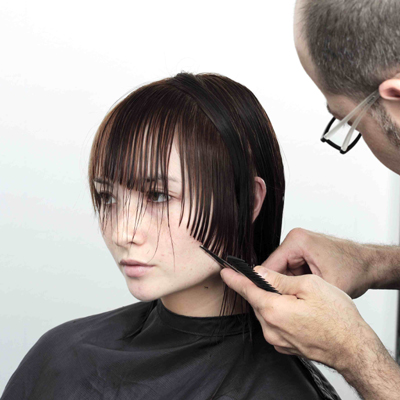 Next, take diagonal back section on the left side and connect this area into the fringe. Continue up the side until you reach the top. You will have left a slight section between the side and the fringe to leave as an accent piece.
 - 8Step 8 of 16
 Example of fringe connection
 - 9Step 9 of 16
Follow the above steps on the opposite sides before starting Step 8 -
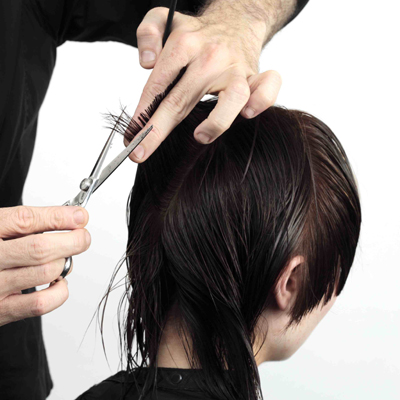
Step 8: Take vertical sections down the centre back, cutting the guide at 90-degrees from the head. Follow the head shape at 90 degrees cutting to desired length. Continue on both sides bringing everything back to the stationary 90-degree guide.
- 10Step 10 of 16
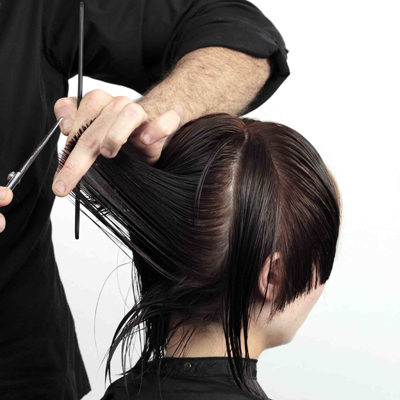
 Continue taking vertical sections down the centre back, cutting at 90-degrees from the head. Follow the head shape at 90 degrees cutting to the desired length. Continue on both sides bringing everything back to the stationary 90-degree guide.
 - 11Step 11 of 16
Continue Step 9
- 12Step 12 of 16
Continue Step 9
- 13Step 13 of 16
 Take the base line, cutting directly on the skin allowing for natural head curve. Follow this until you have no more hair in our sections.
 - 14Step 14 of 16
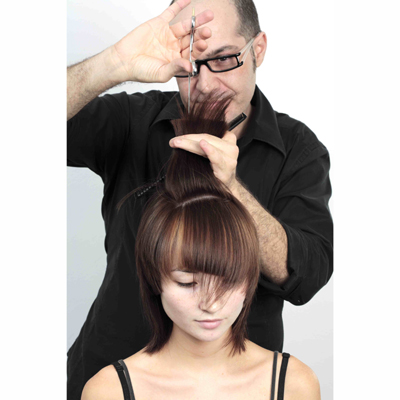 Rework sections initially took and deep point and texturise in order to personalise the haircut and eliminate any excess weight.
 - 15Step 15 of 16
 Rework sections initially took and deep point and texturise in order to personalise the haircut and eliminate any excess weight.
 - 16Step 16 of 16
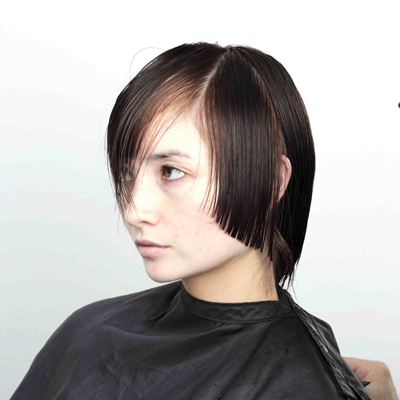
 We finish applying TIGI S-Factor Dream Drops and L’Oreal Professionnel Serie Expert Liss Control before blow drying.
Hair Extensions
E Salon "Extension" Step-By-Step
October 19, 2008·1 min read
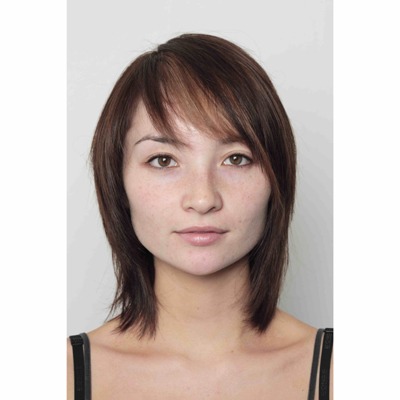
The Extension step-by-step incorporates diagonal and 90-degree cutting techniques to produce this asymmetrical look with a strong fringe. This popular Australian team offers up the how-tos for an edgy, geometric style designed to please the adventurous client. Check out é Salon’s latest “Vacuous” Collection For more information about é Salon please visit www.esalon.com.au Subscribe to behindthechair.com “On Paper” Magazine–4 Issues Only $29.95! Next Issue: COLOR with Beth Minardi! (more…)
More to Read


