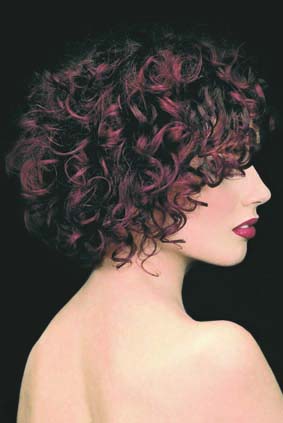
Edo Bianchi shows us what it takes to create a luscious head of ringlet curls. Just barely grazing the shoulders, this curly cut is perfect for texture-crazed salon clients, dying to look like their favorite starlet. Keep up-to-date on all the international trends with a SUBSCRIPTION TO ESTETICA and learn more about ESTETICA. (more…)
- 1Step 1 of 12

- 2Step 2 of 12
 Divide the front section asymmetrically.
 - 3Step 3 of 12
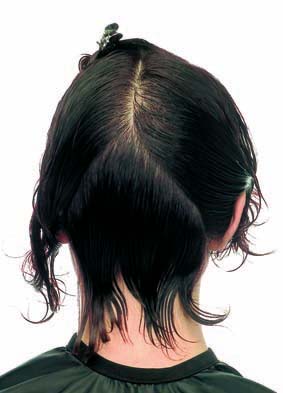 Begin the cut, holding out a section to 45° from the lower part of the centre of the nape.
 - 4Step 4 of 12
 Direct the length towards the centre of the head, holding locks at a 90° angle from the roots. Sculpt the hair cutting upwards to the occipital and repeat on both sides.
 - 5Step 5 of 12
 Create other divisions in the side areas.
 - 6Step 6 of 12
 Hold the hair towards the face and cut. Then connect in the centre.
 - 7Step 7 of 12
 Proceed using the same technique up to the top of the head and connect.
 - 8Step 8 of 12
 Hold the sections at the temples towards the face.
 - 9Step 9 of 12
 Round off and remove bulk from the asymmetric part of the fringe section using thinning shears.
 - 10Step 10 of 12
 Apply a curl defining cream throughout the hair and dry with a diffuser.
 - 11Step 11 of 12
 Credits
Technique: Edo Bianchi for Neos by Selective Professional
Photo: Luis Vidal - 12Step 12 of 12