- 1Step 1 of 18

Before
- 2Step 2 of 18
To establish the fringe section, roll the comb from the corner of the eyebrow up to the top center of the head. Tuck the hair behind the ear to clear the temporal area, then condense the hair to the tip of the nose to maintain a longer outside corner of the fringe. Using the tip of your shears, snip a straight line to create the fringe perimeter, then release the section.
- 3Step 3 of 18
Move to the side. Take a diagonal section from the recession area to right in front of the ear. Condense the diagonal section toward the fringe guide. Keep elevation down towards her cheek, and cut.
- 4Step 4 of 18

- 5Step 5 of 18
Take a vertical section right behind the fringe and side section from the center top part down to mid ear. Divide that section in half, then comb the lower subsection down to the guide. Condense and cut. Next, bring the top subsection down, swinging the hair around to the cheek. Keep the elevation minimal.
- 6Step 6 of 18
Take a second vertical section from the top of the head directly to the back of the ear. Divide this vertical section in half where the ear meets the face. Comb the front portion of the subsection and condense the section over the cheekbone. Line up your fingers on the diagonal and connect the line. Next, comb the back subsection behind the ear. Line up your fingers with the longest point of the front section to connect the line and cut.
- 7Step 7 of 18

Create a parting from behind the ear across and down to the center nape, and comb a portion of the diagonal neckline parting down behind the ear. Line up the tip of your fingers with the last guide, and using the tips of the shears, snip down and around to maintain maximum length.
- 8Step 8 of 18
Continue up the back half of the head with diagonal partings. Check the guide and continue the same cutting angle with low elevation. Take controllable subsections to create steep connection from shorter to longer.
- 9Step 9 of 18
Repeat on the opposite side. Use point-cutting to soften the strong geometric line.
- 10Step 10 of 18
Comb the hair thoroughly from behind and check to make sure the angle is consistent on both sides and that you have created a long point in the center of the back. Divide the hair down the center of the back, moving each side in front of the shoulders.
- 11Step 11 of 18

- 12Step 12 of 18
Take a small central fringe section and slide your fingers down to the ends. Use a razor to lightly tap out bits of hair horizontally above your fingers. Repeat on either side of the center fringe section.
- 13Step 13 of 18
Diagonally part the side section, tapping lighter where the hair is sparse. Determine whether to tap closer to the ends or more towards the roots based on the client’s hair density.
- 14Step 14 of 18
Once you reach mid-ear, carve a diagonal parting from the front central part to the central nape. Separate only this new section away from lower sections to avoid over-razoring the hair.
- 15Step 15 of 18
Overdirect the back with the same angle and elevation while tapping with the razor. Continue up the head with diagonal parts, eying the weight and density as you work. Repeat on the opposite side.
- 16Step 16 of 18
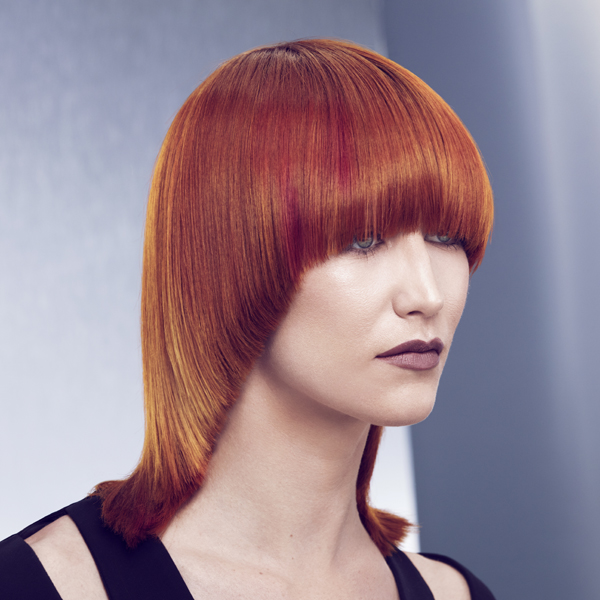
Finished look.
- 17Step 17 of 18

Finished look—alternate view.
- 18Step 18 of 18

Finished look—alternate view.
Hair Color
Classic Concave Cut
July 31, 2017·1 min read
This precision cut makes a statement and can be worn a variety of ways. Watch Mirza Batanovic, Eufora Style Director, create this look by cutting towards the face, then removing weight and creating texture with a razor, then see the entire how-to (including the color steps!) on BTC University! (more…)
More to Read


