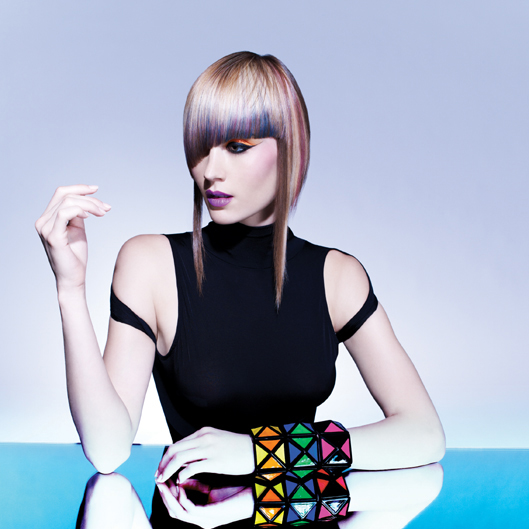
Swoosh! Long, arched lines and sweeping strokes of violet and smoke embedded in a creamy neutral base make this asymmetric style truly unique. It’s from Joico’s innovative Le Graphique collection, inspired by French hairstylist, makeup artist, fashion designer, art director, photographer and visionary Serge Lutens. C’est chic! For more, please visit www.joico.com. On Paper Keyword: celebrityjoico educationjoico (more…)
- 1Step 1 of 13
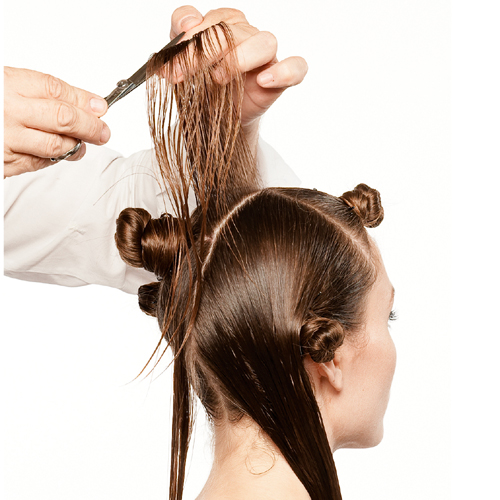
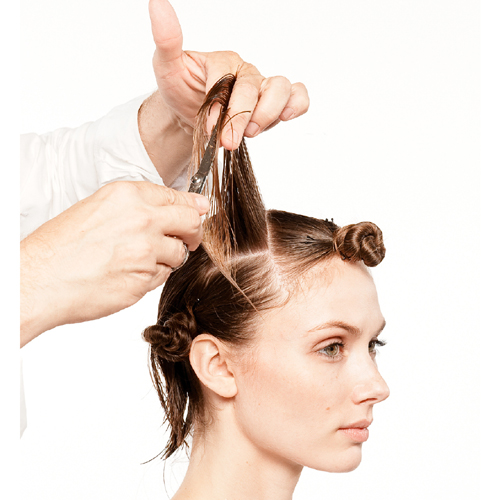
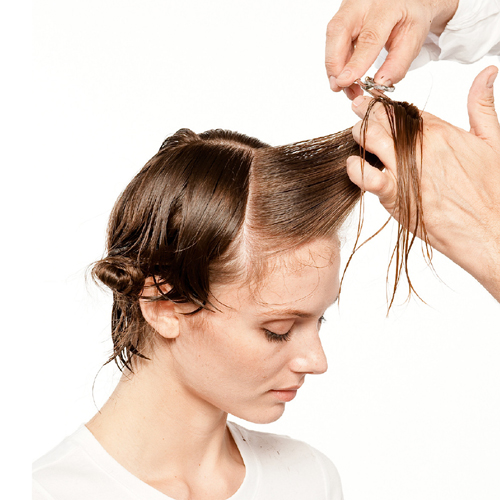
 Create five sections as shown.
 - 2Step 2 of 13
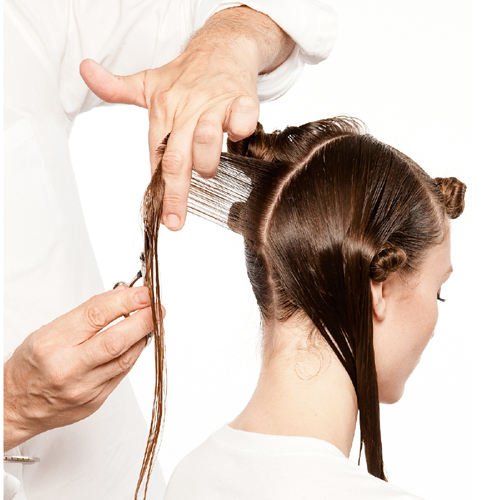
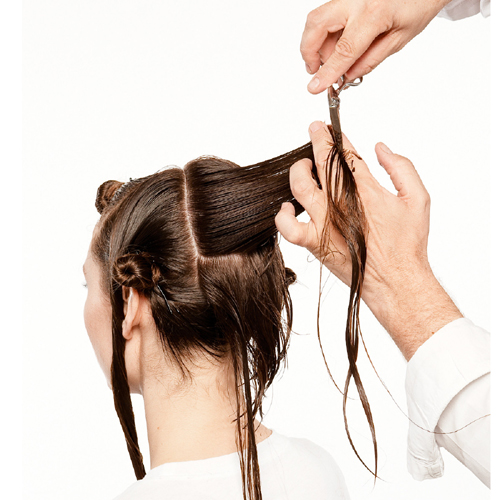
 Create a vertical parting from crown to just below the occipital. Create the desired length using a rounded layer technique.
 - 3Step 3 of 13
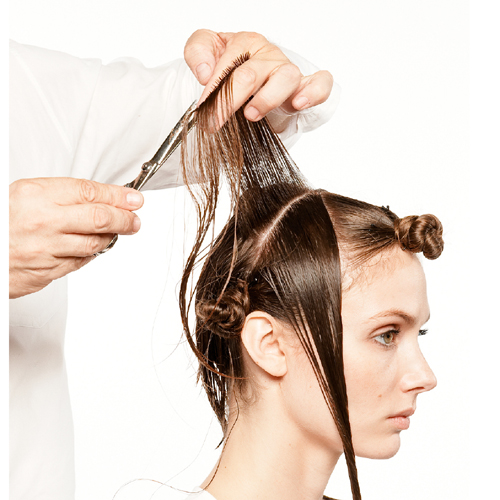
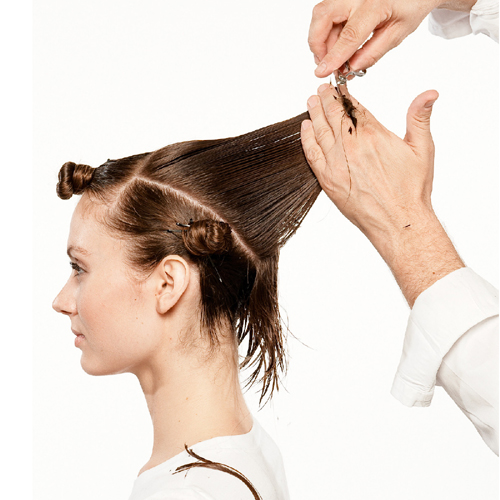
 Elevate hair as shown. The hair can be cut shorter through the crown area and extended to any length.
 - 4Step 4 of 13
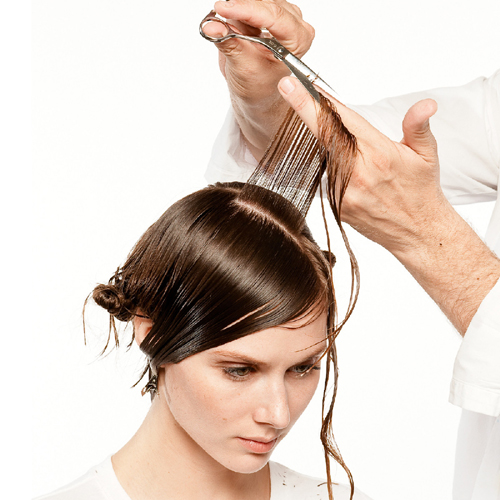
 Continue cutting in this manner, pivoting around the head shape.
 - 5Step 5 of 13
 Work to the side of the head in this manner. The objective is to create a rounded, layered look, sitting on top of longer lengths.
 - 6Step 6 of 13
 Return to the original guideline and cut the opposite side, this time over-directing each parting to the original guide to create asymmetry.
 - 7Step 7 of 13
 Pivot along the head shape to the final section as shown, elevating as necessary to remove unwanted weight.
 - 8Step 8 of 13
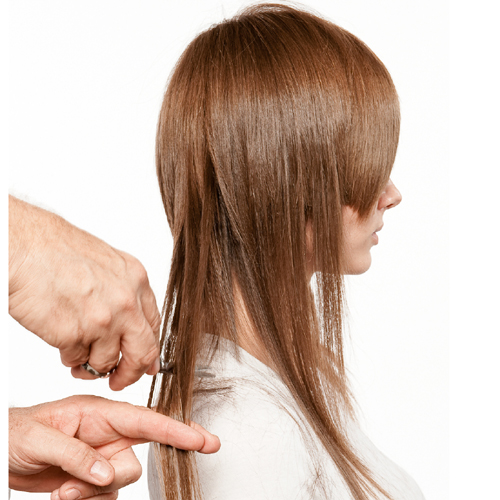
 Create a parting from the crown to the temple and establish the desired top length.
 - 9Step 9 of 13
 Work in sections pivoting off of the crown, over-directing each to the original guide.
 - 10Step 10 of 13
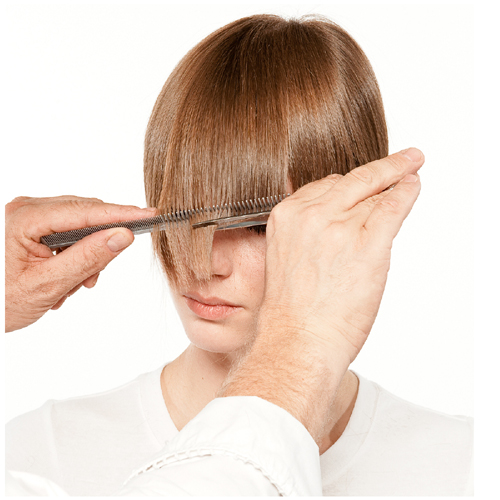 Create a curved fringe to open one side of the face. Use the comb to control the line.
 - 11Step 11 of 13
 Chip out an angular line around the cheekbone.
 - 12Step 12 of 13
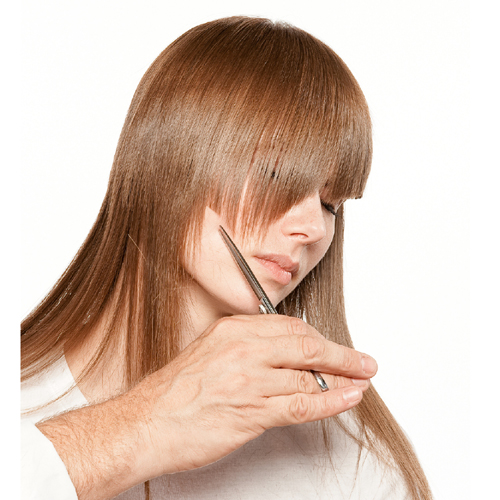
 Texturize the lengths by cutting into the hair freehand to create a chunky, haphazard effect.
 - 13Step 13 of 13