- 1Step 1 of 8
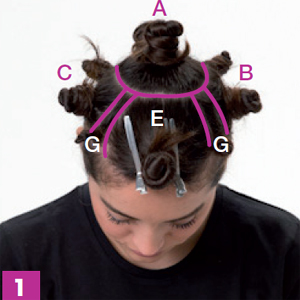
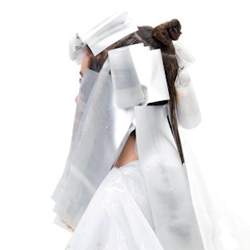
Create a 4-6 cm diameter circle (Panel A) on the crown of the head. Create another circular section beginning at the temples that doesnot go below the ears. Create 4 panels shaped like symmetrical petals (B, C, D, E). The bottom panel is panel F.
See the next two images for additional views of sectioning.
- 2Step 2 of 8
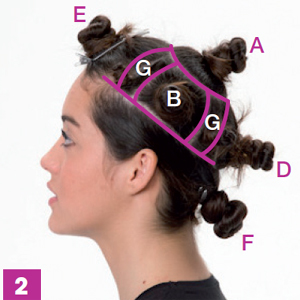
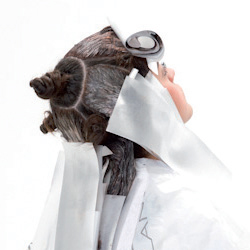
Create a 4-6 cm diameter circle (Panel A) on the crown of the head. Create another circular section beginning at the temples that doesnot go below the ears. Create 4 panels shaped like symmetrical petals (B, C, D, E). The bottom panel is panel F.
See the next image for an additional view of sectioning.
- 3Step 3 of 8
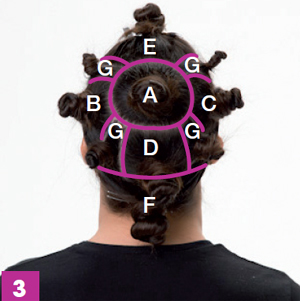
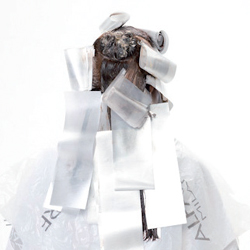
Create a 4-6 cm diameter circle (Panel A) on the crown of the head. Create another circular section beginning at the temples that doesnot go below the ears. Create 4 panels shaped like symmetrical petals (B, C, D, E). The bottom panel is panel F.
- 4Step 4 of 8
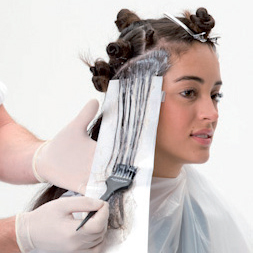 Color panels E and F using Evolution of the Color³ 8.32 mixed with Oxid’o (40 volumes).
 - 5Step 5 of 8
 Color panels B, C, D using Evolution of the Color³ 5.14 mixed with Oxid’o (20 volumes).
 - 6Step 6 of 8
 Color the G panels using Evolution of the Color³ 6.14 mixed with Oxid’o (30 volumes).
 - 7Step 7 of 8
 Color panel A using Evolution of the Color³ 4.32 mixed with Oxid’o (10 volumes).
 - 8Step 8 of 8
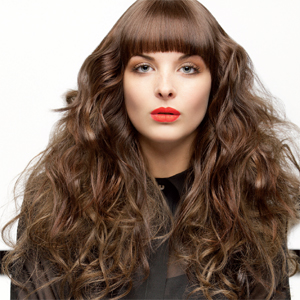
The result of these steps is a subtle, multidimensional brunette!
Hair Color
Bronzed Brunette Color How-To From Alfaparf
February 20, 2012·1 min read
The perfect ’70s cut requires the perfect color. And while this may look like a simple, all-over brunette, take a closer look: this is a brunette with a deep bronze tone contrast between the roots and the rest of the hair. The result is an intense depth your clients will love. Take a look at the following steps and learn how you can transform your client into a radiant brunette. See the step-by-step for the accompanying cut! (more…)
More to Read


