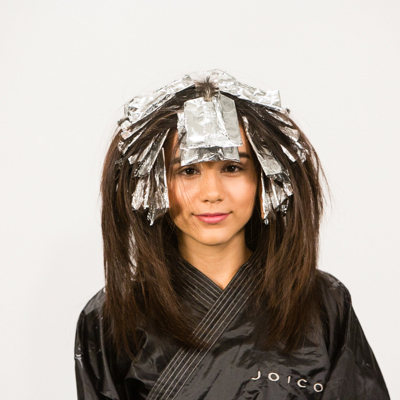
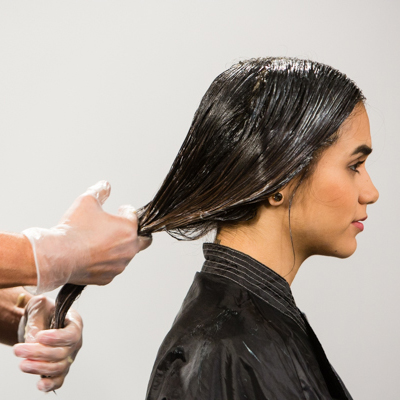
- 1Step 1 of 21
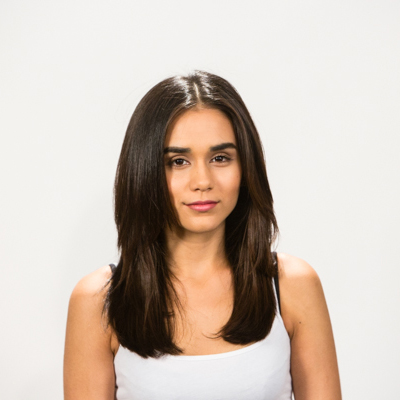
Before
- 2Step 2 of 21
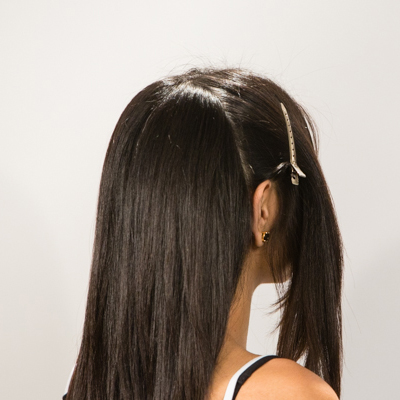
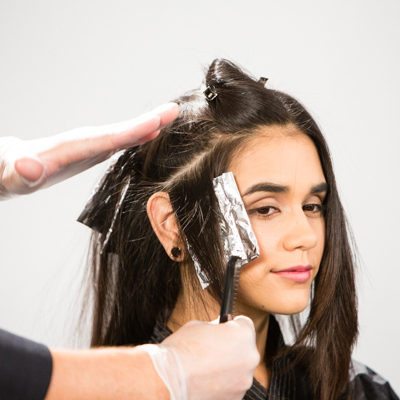
Divide the hair into three sections as shown. Divide the hair at the crown (from ear to ear), then subdivide the hair from the crown to the front hairline, down the center part.
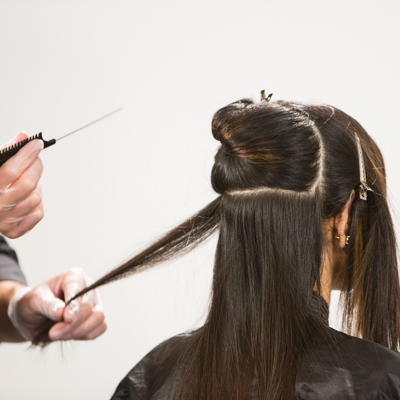
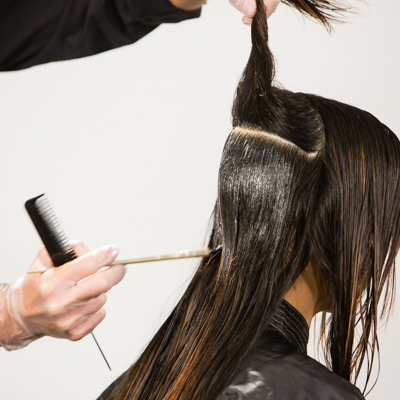
- 3Step 3 of 21
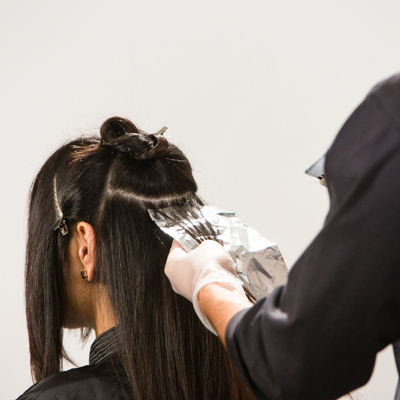
Subdivide the back section at a point between the base of the crown and the occipital bone, and secure the hair above the occipital bone with a clip. Take a weave parting from the center of the section and apply Formula A 2- to 3 inches from the roots to the ends.
Denis's Tip: “Remember to be very light-handed with the Lightener toward the top of each parting to prevent bleeding and over-lightening.”
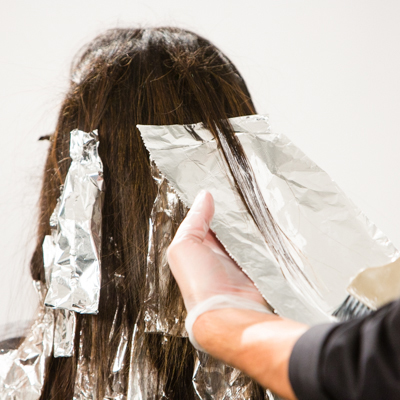
- 4Step 4 of 21
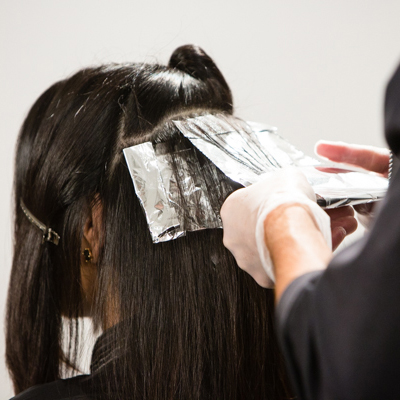
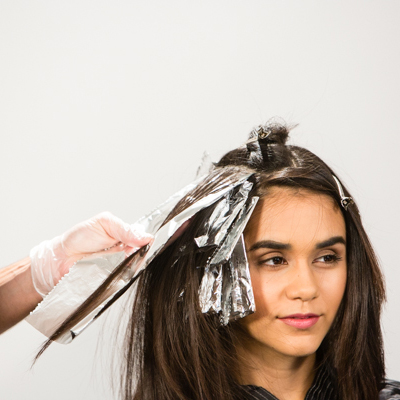
Leave a slice of hair unfoiled above, then shift slightly to the right and take a second weave parting with Formula A.
Denis's Tip: “When choosing sections of hair to lighten, try to imagine where the areas of lightness will fall in the completed look. The goal should be to not leave any obvious lines or gaps, but rather create a seamless transition from dark to light.”
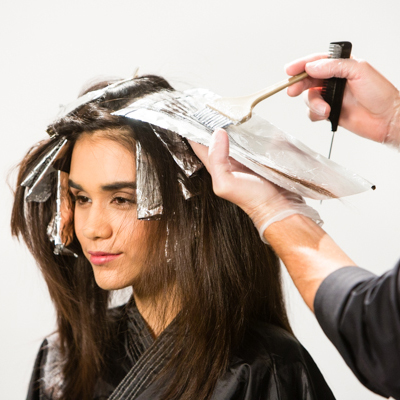
- 5Step 5 of 21

Continue taking weave partings with Formula A throughout the back section. Work up toward the crown, shifting from the center to side to side in a bricklay pattern for a total of approximately eight foils.
Denis's Tip: “The number of foils will vary depending on individual hair density, texture and desired end result. The numbers given in this technique are approximate to provide a general guideline.”
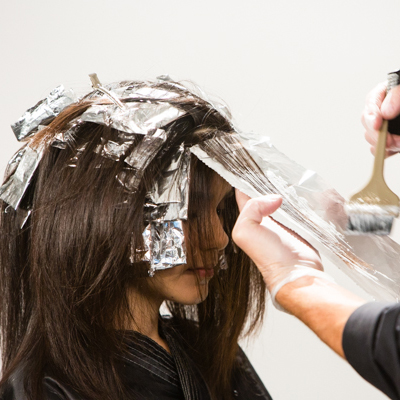
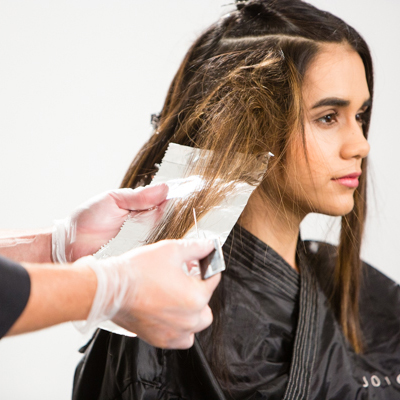
- 6Step 6 of 21
Subdivide the hair horizontally at the parietal ridge, and secure the top section with a clip. Take a fine weave parting from the front hairline (in front of the ear) and apply Formula A 2 to 3 inches from the roots to the ends. Leave a diagonal slice of hair unfoiled, then take a second diagonal weave parting and apply Formula A.
- 7Step 7 of 21
Secure the fringe with a clip, then continue the “face frame” for a total of approximately eight foils.
Denis's Tip: “Sections will become more horizontal as you work toward the center part and incorporate the top sections.”
- 8Step 8 of 21
Repeat steps 5 to 6 on the opposite side.
Denis Tip: “Keep in mind that hair doesn’t fall in slices, it falls naturally.”
- 9Step 9 of 21
From the fringe area, take a horizontal weave parting at the hairline and apply the Formula A 2 to 3 inches from the roots to the ends. Leave a slice of hair unfoiled, then directly above, take a second horizontal weave parting and apply Formula A.
- 10Step 10 of 21
Completed foiling procedure. Process hair until a Level 8 is achieved. Shampoo and condition the hair with Joico K-PAK Color Therapy, then blow-dry the hair.
Denis Tip: “Backcomb the hair at the roots of each section to hold sections in place and prevent bleeding onto the scalp.”
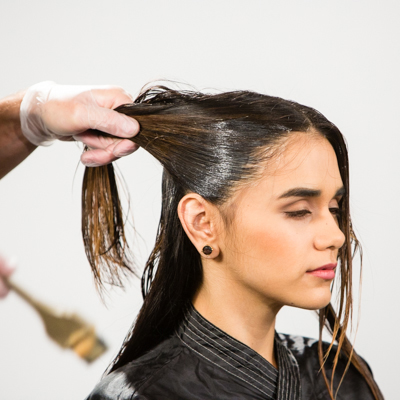
- 11Step 11 of 21
Take two sections from the center and opposite side (about 2 inches apart) and apply Formula A from the midshafts to the ends.
Denis Tip: “Be light-handed with the your application of the Lightener and use your brush vertically to facilitate this.”
- 12Step 12 of 21
Continue working up toward the crown, choosing sections of hair following a bricklay pattern for approximately eight foils.
Denis Tip: “Visually choose areas of hair so that highlights fall in different areas and not in a solid line.”
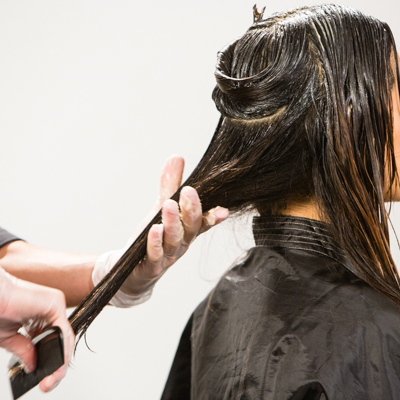
- 13Step 13 of 21
Move to the side area. Divide the hair horizontally from the front hairline to the crown (at the parietal ridge), and secure the top section with a clip. Take a section of hair near the ear, backcomb the root area as before, and apply Formula A from the midshafts to the ends.
- 14Step 14 of 21

Secure the fringe with a clip, then continue working toward the top of the head in the same manner for a total of approximately five foils. Repeat Step 12 on the opposite side. Take a section from the fringe and apply Formula A to the ends. Process until a Level 8 is achieved, then shampoo and condition the hair with K-PAK Color Therapy.
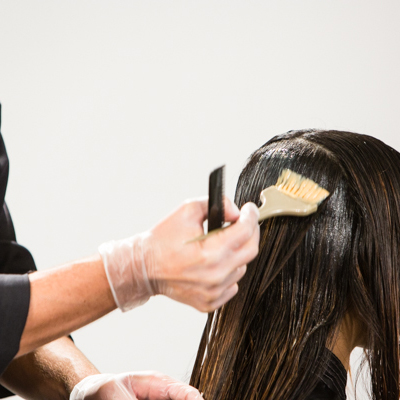
- 15Step 15 of 21
Casually divide damp hair into three sections as before. Starting above the occipital bone, apply Formula B from the roots to the midshaft.
- 16Step 16 of 21
Continue working up toward the crown apply Formula B from the roots to the midshafts.
- 17Step 17 of 21
Move to the sides and apply Formula B from the roots to the midshafts.
- 18Step 18 of 21
Starting at the back, apply Formula C from the midshafts to the ends.
- 19Step 19 of 21
Move to the side areas, apply Formula C from the midshafts to the ends, and comb through to blend both formulas slightly.
Denis Tip: “Running a comb through the hair slightly blends the formulas to ensure no line of demarcation.”
Pull hair into a loose ponytail, saturate the hair with Formulas B and C and comb through again. Allow formulas to penetrate for a few minutes, then rinse, shampoo and condition with K-PAK Color Therapy.
- 20Step 20 of 21
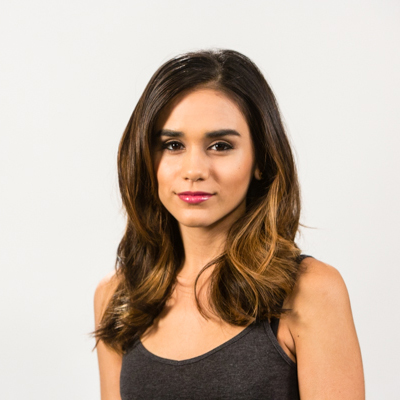
Finished Look
- 21Step 21 of 21Watch the video ↗
Hair Color
Brazilian Sombré
January 4, 2015·1 min read
What could be better than a rich brunette kissed by the sun? Here, Joico Celebrity Colorist Denis de Souza recreates his signature sombré—a soft, universally flattering update of the traditional ombré inspired by the subtly sun-kissed tresses of Brazil’s legendary beach beauties. Here’s how it’s done! (more…)
More to Read


