- 1Step 1 of 9
- 2Step 2 of 9

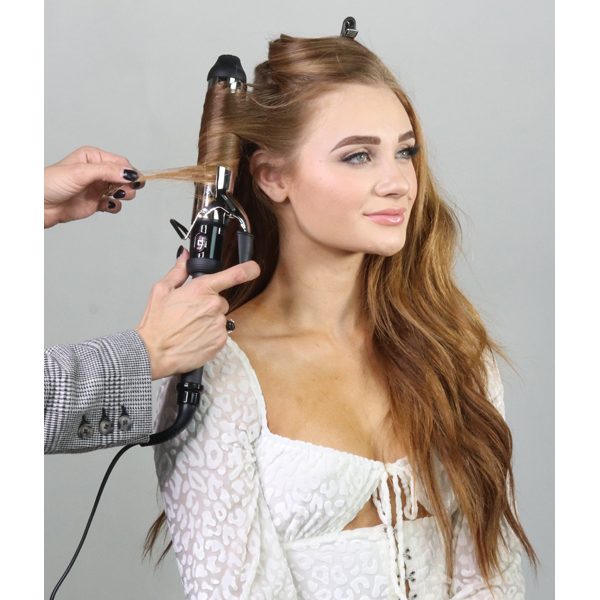
Once all the hair is curled, go through the crown area and crimp the top two inches of each section at the base using the Sam Villa Signature Series Textur® Professional Texturizing Iron.
- 3Step 3 of 9
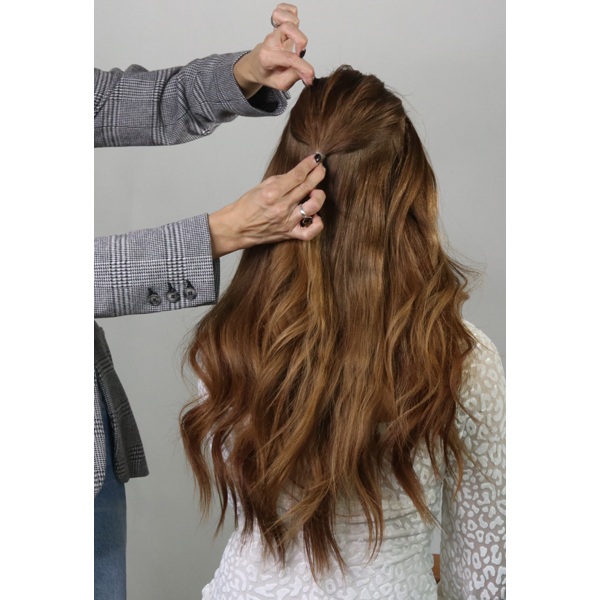
Next, gather a section of hair at the crown, pull it back to the occipital bone and secure with an elastic.
Pro Tip: Hold onto the base of the ponytail and gently pinch and pull random ¼-inch sections up to create more volume at the crown.
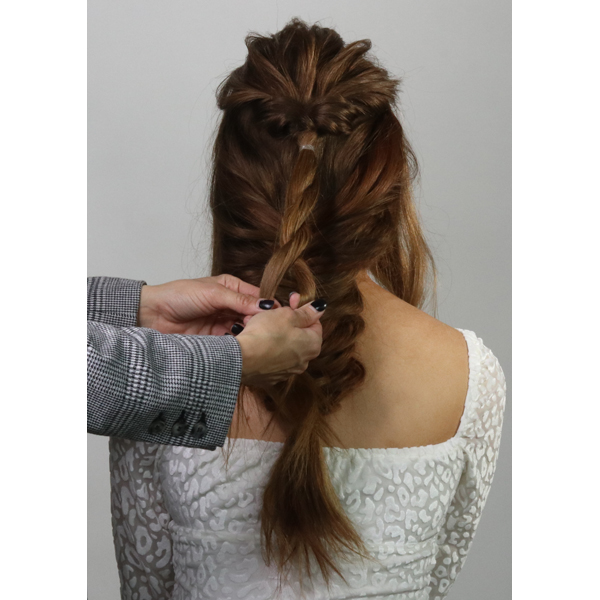
- 4Step 4 of 9
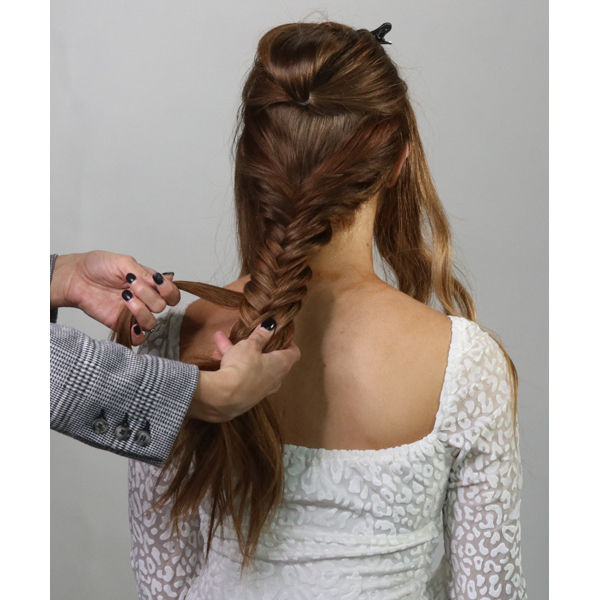
Pin the top ponytail out of the way, then create a fishtail with the remaining hair and secure with an elastic.
Pro Tip: To create a fuller-looking braid, apply AIIR Texture AIIR to create grit and pancake the braid.
- 5Step 5 of 9
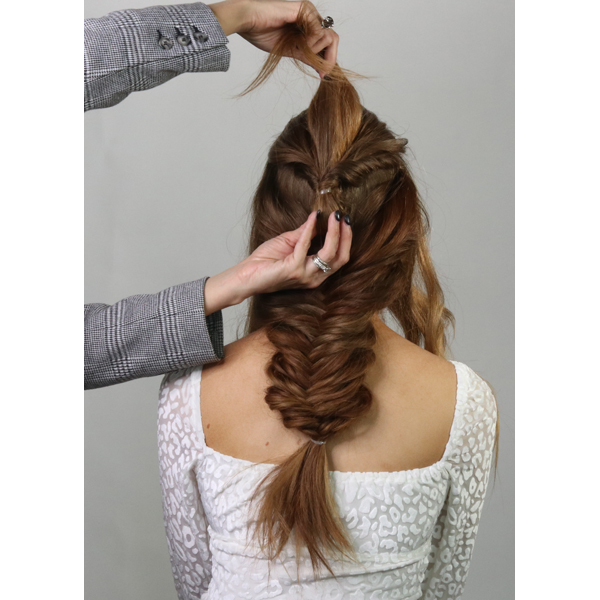
Release the ponytail that was previously pinned out of the way and create a topsy tail effect by creating a small gap above the elastic and pulling the hair through.
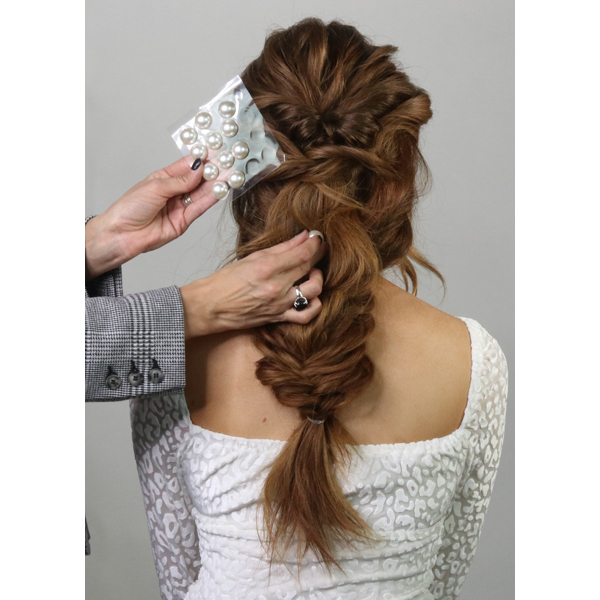
- 6Step 6 of 9
Then, divide the ponytail into two sections and create a rope braid by twisting the right section to the right and crossing it up and over the other section until you reach the end. Apply Texture AIIR, pull the braid out gently so it appears fuller and secure with an elastic.
- 7Step 7 of 9
Finish with AIIR Shine Spray to tame any unwanted flyaways and add an accessory or embellishment, if desired.
- 8Step 8 of 9
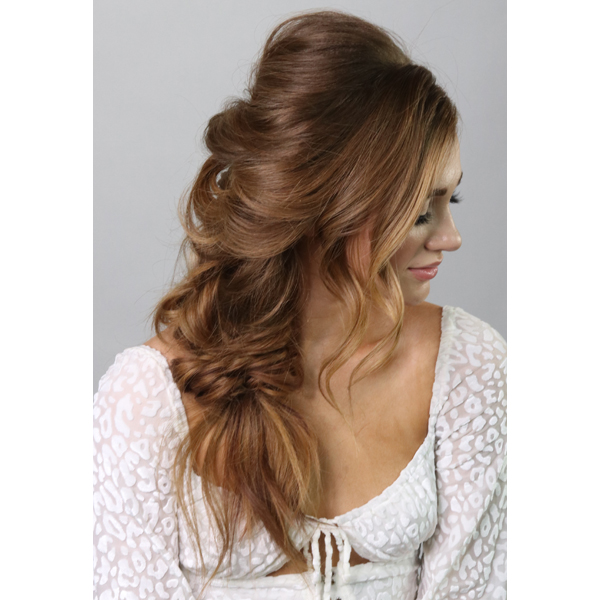
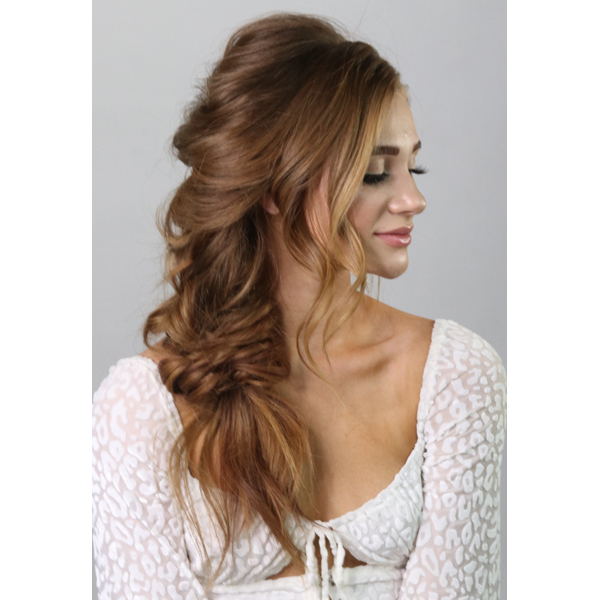
Finished look.
- 9Step 9 of 9
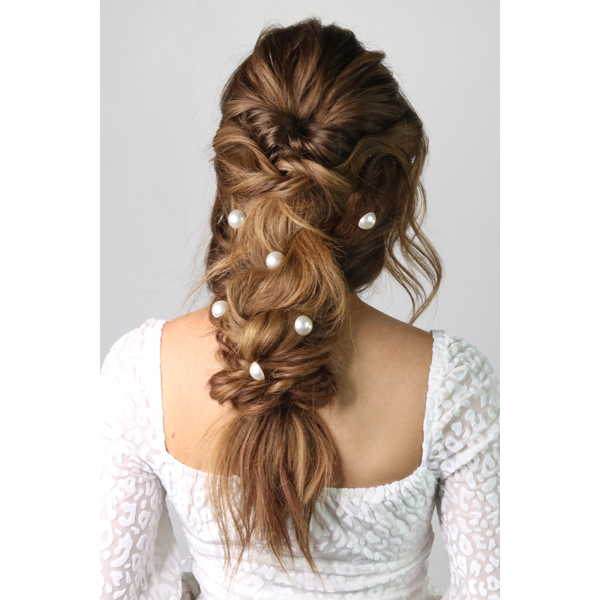
Finished look—back of the head.
Braids
Braided Boho Downstyle
December 3, 2020·1 min read
Whether styling a bride for her winter wedding or getting a client ready for her company’s virtual holiday party, Jenny Strebe (@theconfessionsofahairstylist) has just the look: This braided boho downstyle. “This romantic style works for a variety of people and events,” she explains. “You can change up the accessories to make it elegant and sparkly or simply add flowers to make it more formal and festive.” Keep scrolling to get the full step-by-step tutorial! (more…)
More to Read


