- 1Step 1 of 10
HIGHLIGHT FORMULA: Enlightener™ Powder Lightener + 20-volume Color Catalyst™ Creme Developer
Note: To create a highly-textured look, mix density of weaves and slices, working through hair to lighten 80% of natural color. This can be achieved by randomly leaving out bits of natural hair.
- 2Step 2 of 10
 Create a circular panel at top of head, as shown above. Circle should sit approximately three inches back from front hairline, depending on size of fringe and point of distribution.
 - 3Step 3 of 10
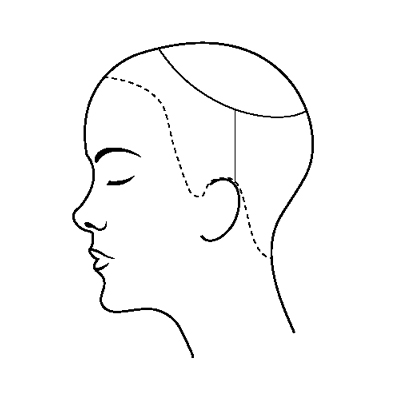 Subdivide hair with a vertical parting from circular panel to top-of-ear on both sides of head.
 - 4Step 4 of 10
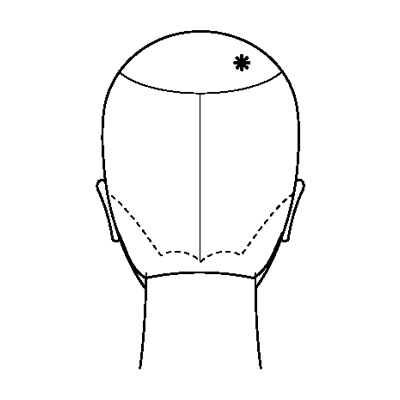 Divide back panel in a separate vertical parting from the circle panel to the nape. Divide and clip away the front fringe section.
 - 5Step 5 of 10
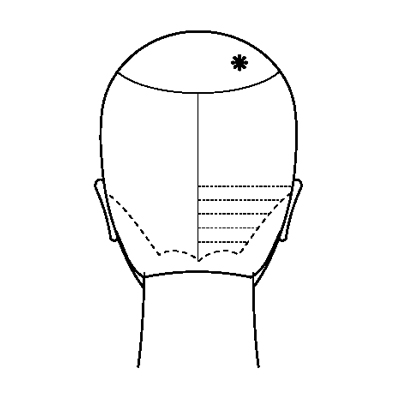 Starting at nape, apply foils with the Highlight Formula, horizontally up toward the circular section, through entire back of head.
 - 6Step 6 of 10
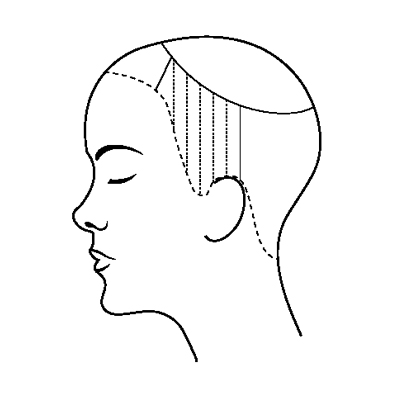 Place foils with Highlight Formula vertically through the side panels.
 - 7Step 7 of 10
 Work through the fringe by placing foils diagonally to create more texture. Place foils into the top section in a radial pattern.
 - 8Step 8 of 10

- 9Step 9 of 10
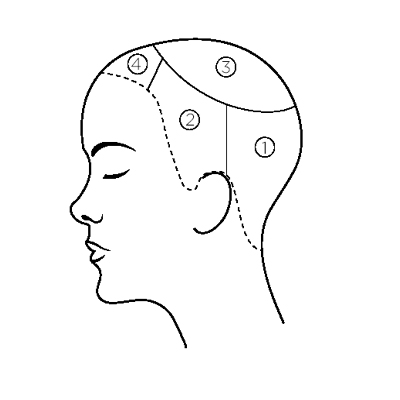
This technique can be customized in many different ways. Here’s a placement idea, along with color formulas, you can try on your client:
The diagram above illustrates a full-head fashion color application. Use the original sectioning pattern, but use the appropriate full-head application with the darkest color in Panel 1, a lighter color in Panel 2 and a bright formula in Panel 3. Use the brightest color in Panel 4. Depending on the focal point or depth you choose, you can swap color application in Panels 3 and 4 to accentuate the color differently.
- 10Step 10 of 10
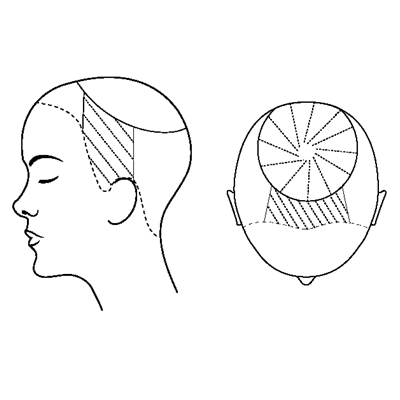
This technique can be customized in many different ways. Here’s a placement idea, along with color formulas, you can try on your client:
The diagram above illustrates a half-head foil placement idea. Repeat the original subsectioning, but only work foils through the sides, fringe and top. For this placement, Ian recommends a diagonal brick-lay pattern for the foils in the side panels.
Blonde
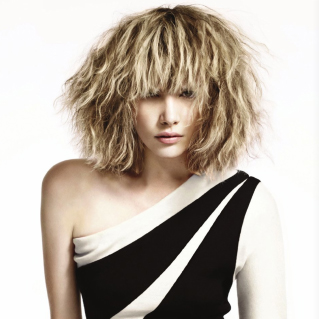
Bold Blonde Highlights From Aveda
July 11, 2012·1 min read
Here’s a great summer-into-fall blonde! In this look from Aveda, fine and thick highlights work together to create a natural, choppy finish. “We wanted the style to be broken up with color,” says Ian Michael Black. “We did this by building texture through juxtapositions of fine and chunky bits—working fine weaves next to thick weaves and leaving out little sections so deeper brown tones peeked through.” More How-TosApricot Blonde HaircolorAntique Rose Blonde and Short BobColor Melted Brunette (more…)
More to Read


