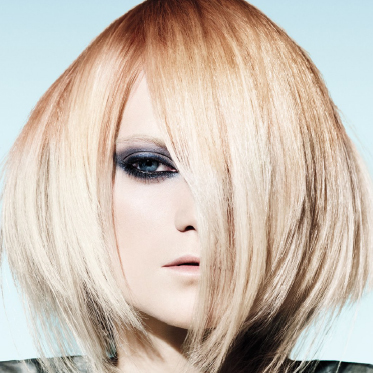
This look from Aveda’s Super Natural Collection is inspired by the sun (“Pawa,” according to the Yawanawa tribe in Brazil.) For the cut, artistic director Ricardo Dinis created a hidden internal geometry with thinning shears so the hair fell like a veil on the outside, with soft edges. For the color, artistic director Ian Michael Black worked an apricot, henna-like stain through the top of the hair from underneath, sifting the color through the feathery blonde ends. To learn more, go to www.aveda.com Subscribe to behindthechair.com “On Paper” Magazine–5 issues only $29.95! (more…)
- 1Step 1 of 14
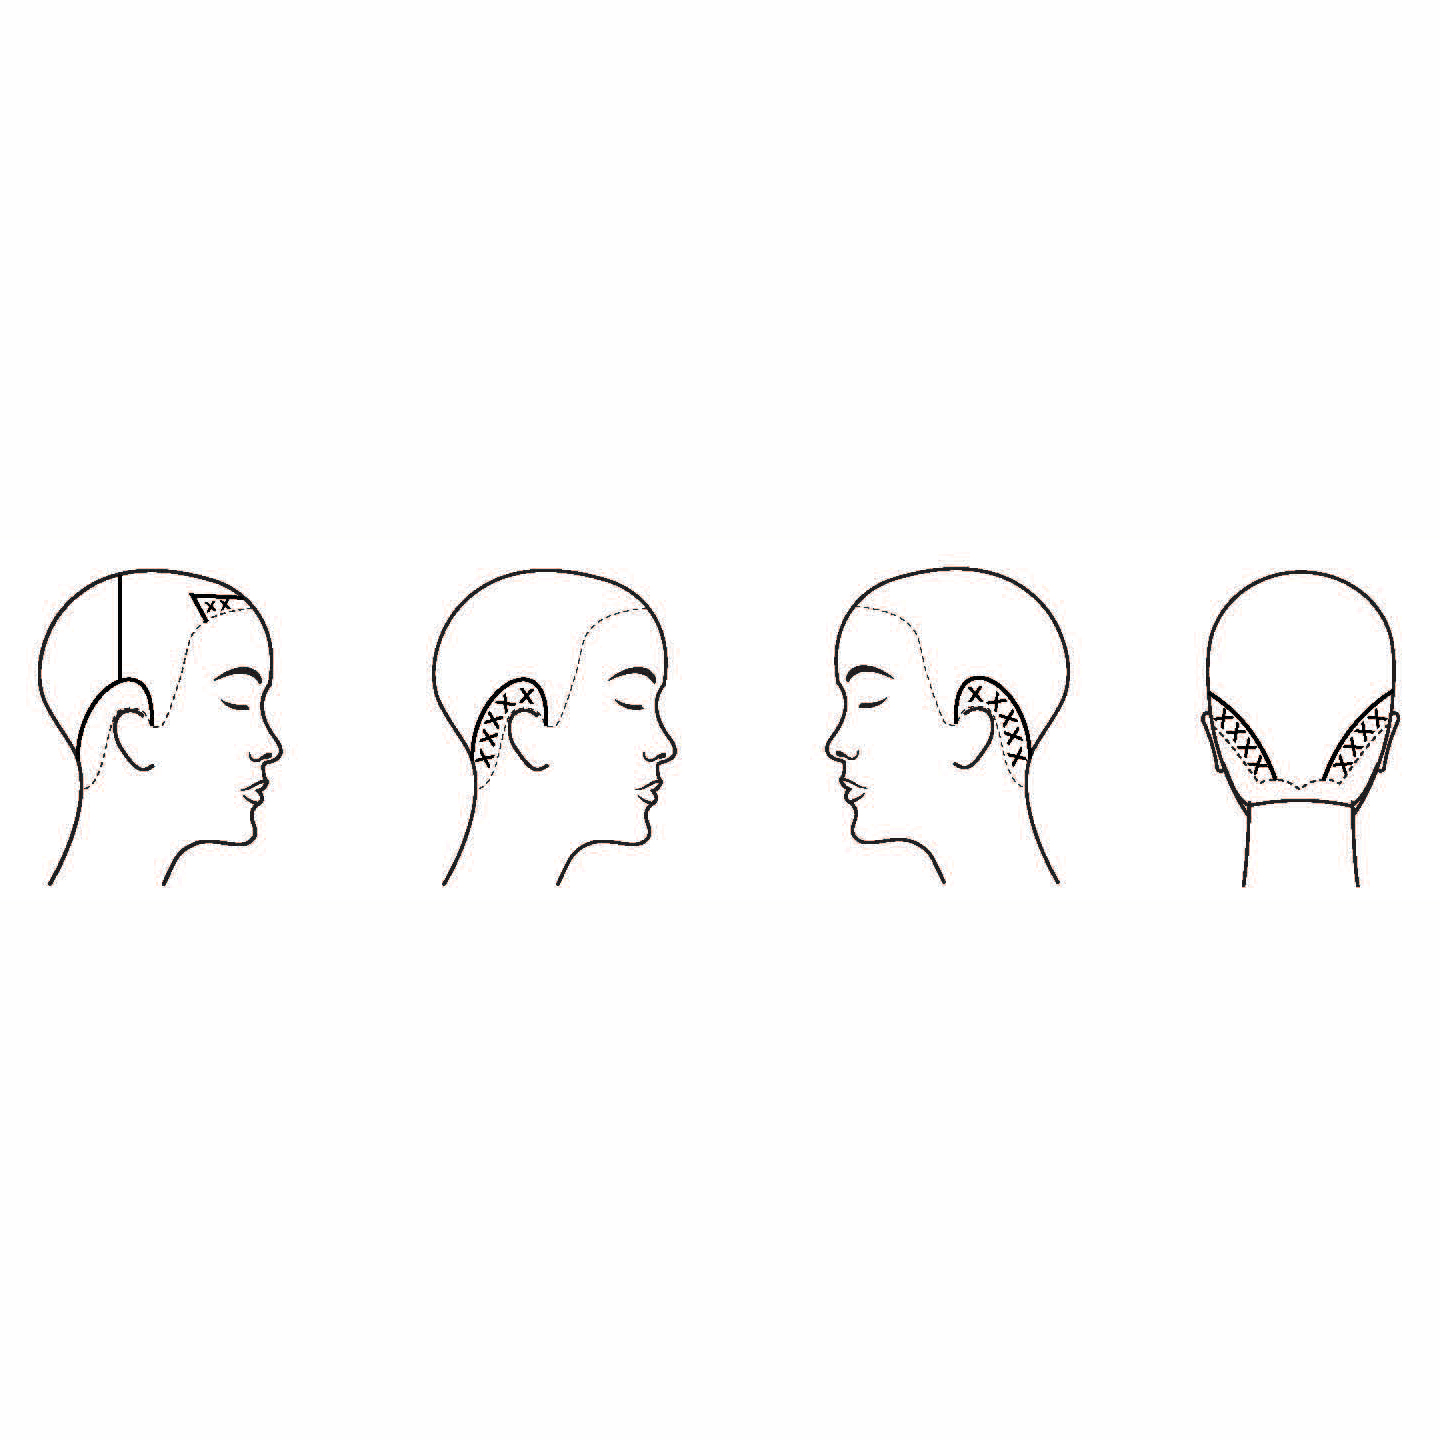
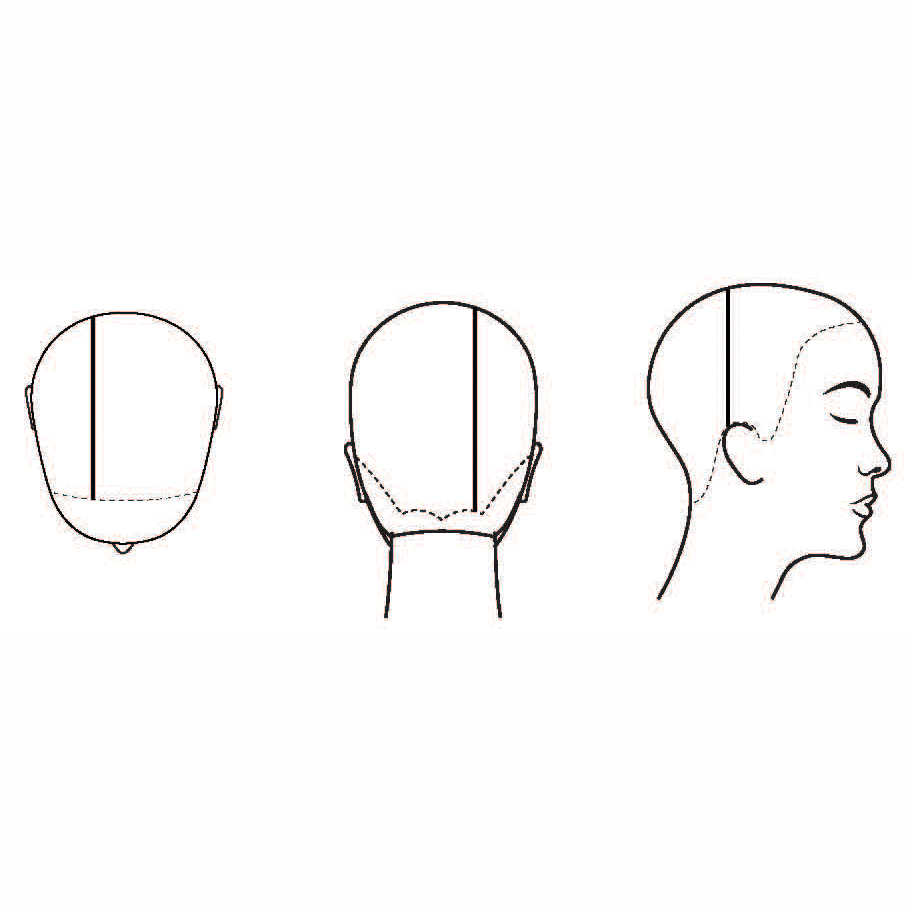 Locate natural part and divide center back from apex to nape. Next, divide from apex to back of ear.
 - 2Step 2 of 14
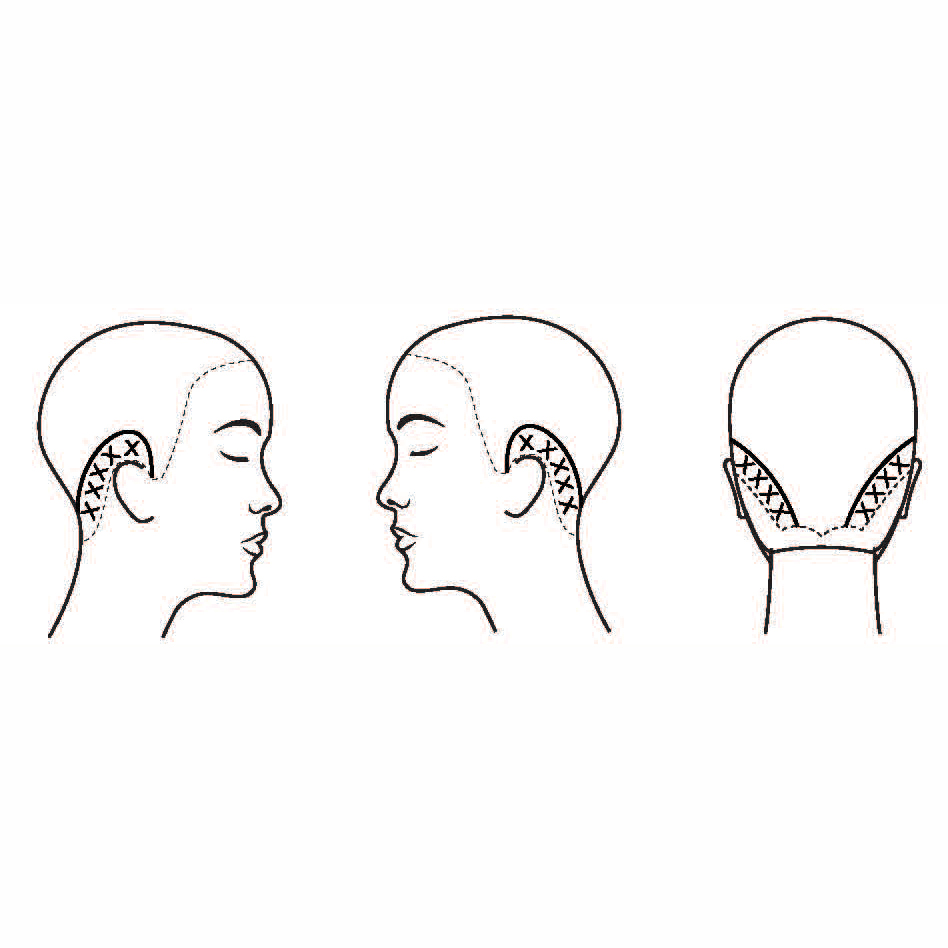 Pre-section starting at front of the ear. Take curved section that follows the mastoid process into nape on both sides. Clip these panels away.
 - 3Step 3 of 14
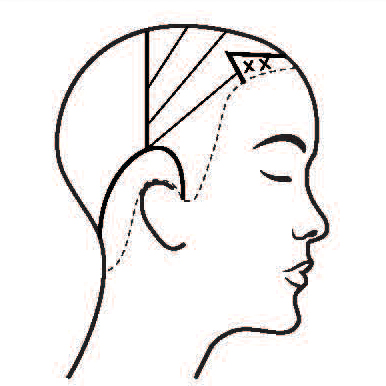
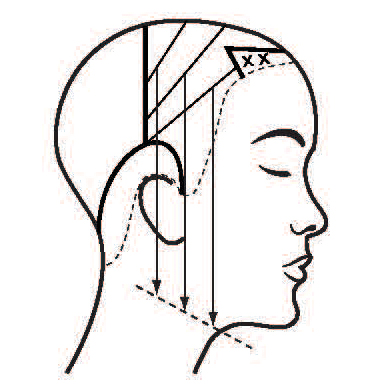
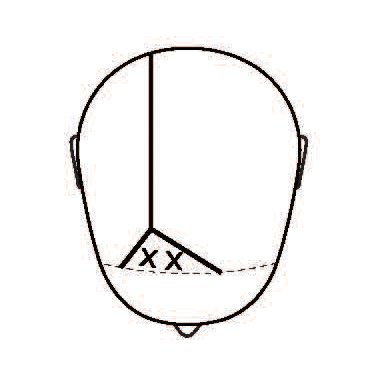 Disconnect a small, off-center triangle starting at the same point as disconnected panel through the side frontal bone to high recession using natural parting as center point. Clip this panel away.
 - 4Step 4 of 14
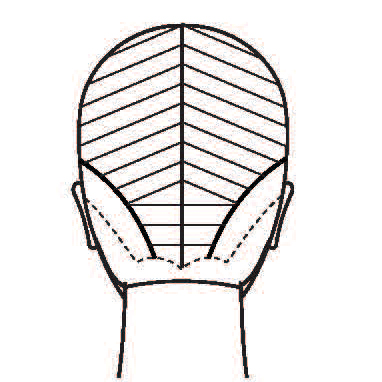
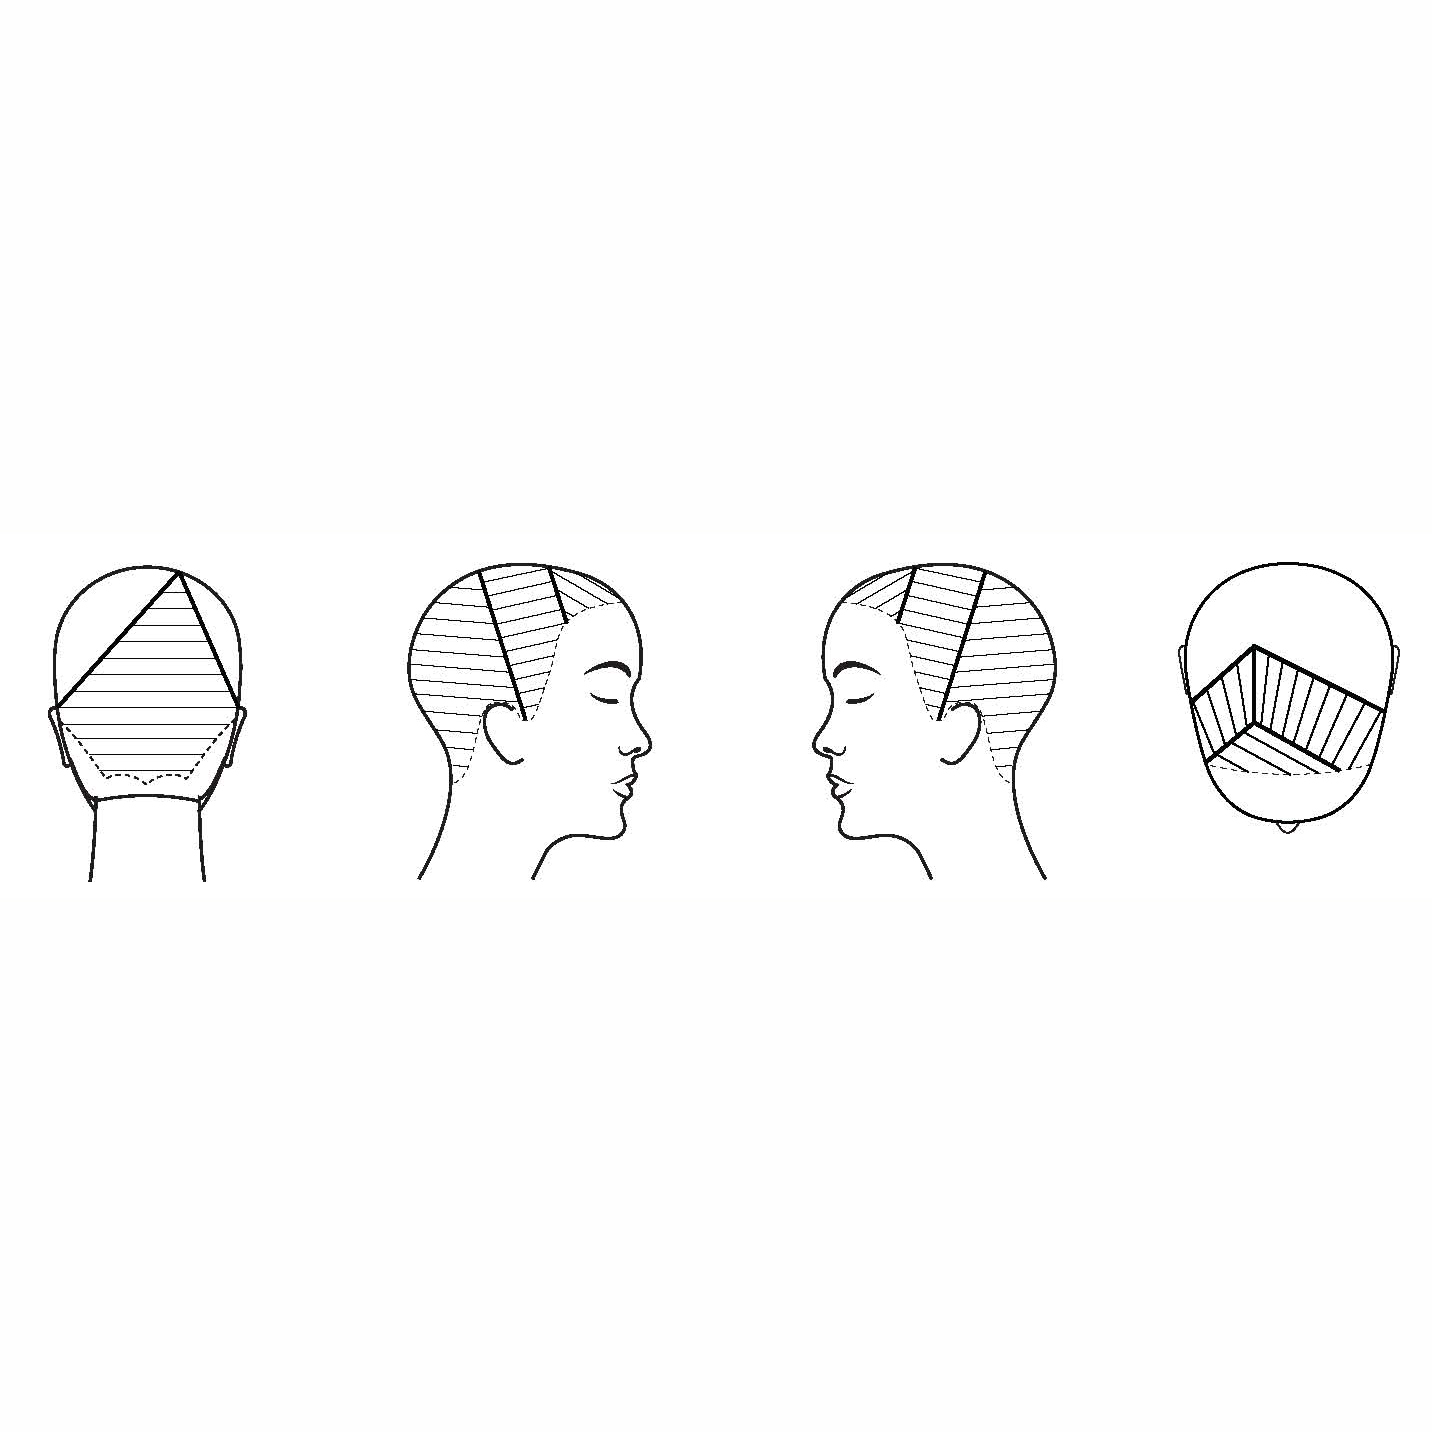
 Begin cut in nape by taking a horizontal section holding at low elevation. Using your fingers and medium tension, cut an outline. Using the outline as a guide, make subsequent sections slightly elevated to create graduation. Continue until you reach the occipital bone.
 - 5Step 5 of 14
 Now change your sections to diagonal, running from the base of the occipital bone to the hairline. Use your outline as a reference to begin extending your graduation.
 - 6Step 6 of 14
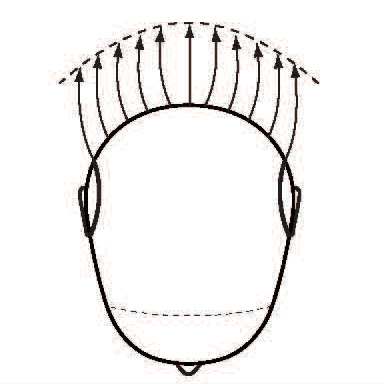 Overdirect sections to the previous sections to preserve length and weight—essential for the shape.
 - 7Step 7 of 14
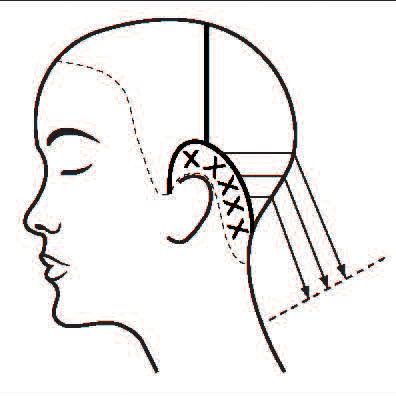
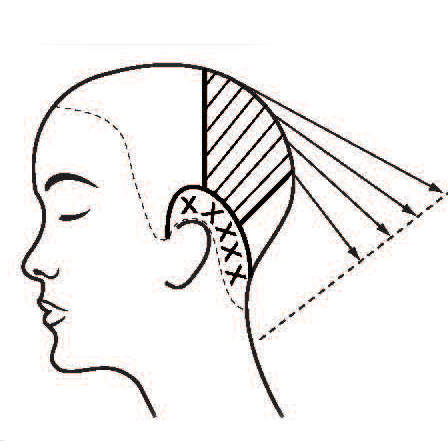
 Work in this manner until you reach a point on top of the occipital bone and top of the ears. From this point, keep the rest of the sections parallel and continue to overdirect sections to maintain weight. Begin using a weave-cutting technique to continue extending your graduation and allowing for disconnected lengths to drop.
 - 8Step 8 of 14
 In the panel, take a diagonal section that is thick enough to allow for any weakness in the hairline.
 - 9Step 9 of 14
 Cut this section clean or blunt following the line of the jaw and elevating to the length at the nape. Use one finger elevation. Subsequent sections become more vertical using the top of the ear as a pivot point. Elevate and section progressively using the weave-cutting technique. NOTE: Remember to maintain your disconnected panel and keep it clipped neatly out of the way. When a complete vertical angle is reached from the apex to the back of the ear, stop cutting. This ensures slight disconnection is reached.
 - 10Step 10 of 14
 Release the previously clipped away panels. Blow-dry using a wrap technique. Strengthen the outline where needed using weave-cutting. Soften disconnected lengths by point-cutting and slicing. Work visually to reach desired effect.
 - 11Step 11 of 14
Formula A (Moonlight): Full Spectrum™ Protective Permanent Creme Hair Color 40g 10N Lightest Blonde + 3g Light Violet/Blue Pure Tone + 80ml 30 volume Color Catalyst™ Creme Developer (1:2 ratio provides up to one level of extra lift)
Formula B (Vibrant Apricot): Full Spectrum™ Protective Permanent Creme Hair Color 40g 9N Very Light Blonde + 8g Light Orange/Red Pure Tone + 40ml 20 volume Color Catalyst™ Creme Developer
Formula C (Soft Peach): Full Spectrum™ Protective Permanent Creme Hair Color 40g 10N Lightest Blonde + 1g Light Orange/Red Pure Tone + 1g Light Yellow/Orange Pure Tone + 40ml 20 Volume Color Catalyst™ Creme Developer
- 12Step 12 of 14
 As a pre-color service for weak or damaged hair, apply Strength Infusion to clean, damp hair. Process to 10 minutes. Rinse and dry hair. The model’s new growth is colored to match length and ends with Formula A. Section hair as shown in a modified halo pattern. Apply barrier cream for guest’s comfort and protection.
 - 13Step 13 of 14
 Place foils at nape, working vertical foils on hairline at both sides. Use fine weave and heavy density application applying Formulas B, C and D working down hair shaft, Color-Melting your formulas. Place a second foil over first to protect the section before folding. Complete entire head. Process according to directions. Shampoo and condition with Color Conserve™ Shampoo and pHinish™.
 - 14Step 14 of 14


